Showing posts with label Ceramics. Show all posts

Wednesday, March 18, 2020

Graphic Design + Ceramics

In my school, my graphic  design course functinos like an Art 1. It is not difficult to hit all the competencies while incorporating traditional art media with digital media. This year I've been conscious about pairing a digital project with each traditional media assignment. There were 2 parts to the introduction to ceramics, designed to cover techniques that the students would be able to pull from in future assignments with more choices. The first assignment was to make a cylinder which could function as a cup or a mug. This assignment covered slab building, pottery, art history, and surface design.
I started wondering about the history of graphic design in ceramics and when I searched, I found a wonderful resource, Guity Novin's a History of Graphic Design, and chapter 12 is Graphic Design in Ceramics. Bingo! Chapter 13 is on Native American Pottery so I showed some of those examples as well. I'm just pretty pumped to know about this resource!

Here is the slides presentation I showed the students so that I could group images by technique:
After the presentation, I demonstrated a variety of surface design techniques that I asked students to take notes on- sgraffito, underglaze, mishima, slip trailing, carving, and stamping. On the note sheet, the students wrote about which technique(s) they would like to try and then were able to sketch their idea.
The students had the rest of the 1st class to plan then 2-3 classes to construct their cylinders and complete the designs. I demonstrated pulling handles for anyone who was interested.

The design on the left used carving and underglazing. The cup on the right used carving, sgraffito, and mishima with the same repeated pattern.
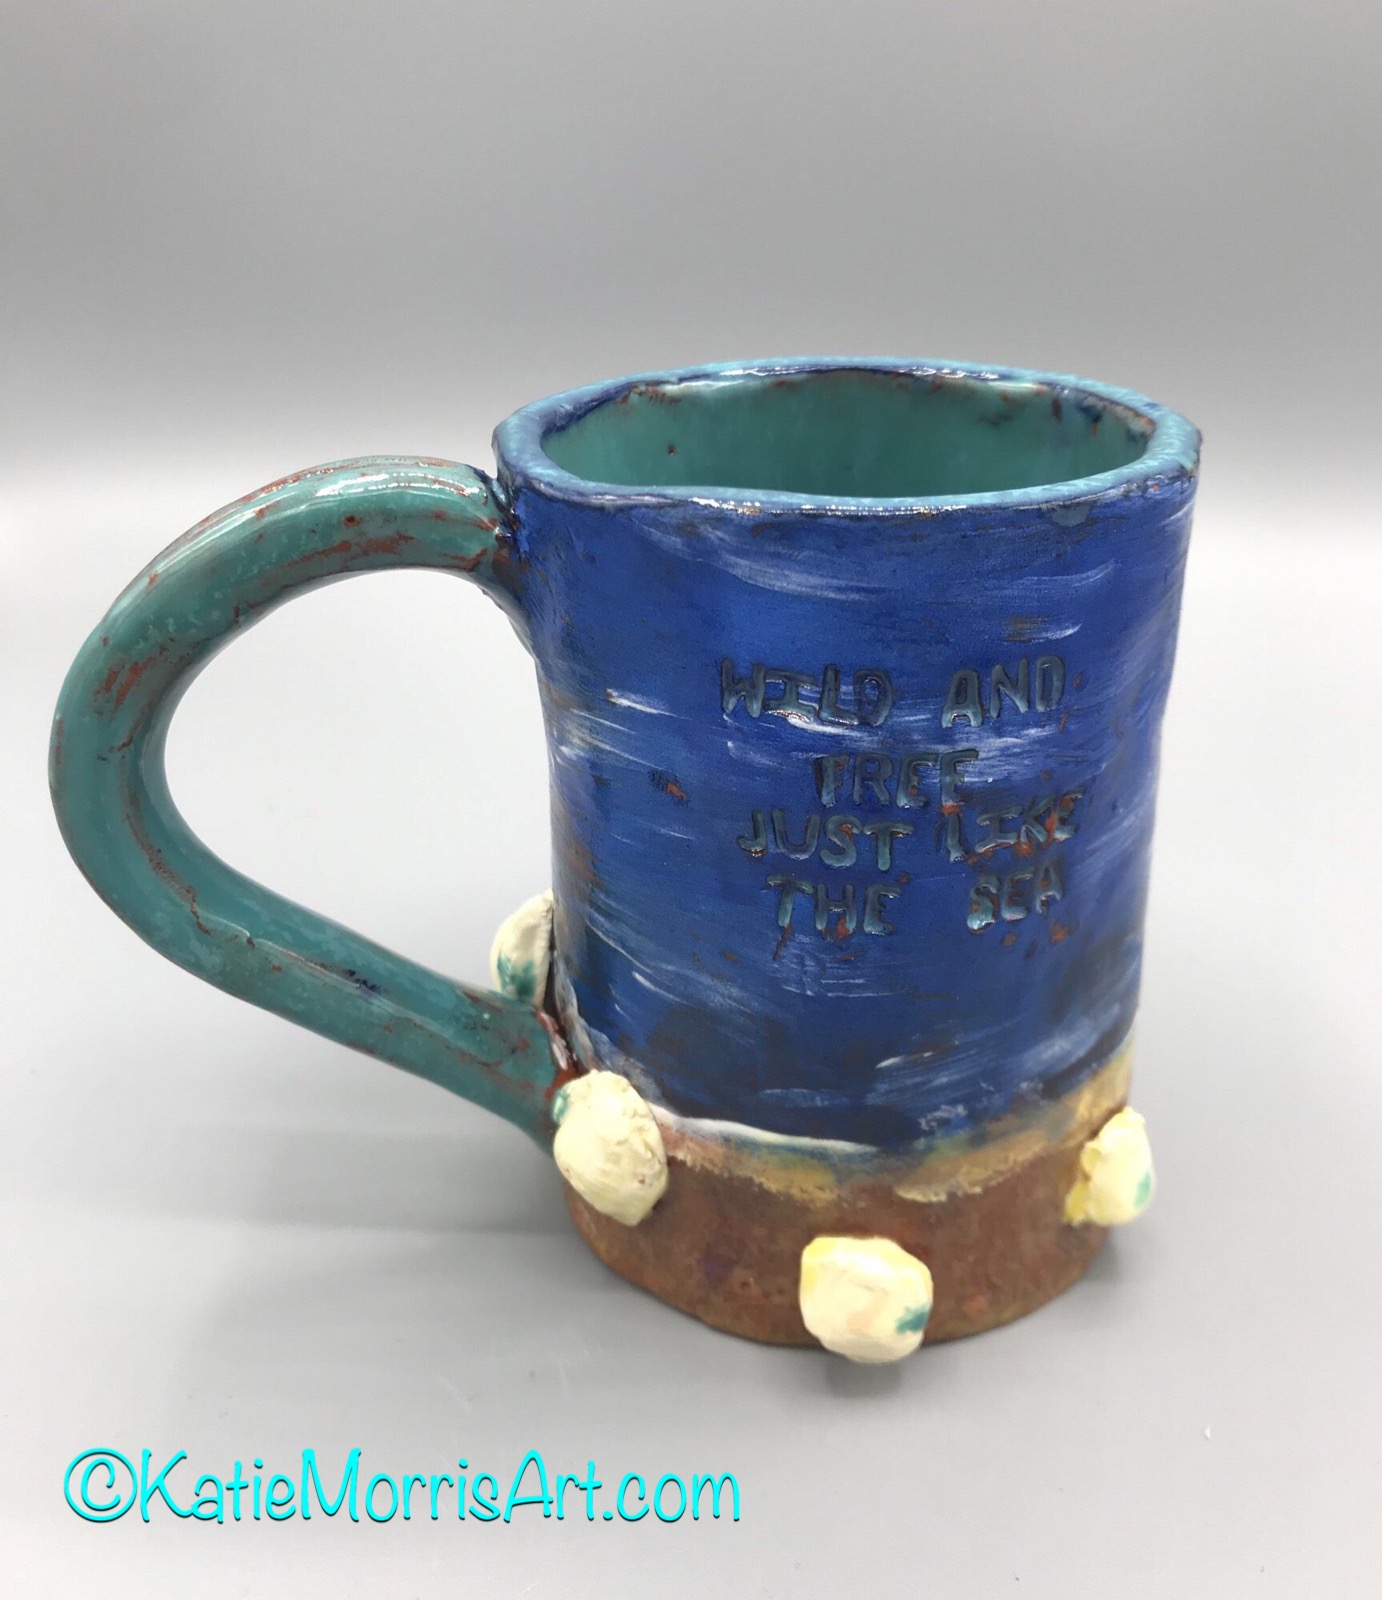
This student incorporated a favorite quote in her ocean-themed mug.
Some inspiration from the Great Wave!

After the cylinders were complete, the students started on the digital part- designing a magazine cover that featured their cups.  
1. Students watched a video that broke down a magazine cover into parts and completed a worksheet I made to label them.
2. They wrote an analysis of a magazine cover they looked up.
3. Students photographed their cups.
4. Adobe Photoshop was used to create the magazine covers. (It was a quick assignment so I didn't want to tackle introducing new software.)


Here are some of the magazine designs

Monday, March 9, 2020

Mystery Glaze

Have you ever heard of mystery glaze? I can't remember where I read about it- likely on one of the art teacher facebook groups that is so helpful for sharing tips and trouble shooting- but I gave it a try!
Why is it called mystery glaze? Because you don't know what it will look like! It is made from a bunch of different glazes mixed together.
You can make mystery glaze when...
you have just a little bit of glaze left in a bottle but not enough to use on it's own
your students didn't stir a glaze with color burst crystals in it good enjoy and there are a bunch settled at the bottom
you have dried up bits of glaze that you don't want to throw out but can't rehydrate on its own

I went through all my glazes last fall and combined partial bottles of the same color when I could to try to save space. If there was a glaze that I couldn't or didn't reorder that was pretty low, it got dumped into the mystery glaze container. All the old glazes I'd tried to save without luck, got mixed in along with some water and some Gum Arabic to improve the texture. 

I used the mystery glaze on the inside of this mug and you can just see a bit of the color in this picture.
Now if someone can't decide on a glaze color, they don't care what goes on the inside of pottery, or they just want the fun of a surprise, mystery glaze is the answer! So far ours has ended up blue-is with bursts of other colors but the glaze will change as we get further into the container since it will have a different mixture of glazes making up that portion. 

*You should obviously make sure that you only mix glazes that mature in the same range and make sure they are all dinnerware safe if there is a chance they could be used on pottery!

Thursday, January 9, 2020

8th Grade Pottery

Since 8th graders made ceramic hand sculptures earlier in the semester and wanted to make something functional, I told them I would make sure they got the chance before the end of the class! The students had a day to research and find examples of pottery that fit into 3 categories: functional, decorative, and sculptural. I said functional pottery might have cool glaze, but is pretty simple, decorative has more design work added to it like carving, underglaze painting, stamping, etc., and sculptural has sculpted elements. After some initial confusion on which category to put each chosen image in, the students had some inspiration to design their own projects.

A couple students made slumped bowls.

I have a mug template that is a pretty nice size and involves only a slab-rolled rectangle and a circle made with a cookie cutter and many students chose that base.
Some students made handles, some left their cups plain.
Sgraffito is one of my all time favorite techniques so I was excited to have some students give it a try!

Bowl on a pedestal with tree pillars. Layered glazes inside the bowl.

The students could make any type of functional pottery, they just had to think about their designs and get a plan approved. This year I think I found a pretty good balance between having open-ended but still structured lessons with choice-based projects in between. 

I've struggled the most with finding the right balance between structure and freedom in my middle school classes out of all PreK-12 and I'm hoping this structure continues to work well with my 7th graders who will be have art 2nd semester.

Thursday, May 23, 2019

7th Grade Choice Ceramics

One of the questions that always comes up when discussing Teaching for Artistic Behavior is does it meet the standards? The answer is yes! TAB can work really well with the National Arts Standards.
When I was planning my 7th grader's choice ceramics project, I used 3 standards as the focus:
VA:Cr1.1.7
I can apply methods to overcome creative blocks.
I can use different approaches to solve problems.
VA:Cr2.1.7
I can demonstrate persistence in developing skills with various materials, methods, and approaches in creating works of art.
VA:Cr1.2.7
I can develop criteria to guide making a work of art or design to meet an identified goal.
I explained to the students that we were going to discuss what they think makes a ceramic project successful and then they would work together to decide on criteria for success- this is the identified goal from VA:Cr1.2.7. The students said the main success points for them were:
1. Details to make it look realistic, like adding textures
2. Coloring makes sense
3. Stable- stands or sits how it's supposed to
4. Smooth seams and stron attachments

As the students brainstormed, I recorded what they said and then printed the finalized list for reference. 

We looked at Oldenburg's and Thiebaud's food pop art before we started the project so that students who were more comfortable with having a starting point could use food as a theme. Others came up with their own ideas and checked with me before starting to work.
I made a rookie mistake when firing their projects. I had recently fired to cone 5 for the first time and programmed the kiln too quickly to notice that it said 5 instead of 05. Their projects were... a little crispy. A few melted and they were all dark brown. Thankfully they were very understanding and ok with painting with acrylic instead of glazing! I won't make that mistake again!

Sunday, April 14, 2019

Clay Around the Room

This school year I did my ceramics boot camp a little differently. I've started using some "around the room" activities- a brilliant idea that TAB teacher Cynthia Gaub came up with. You can read an article about her Around the Room activities HERE. Basically, there is some type of activity at each table to which students rotate to try something new or learn a new skill. I started making handouts for each around the room activity and storing them in page protectors in a binder so I can just pull them out next year.
For ceramics, my stations were coils, pinch pots, sculpting, and slabs.
At the coil table, students were shown images of coil construction then challenged to roll the longest coil they could and try to make a little bowl.
At the sculpting table they were once again shown images of some ceramic sculptures and were asked to manipulate the clay just using their hands and no other tools to make something. My students tend to think in parts and I wanted them to see they can pinch and pull the clay instead of just assembling.
At the slab table, students learned to use the slab roller then I asked them to make a 90 degree corner by mitering the edges, scoring, and slipping.

At the pinch pot table I asked the students to form two similar pinch pots and put them together to make a hollow form. 
The around the room practice pieces were recycled so we covered a lot of skills without waste.
To finish off the boot camp, the students made clay plaques for lack of a better term. They had to use additive and subtractive techniques as well as create texture. Some melted stained glass in a few areas. The theme and subject were up to the students. They tend to remember seeing this "project" in the hallway from previous years and enjoy making their own ideas.


Thursday, July 28, 2016

Choice Ceramics Projects

In my last post I shared what we tried last school year for the ceramics boot camp. After students had sampled each of the basic hand building techniques we covered, they proposed a plan for an independent ceramics project. Here are some of the results. It was really fun to see all the different directions it went. A few students chose to learn to throw on the wheel but I will have to add those pictures later. I didn't make wheel throwing a requirement as we only have three wheels.
I had two students make tromp l'oeil food sculptures. They used plates as slab molds to make the base and then used several techniques to create the look of the food. There was SO much detail put into these two projects. The curly fries were made by cutting a slab into skinny strips and curling them so they would maintain the square edges. The fries were fired separately so they could be dipped into glaze and fuse in the last fire. The cheeseburger was made from slabs and coils. I saw a lot of thought go into which glazes to combine to create the desired effects.
The stack of pancakes was originally going to be a box with the berries acting as a handle. There was a little blowout in the bottom during the bisque fire so the student glazed it together to just be a hollow form and I found some felt with a sticky back to add to the bottom to disguise the chips.
One of the most fun parts was figuring out how to make bacon! We rolled coils of red and white clay, stuck them together, flattened them, and crimped.
 The football below is a bank made by a freshman. The mask was made with a mold I got for a project through Donors Choose. The student achieved a really cool texture by applying and wiping away glazes.
 The next project was made by a senior who joined art second semester. It was inspired by Skyrim. I don't think the student had ever taken art before and I thought he did a really nice job. He layered multiple glazes and the blue eyes were made by melting stained glass into a depression.

 I received some underglaze pencils for Christmas so I tested them futon a plate. I learned that they can smudge a bit from brushing on a clear glaze so I'm trying to work around that but I think there are a lot of possibilities and I'm looking forward to offering it as an option in the coming school year.