Showing posts with label high school. Show all posts

Sunday, January 30, 2022

2021 Snow Globes

Last year building snow globes in graphic design turned out so good we did it again this year! Here are pictures of what the students made.



 

Friday, December 17, 2021

Altered Digital Compositions with Textiles

I usually like to do a quick project with my graphic design kids to have them explore filters and effects within photoshop. Last year I was excited to discover artist Prince Eric Nichols (https://www.princeericnichols.com/) and his work made from digital textiles. The textiles usually relate to the subject he is representing and I started to think about how students could do both the technical process of overlaying textiles with layer masks and work with the idea of choosing textiles that could represent their own cultures and interests.

Here is the handout I posted for students: 
https://docs.google.com/document/d/1JIFjV8slFuVaFlCjle9PxdJTEgluWX45sH3RAna48Cs/view
This took 2 class periods for my students but it could definitely be done in one if your students have more experience. Next time I will more strongly encourage students to bring textiles or photos of textiles from home instead of using what was in the art room, though I'm thankful we found quite a few options in the classroom that would work.


Tuesday, May 11, 2021

Virtual Art Show 2020-2021

 This year our League Art show was held virtually. Since I already had photographs for all of that artwork, I decided to add in some more artwork that wasn't finished in time or couldn't fit in the limited number of entries for League and share it as our school's virtual art show. I'm requesting to show these before the awards programs for middle and high school since I didn't keep artwork at school for a physical show.

Enjoy!


Wednesday, April 14, 2021

Ice Dyed T-Shirts

One of the workshops at the 2020 KAEA Virtual Fall Conference was about how to ice dye. I had wanted to give my graphic design students to make an actual product they could use and knew they would like the look of ice dyeing, so this lesson was born!

For the first part, the students designed a logo for the Heart of Jackson Humane Society that could be used on a t-shirt as a client project. 

Next, they had the chance to design their own t-shirt. The theme was open and the design was limited to one color- black- because that is what we had available for iron-on vinyl. Art Club paid for the shirts and we got a great deal since a local t-shirt shop offered to order plain white tees for us at cost. This worked out really well since I didn't have to worry about students bringing their shirts on time or bringing shirts that did not have enough cotton to accept the dye.

While students were designing, we started dyeing shirts. The ice took so long to melt that I had to ask what colors the students wanted and start sprinkling the colors on in the morning. Now that I know how long it takes, I will plan my timeline differently in the future so students can apply the powdered dye themselves.

1. Soak the t-shirts in soda ash water for at least 15 minutes
2. Ring out the shirt and arrange bunched up on a cooling rack, wire basket, etc. so the water can drip through
3. Pile ice on the shirt, trying to cover everything- this can take a little practice to get the ice stacked up
4. Sprinkled on powdered dye- we used jacquard procion dye, about a tablespoon total per shirt, so if you use 3 colors, a teaspoon of each. We did not measure this precisely because I didn't have measuring spoons at school and the spoons borrowed from my clay tools wouldn't fit in the little jars. We stuck the handle of the spoon in and scooped some out, sometimes sprinkling a bit more dye if it looked too pale as the ice melted.
5. Wait until the ice melts
6. When ice is totally melted, rinse the shirts until the water runs clear. Ring it out and rinse it again to be safe.
FYI- if you use a blow dryer to melt the ice the colors don't seem to be as vibrant as if you let the ice melt on its own.

Students created their designs in Photoshop then turned in a jpeg so I could import it to Silhouette studio and cut it out with my portrait on heat transfer vinyl. I learned to order the easy weed vinyl in the future and to do a small test cut to check the depth and number of passes required. The default was not enough for the HTV I ordered so it took some testing to get the right combination.
There were two shirts that the student and I both looked over and didn't notice small missing words like the "in" that should be before affliction. We won't make that mistake again! We ended up trying to match the size and patched it in.

Some students went with just lettering while others went with illustrations.

The students were pretty pumped about their shirts. I asked everyone to wear them on the same day so we could take a group picture. Here is one class:

Thursday, December 31, 2020

Symbolic Fused Glass

This is a lesson plan I developed after hearing Preston Singletary speak at the 2019 KAEA Fall Conference.  I think it’s important to remember thy we can be inspired by artist’s big ideas without trying to imitate the look of their artwork. (Full lesson plan at the end of this post!)

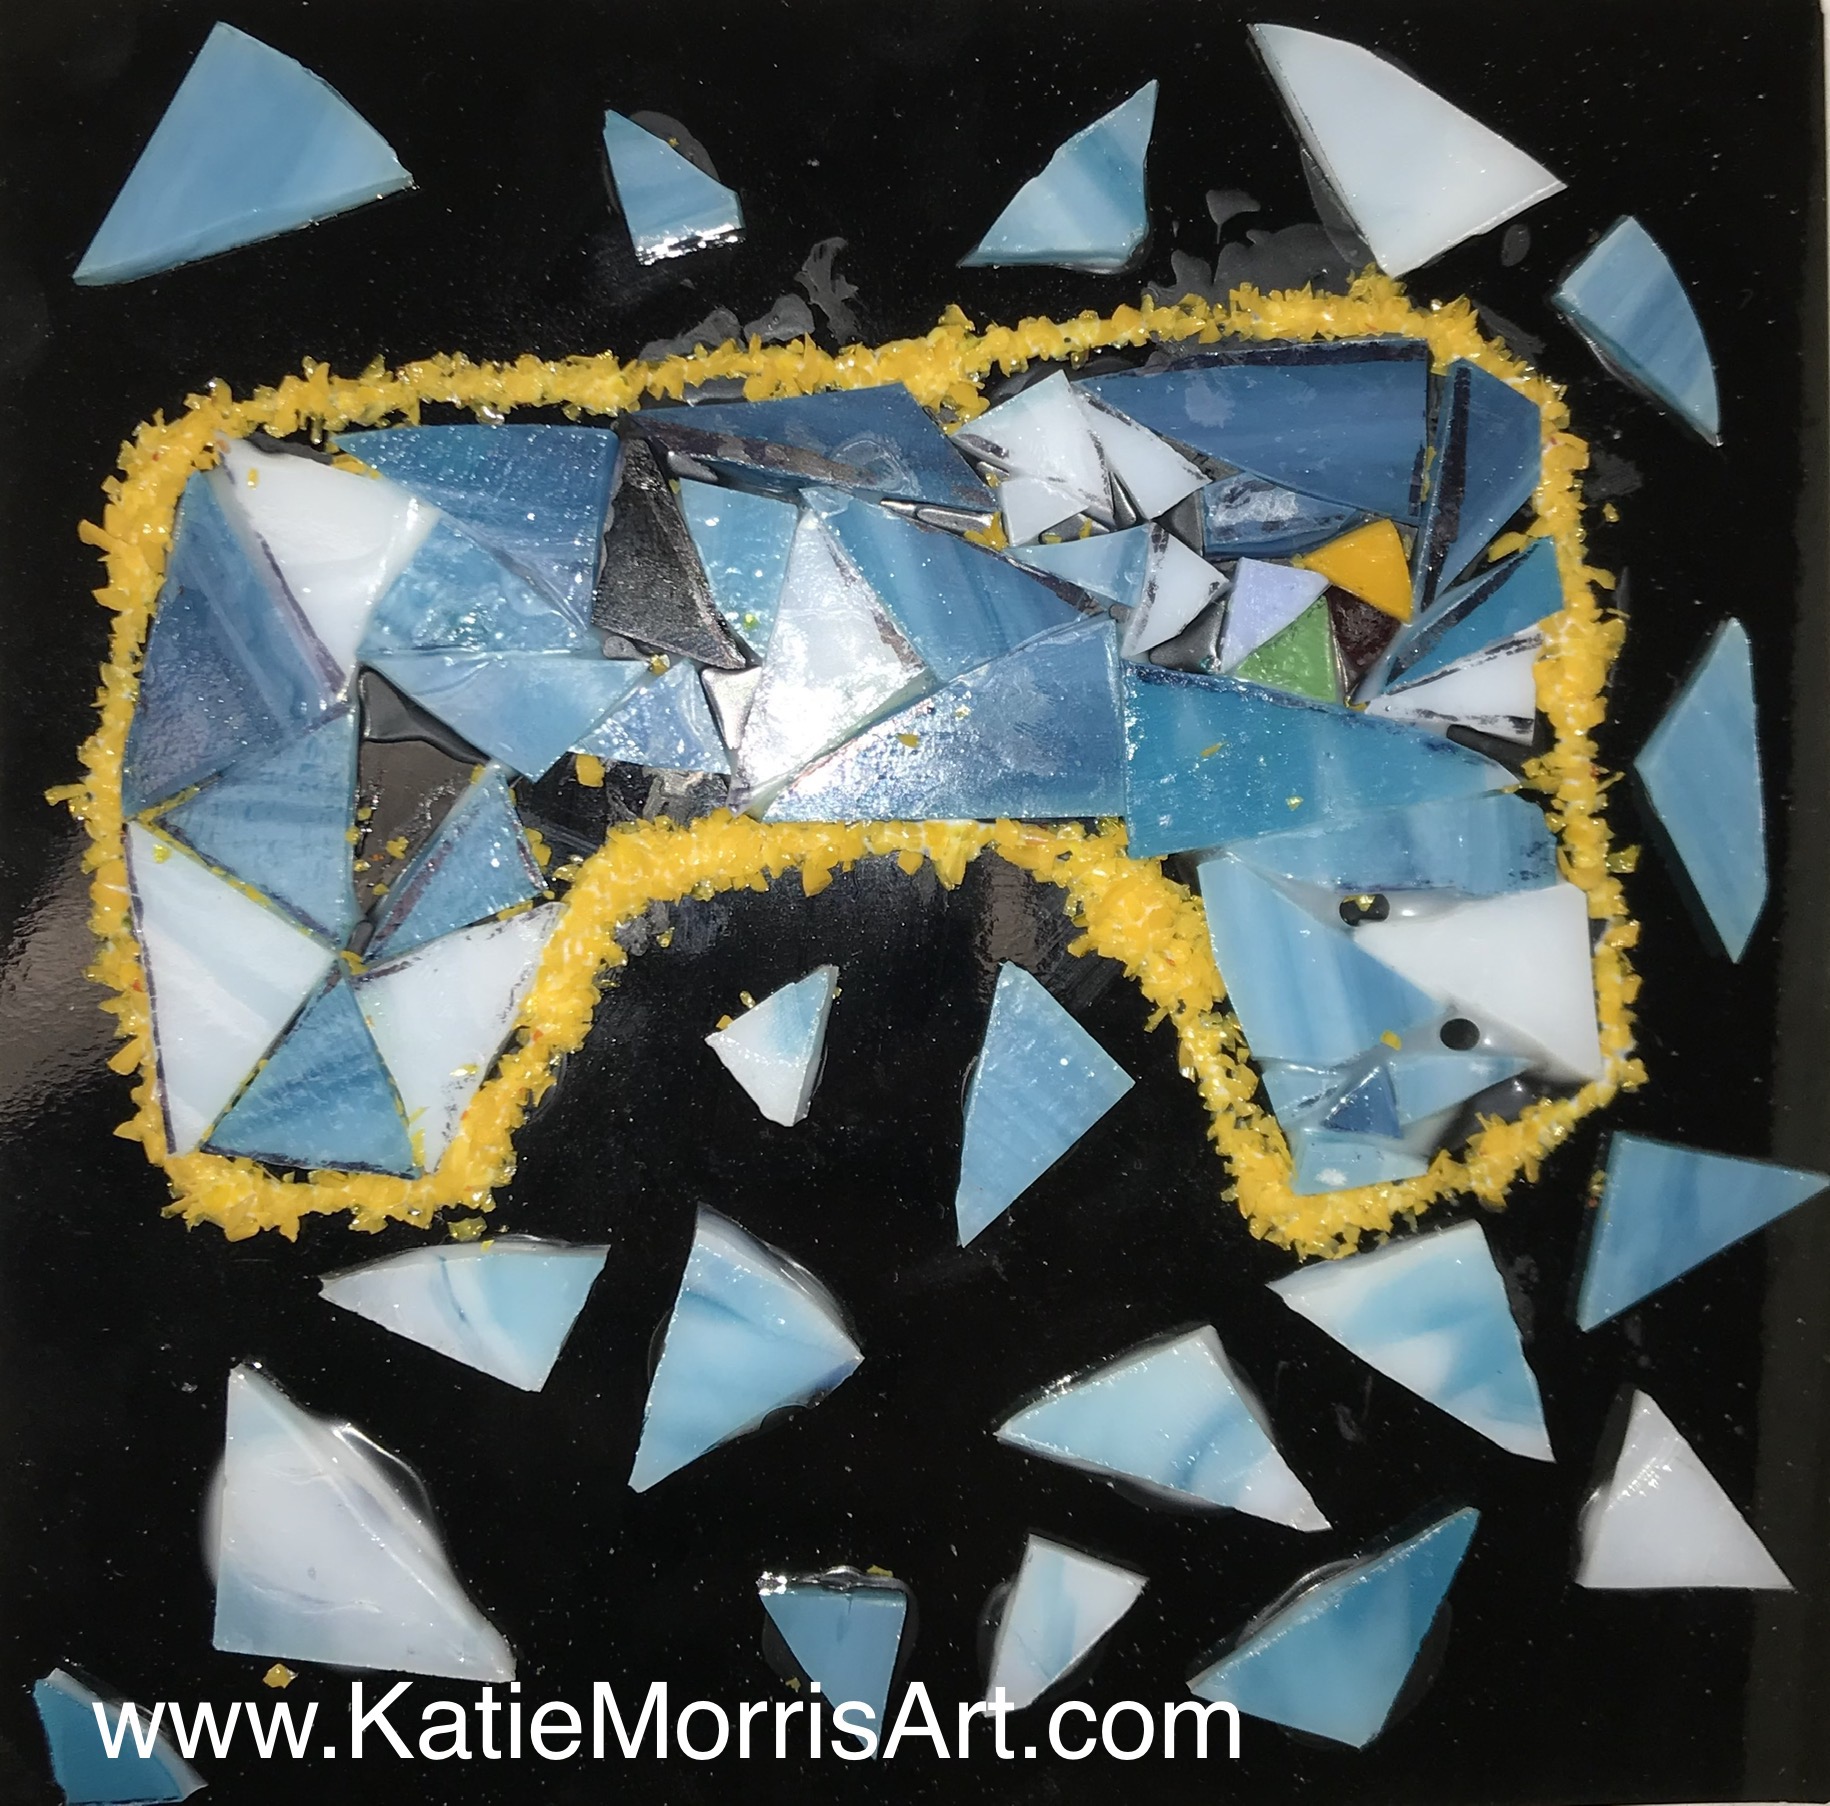
First we go through the slides presentation and use that to discuss Singletary’s artwork and big ideas. There is a nice video segment that shows his process and let’s him explain his goals. 


At the end, students are asked to reflect on their lives and what symbols could be used to represent their identity and their story. 

After choosing a symbol they work to simplify it into shapes that could be cut from glass. We have access to glass for fusing so that became the medium for the project. Students learned to cut and grind glass to prepare their work. We used Elmer’s glue or Aloe Vera gel to hold pieces in place until they were fired. 

The plan was to let students cover the edges in copper foil and solder chain to the top so they could hang in a window but we were having issues with the soldering iron and Covid happened before I could order a new one! Thankfully we have a new soldering iron now so we should be good to go if we do this again!
Video game controller design made from glassHorse shoe design made of glass

Speed boat design made of glass

Ice cream cone design made of glass
Glass layouts loaded in the kiln
Finished fused glass tiles

Katie Morris

Jackson Heights High School


Advanced Art


Lesson Title: Symbolic Fused Glass


Rationale: This lesson is intended to introduce students to glass artist Preston Singletary and the idea of using symbolism to tell stories.


Objectives

  1. The students will participate in an inquiry based discussion of glass artist, Preston Singletary’s work.

  2. The students will describe how Singletary used symbolism to tell stories.

  3. The students will reflect on their own lives and make a list of stories that are important to their identities.

  4. The students will brainstorm possible symbols to represent their identities and personal stories.

  5. The students will work to simplify and abstract images into geometric shapes.

  6. The students will demonstrate good craftsmanship and safe use of tools and materials when working with fused glass.

  7. The students will design and create a fused glass design that incorporates personal symbols to tell a story.

  8. The students will consider possibilities and make artistic choices about the function and method of display for their glass piece.

  9. The students will reflect on and explain their work in a written artist statement.


Resources

Slides presentation about Preston Singletary

Fused glass book

PBS Craft in America: Nature (Trimmed: https://youtu.be/HG1mgw6cIgA?start=2016&end=2725 )

Tools and Materials

Paper and pencils

Fused glass

Glass cutting tools

Elmer’s glue and Aloe Vera gel (to hold glass in place)

Kiln

Shelf liner paper


Artist Bio

Seattle-based Preston Singletary (bass and founder of Khu.éex’) is a visual artist, glass sculptor, and teacher who renders traditional Tlingit forms in the non-traditional medium of glass. He has worked globally with Indigenous art communities and artists.

Recognized internationally as one of the leading glass artists of his generation, Singletary has artworks in dozens of museum collections. In 2004 he had a solo exhibition at the Seattle Art Museum. Singletary maintains an active schedule by teaching and lecturing internationally, including an Artist Series lecture at the NAEA 2018 convention. PBS featured his work in the 2017 Craft in America NATURE episode.


Procedure

Day 1: The teacher will lead the students in an inquiry based discussion about Preston Singletary’s work, starting with an image of his artwork and asking the students questions about what they see and think. The students will try to “read” the symbols to see if they can figure out any of the stories before watching a video of Singletary talking about his work and telling the stories of his people. Next, the teacher will ask the students to follow the design process to develop symbols that tell their personal stories/represent their identities which will be used in a fused glass project.


Symbol Design Process

  • Reflect on your life and make a list of stories that are important to your identity

  • Brainstorm possible symbols to represent your identity and personal stories

  • Sketch pictures of the symbols

  • Narrow down your symbols to the top 1-3

  • Simplify your symbols into geometric shapes


Day 2: The teacher will explain and demonstrate the fused glass process.

  • Start with a solid colored piece of glass as the base

  • Use scrap pieces and the glass cutting tools to create the shapes needed to represent your symbol(s)

  • Layer the glass pieces up to 3 thick

  • When satisfied, glue in place with Elmer’s glue or Aloe Vera

  • Frit (small pieces) can be used to add details

  • The glass will be heated in the kiln on top of shelf liner to a point that all the pieces are fused into one piece

  • After the initial fusing, the piece can be fired again to slump it into a mold, or it can stay flat

The students will finalize their design plans and begin to prepare their glass pieces.


Day 3: The students will finish their fused glass preparations and the teacher will load in the kiln.


Day 4 (after first firing): The students will prepare the work for slumping if desired.


Day 5: The students will reflect on and explain their work in a written artist statement which will be displayed with their work.


Student Examples


Standards


VA:Cr2.1.HSIII


I can experiment, plan, and carry out an exploration of a personally meaningful theme, idea, or concept.

I can explore a personally meaningful theme, idea, or concept through multiple works of art.

I can experiment with different media and techniques in the planning phase of art-making.


VA:Cr3.1.HSIII


I can work back into a completed work of art to revise or refine to meet criteria.

I can examine, reflect on, and plan revisions for works of art and design in progress by applying relevant criteria and personal artistic vision.


VA:Re7.1.HSIII


I can analyze how reactions to art change over time with new knowledge and/or experiences.


VA:Re8.1.HSIII

I can analyze different interpretations of an artwork and choose one to defend.


VA:Cn10.1.HSIII


I can make meaningful works of art by using my knowledge of social, cultural, historical, and personal life.

Tuesday, October 13, 2020

Embrace the Grid

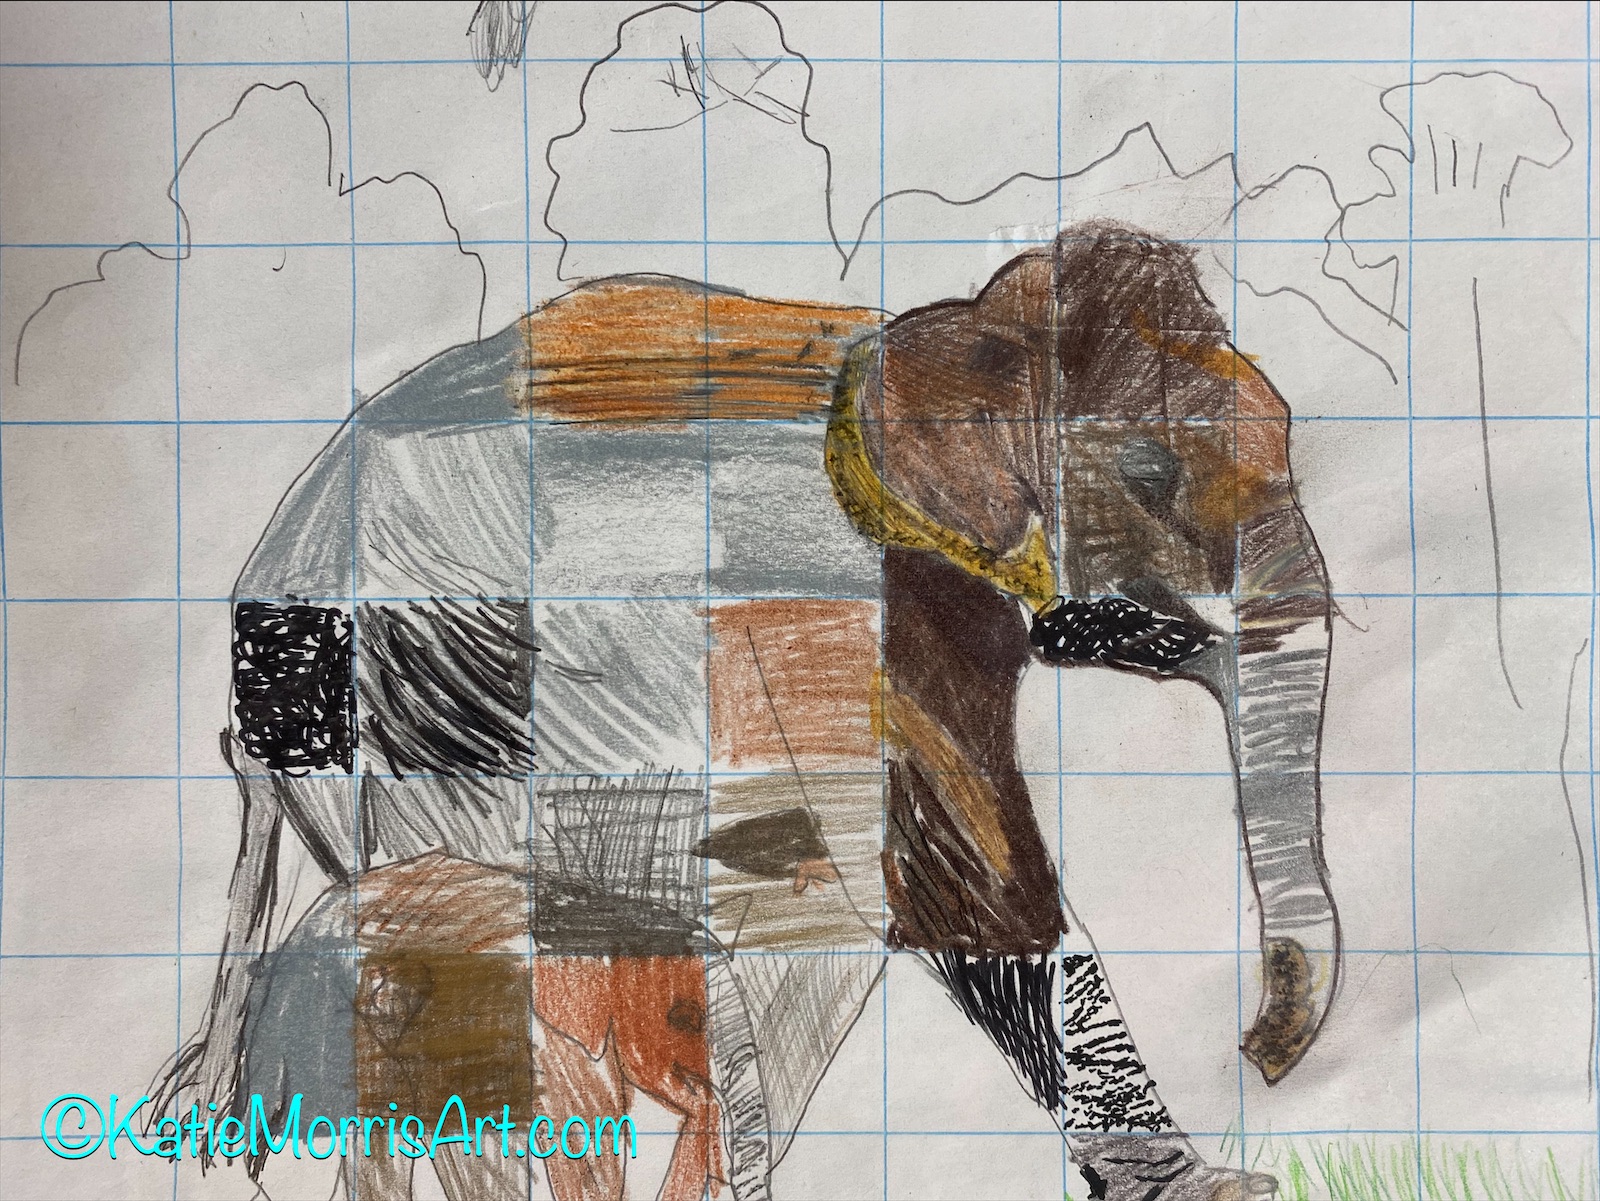
I like to introduce grid drawing to students so they know it's a tool they can use if needed, but I didn't want to spend a lot of time on a traditional project that would take a long time to complete. I was also on a mission to make sure that students know how to use the materials in their personal art supply kits and are comfortable using them. That's how this project was born!
Here is my test before introducing it to the students- a drawing of one of our roosters.
Instead of hiding the grid we embraced it, switching technique or medium in every neighboring square. Students could use their own photo or a creative commons photo. We printed the photos with the grid on them and then drew on one inch grid paper with thin blue lines.

Saturday, July 18, 2020

Theme: Music

Music was the last theme that my high school students worked on before spring break when EVERYTHING changed.
I don't think I know anyone who doesn't like music. Everyone can find a style they like. In addition to March being Youth Art Month, it is Music In Our Schools Month so it seemed like a good time to make connections between the arts.

Here is the slides presentation that I used to go over the big ideas:
The big questions for this unit were:
How can artists visually express music?
and
How can color convey feeling?

After the discussion, the students warmed up by using 10 minutes* to capture the feeling of a song in a nonobjective painting. The majority of students wanted to keep working so they spent the rest of the class period on the task. I let the students listen to the song of their choice using their personal device or headphones and their school computer.

Students had choice of media.
Eventually, students came up with a plan for a project inspired by music that they could complete in about 2 weeks.
This student painted on old records and then riveted them together to form a wall hanging.

The inspiration for this experimental painting came from the title of the sheet music. I have a couple of old sheet music books I rescued from being recycled.


This painting was inspired by Weezer's Island in the Sun

These two friends made paintings the complement each other.

This drawing was by our Italian exchange student who really loved to draw. I like how you can see where she erased on the left side.

Here are the Visual Arts Standards and Graphic Design Competencies we addressed through this unit:

Wednesday, June 3, 2020

Forced Perspective Photography

I've been done with this school year for a little while now so I wanted to share some of my middle and high school students' work from Continuous Learning. 

I used choice boards for the majority of the 7 weeks and had most of the same choices for middle and high school students. I felt that the majority of the students would want some type of starting point as opposed to full choice and I made sure to include options that could be done on their computers, without internet, with art supplies, without art supplies, and that would take varying amounts of time so that the students could all choose something that would work best for them.


Several options incorporated photography since the majority of students have cell phones available for use. Forced perspective photography was one of the options. The middle school students especially seemed to enjoy this option and the opportunity to pull out childhood toys for models and props.


Siblings and pets also helped out!

Dear Photograph
One of the options for high school students, though not what you would think of as forced perspective, was "Dear Photograph". Students took a picture of a photo from the past in the present and then wrote a short letter to the photograph reflecting on how things have changed and stayed the same. I usually use this option as my senior students' final but due to moving online, I only had a few seniors. The students did a nice job and I enjoyed seeing what they wrote about the photos!