For the first part, the students designed a logo for the Heart of Jackson Humane Society that could be used on a t-shirt as a client project.
Next, they had the chance to design their own t-shirt. The theme was open and the design was limited to one color- black- because that is what we had available for iron-on vinyl. Art Club paid for the shirts and we got a great deal since a local t-shirt shop offered to order plain white tees for us at cost. This worked out really well since I didn't have to worry about students bringing their shirts on time or bringing shirts that did not have enough cotton to accept the dye.
While students were designing, we started dyeing shirts. The ice took so long to melt that I had to ask what colors the students wanted and start sprinkling the colors on in the morning. Now that I know how long it takes, I will plan my timeline differently in the future so students can apply the powdered dye themselves.
1. Soak the t-shirts in soda ash water for at least 15 minutes
2. Ring out the shirt and arrange bunched up on a cooling rack, wire basket, etc. so the water can drip through
3. Pile ice on the shirt, trying to cover everything- this can take a little practice to get the ice stacked up
4. Sprinkled on powdered dye- we used jacquard procion dye, about a tablespoon total per shirt, so if you use 3 colors, a teaspoon of each. We did not measure this precisely because I didn't have measuring spoons at school and the spoons borrowed from my clay tools wouldn't fit in the little jars. We stuck the handle of the spoon in and scooped some out, sometimes sprinkling a bit more dye if it looked too pale as the ice melted.
5. Wait until the ice melts
6. When ice is totally melted, rinse the shirts until the water runs clear. Ring it out and rinse it again to be safe.
FYI- if you use a blow dryer to melt the ice the colors don't seem to be as vibrant as if you let the ice melt on its own.
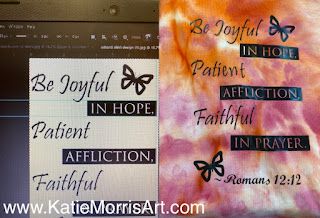
Students created their designs in Photoshop then turned in a jpeg so I could import it to Silhouette studio and cut it out with my portrait on heat transfer vinyl. I learned to order the easy weed vinyl in the future and to do a small test cut to check the depth and number of passes required. The default was not enough for the HTV I ordered so it took some testing to get the right combination.
There were two shirts that the student and I both looked over and didn't notice small missing words like the "in" that should be before affliction. We won't make that mistake again! We ended up trying to match the size and patched it in.
The students were pretty pumped about their shirts. I asked everyone to wear them on the same day so we could take a group picture. Here is one class:


No comments:
Post a Comment