
Showing posts with label painting boot camp. Show all posts

Tuesday, February 4, 2020

Painting: Trying to Loosen Up

Once upon a time, I stopped painting. Frustrated that I couldn’t get my paintings to look “right” (read: real), I stepped away for a while. 
Most of the artwork to which I’d been exposed was a realistic style so in my mind that was the kind of art that was good. When I was given the opportunity to learn and see more of art history and realize that there are lots of different styles I was able to loosen up and come back to painting. 

This is my 5th year in my current teaching position and I have observed the majority of students working on paintings being very tight trying to force a realistic style. The students also struggled to work with acrylic quickly enough and ended up frustrated with trying to blend dried paint. One of my goals for introducing painting this year was to encourage them to loosen up, move more quickly, and understand their options for different styles and approaches. 

With watercolor we tackled landscapes. I gave students the option of following along with me in a guided painting or working on their own landscape. I wanted them to have a basic understanding of landscapes without spending weeks on an acrylic painting like has been the tradition. We used wet on wet and other techniques to get the main composition laid out the first day then the 2nd was spent on adding layers for definition and texture. I asked the students to only make a few lines with pencil for a guide before starting opposed to drawing every little detail and talked about embracing the nature of watercolor- water likes to stick to other water!


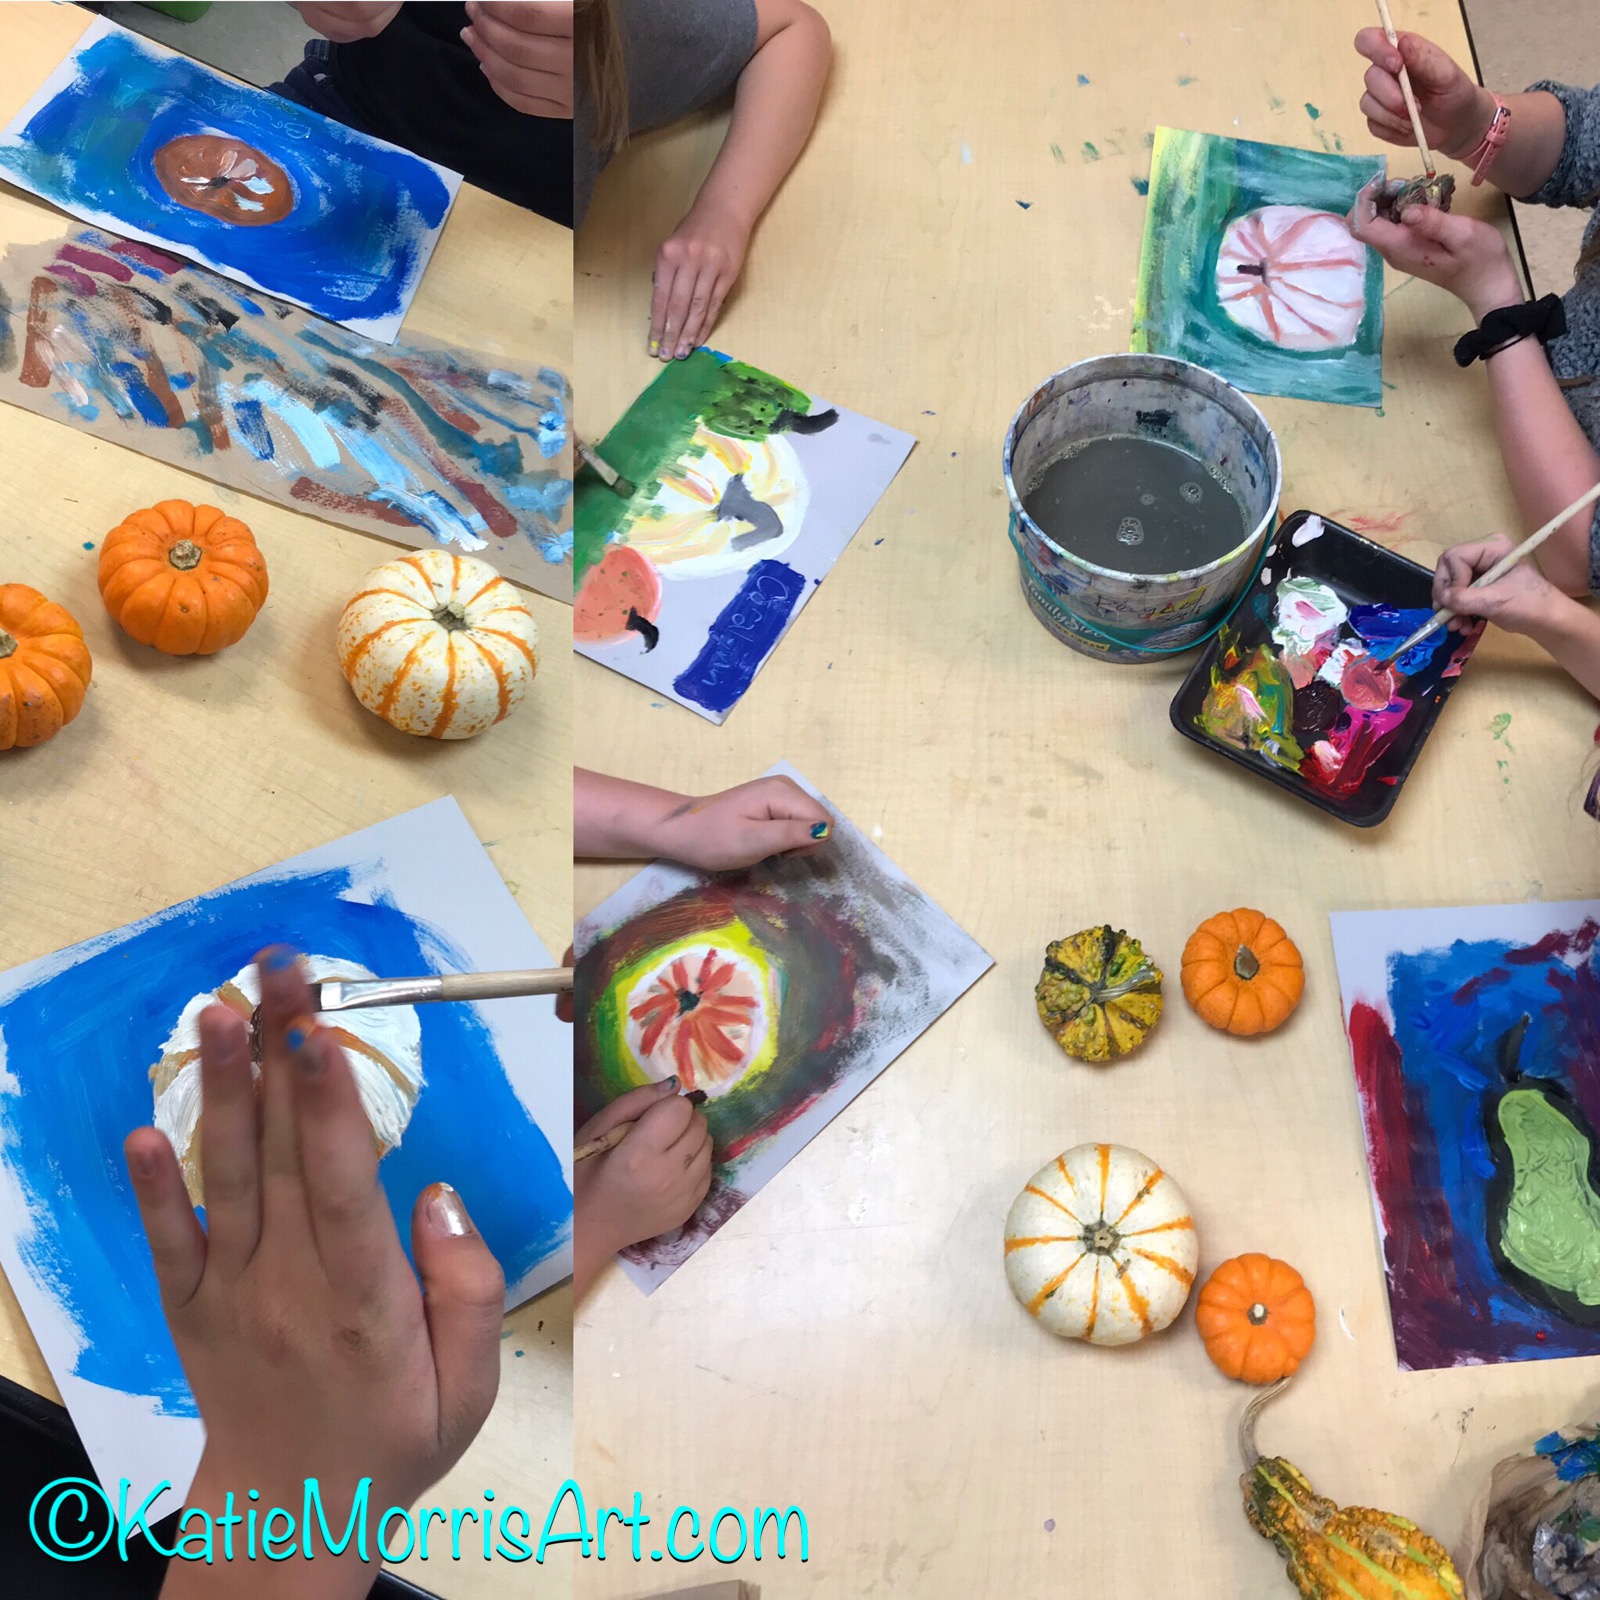
Before the students started on their 16x20 canvas paintings, we did a couple of exercises with opaque paint. First, we did a one class period “speed painting” challenge. I brought in a variety of miniature gourds with different colors and textures and students each chose one to observe and paint. Here are the rules- use only primary colors plus white and black. No pencils or drawing before painting. No washing your brush. I did about a 2 minute demo mixing paint directly on my paper and using my brush handle to make marks with a Sgraffito technique. While the students were hesitant at first they relaxed and had fun with it after a few minutes, besides a few that I’m still trying to help break free of perfectionism.


The 2nd exercise was a simple technique sampler. Students folded their paper into quarters and made tiny paintings with different techniques in each section: palette knife, dabbing, scraping (using a piece of mat board), and sgraffito. 

When the time came for students to begin their final paintings they had learned some new techniques to have at their disposal. I gave the themes of “object” and “shoes” as starting points but some branches off in different directions.

I feel like intentionally practicing techniques for loosening up, in addition to introducing different styles of art in the art genres unit made a big difference in the students’ confidence and willingness to try new approaches. 
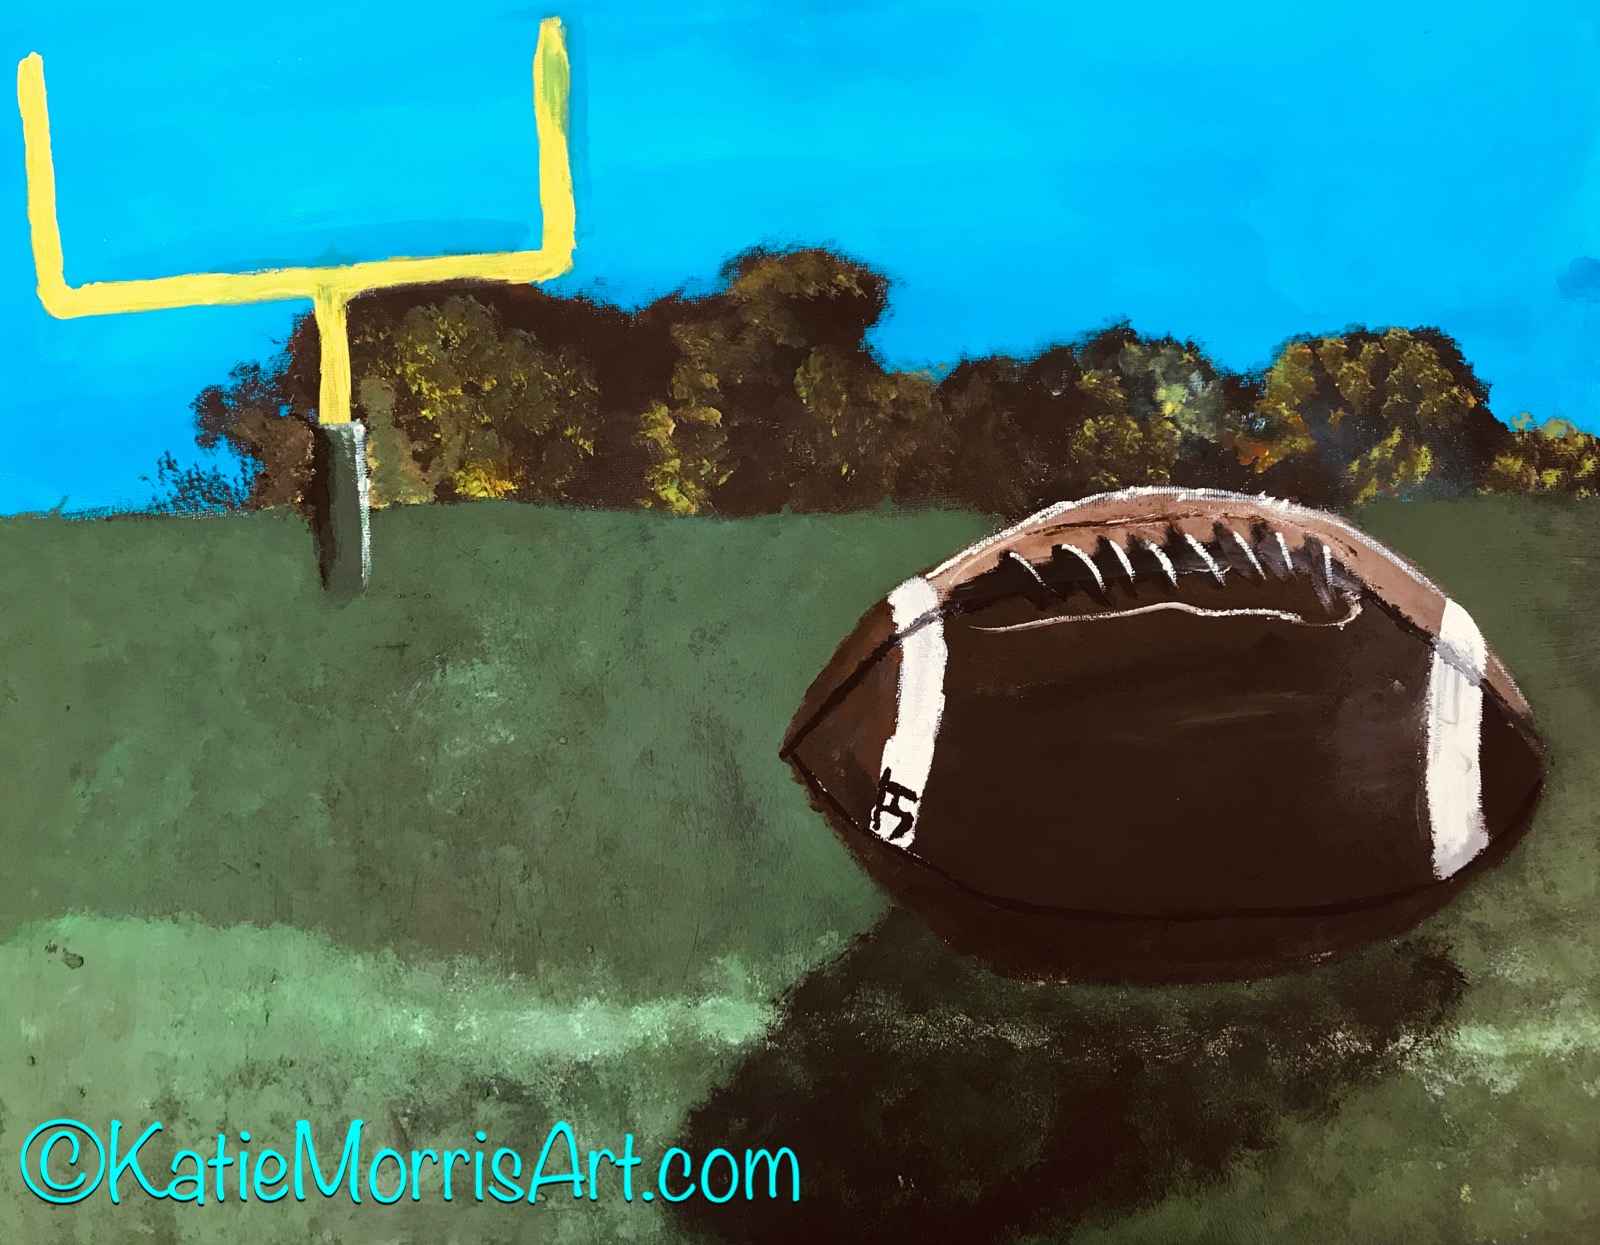
These paintings were created by a couple of freshmen boys who were not very comfortable with painting before.

A few students decided to paint candy still lifes. I pulled in Wayne Thiebaud when they were trying to figure out what to do with their shadows.

Not many takers on watercolor, but the couple that used it did a nice job.

This is the wall in our front office where I can display 10 16x20 inch paintings.
Do you find that your beginning students are stressed about realism? How do you help them to loosen up?

Tuesday, February 19, 2019

Favorite New Watercolor Technique

Last September I attended a watercolor workshop in my hometown where we learned to embrace the loose, flowy nature of the medium using Japanese techniques. We started by sketching the focal point and using masking fluid to cover it. It’s also nice to let some drops of masking fluid fall on the Negative space to create some highlights. When that was dry (do not use a blow dryer to speed it up), we wet the paper and just waited for it to lose the sheen. Next, we applied red, yellow, and blue watercolors (we mixed tube watercolor with water in little cups aiming for a medium value), allowing the colors to mix and bleed together. We added more paint in certain areas trying to match the light and dark zones from the reference picture. As the paint dries you can go back and work to define the negative space. An example would be making the background darker around the shape of a leaf. This is usually more interesting than just painting the positive space. Eventually you remove the masking fluid and paint the focal point in a more controlled manner.

I really enjoyed this technique and since I realized I needed to do a better job of selling watercolor  to my students, I made a small watercolor painting part of our painting bootcamp. I have the students 5x7 inch pieces of watercolor paper and asked them to choose a simple subject for the focal point that could have a flowy background, like a flower or an animal. We used sax liquid watercolors dispensed I go palettes and I also let the students sprinkle salt on the wet paint if they wanted to try out that effect. We have table salt at school but lately I’ve been adding a bit of sea salt or kosher salt at home and I like how the bigger crystals make a different look.

I enjoye this process so much that I used it as the hands-on portion of a TSB workshop I co-presented at the 2018 Kansas Art Education Association fall conference.


Masking fluid can be kind of expensive but I’ve found that you really only need 2 or 3 bottles since the students will be ready for it at different times and can share. I’ve also been told that it doesn’t last forever so you shouldn’t really buy more than you’ll use in a year.
What is your favorite watercolor technique to teach?
One of the art teacher workshop participants created this flower.

Here are a few of the small paintings I've created practicing this technique.

My student's finished clownfish

Sunday, October 25, 2015

Painting Boot Camp

I did lots of thinking over the summer. LOTS of thinking. I knew I wanted to stick with TAB, but I hadn't ever used the approach with high school students. I was torn until I read about Apex's idea of "boot camp". Brilliant! Students spend time doing activities to get acquainted with new media so they know what they want to use for their choices later on. The first month of school was basically 2D boot camp in my graphics classes. We covered observational drawing, pencil rendering, ink techniques, acrylic, watercolor, colored pencil, mono printing, and collage! Soon, we will do a 3D boot camp and later on, digital media.
Our painting boot camp started with a color mixing challenge. Students were divided into teams, given a sheet with numbered paint sample swatches, tempera paint in primary and neutral colors, and worked together to mix paint to match the colors as close as possible.

The next task was to complete a one day acrylic painting of fruit. I gave the students small pieces of poster board to paint on and did not allow them to draw the fruit ahead of time. I wanted to see how they would do starting directly with paint.


 After acrylic, students completed one day watercolor paintings. I suggested a landscape, but it could have been something else. No reference photos, just see what you can come up with out of your head.
Students were much more comfortable with acrylic than watercolor, so one of my goals for the year is to win some more over to team watercolor!

The next post, some day, when I'm once again caught up on grad work, will cover mono printing and collage boot camps. If you want to see what we're up to in closer to real time, follow @JHArtClass on Instagram!https://instagram.com/jhartclass/