I really enjoy painting watercolor feathers. I usually stick to chickens and game birds, but decided to paint a peacock feather for a bigger challenge. It was definitely more complicated but I enjoyed it! I have a couple feather paintings available in my Etsy shop and would be happy to paint custom feathers for anyone interested.

Showing posts with label Watercolor. Show all posts
Showing posts with label Watercolor. Show all posts
Sunday, August 28, 2022


Tuesday, February 4, 2020
Painting: Trying to Loosen Up
Once upon a time, I stopped painting. Frustrated that I couldn’t get my paintings to look “right” (read: real), I stepped away for a while.
Most of the artwork to which I’d been exposed was a realistic style so in my mind that was the kind of art that was good. When I was given the opportunity to learn and see more of art history and realize that there are lots of different styles I was able to loosen up and come back to painting.
This is my 5th year in my current teaching position and I have observed the majority of students working on paintings being very tight trying to force a realistic style. The students also struggled to work with acrylic quickly enough and ended up frustrated with trying to blend dried paint. One of my goals for introducing painting this year was to encourage them to loosen up, move more quickly, and understand their options for different styles and approaches.
 With watercolor we tackled landscapes. I gave students the option of following along with me in a guided painting or working on their own landscape. I wanted them to have a basic understanding of landscapes without spending weeks on an acrylic painting like has been the tradition. We used wet on wet and other techniques to get the main composition laid out the first day then the 2nd was spent on adding layers for definition and texture. I asked the students to only make a few lines with pencil for a guide before starting opposed to drawing every little detail and talked about embracing the nature of watercolor- water likes to stick to other water!


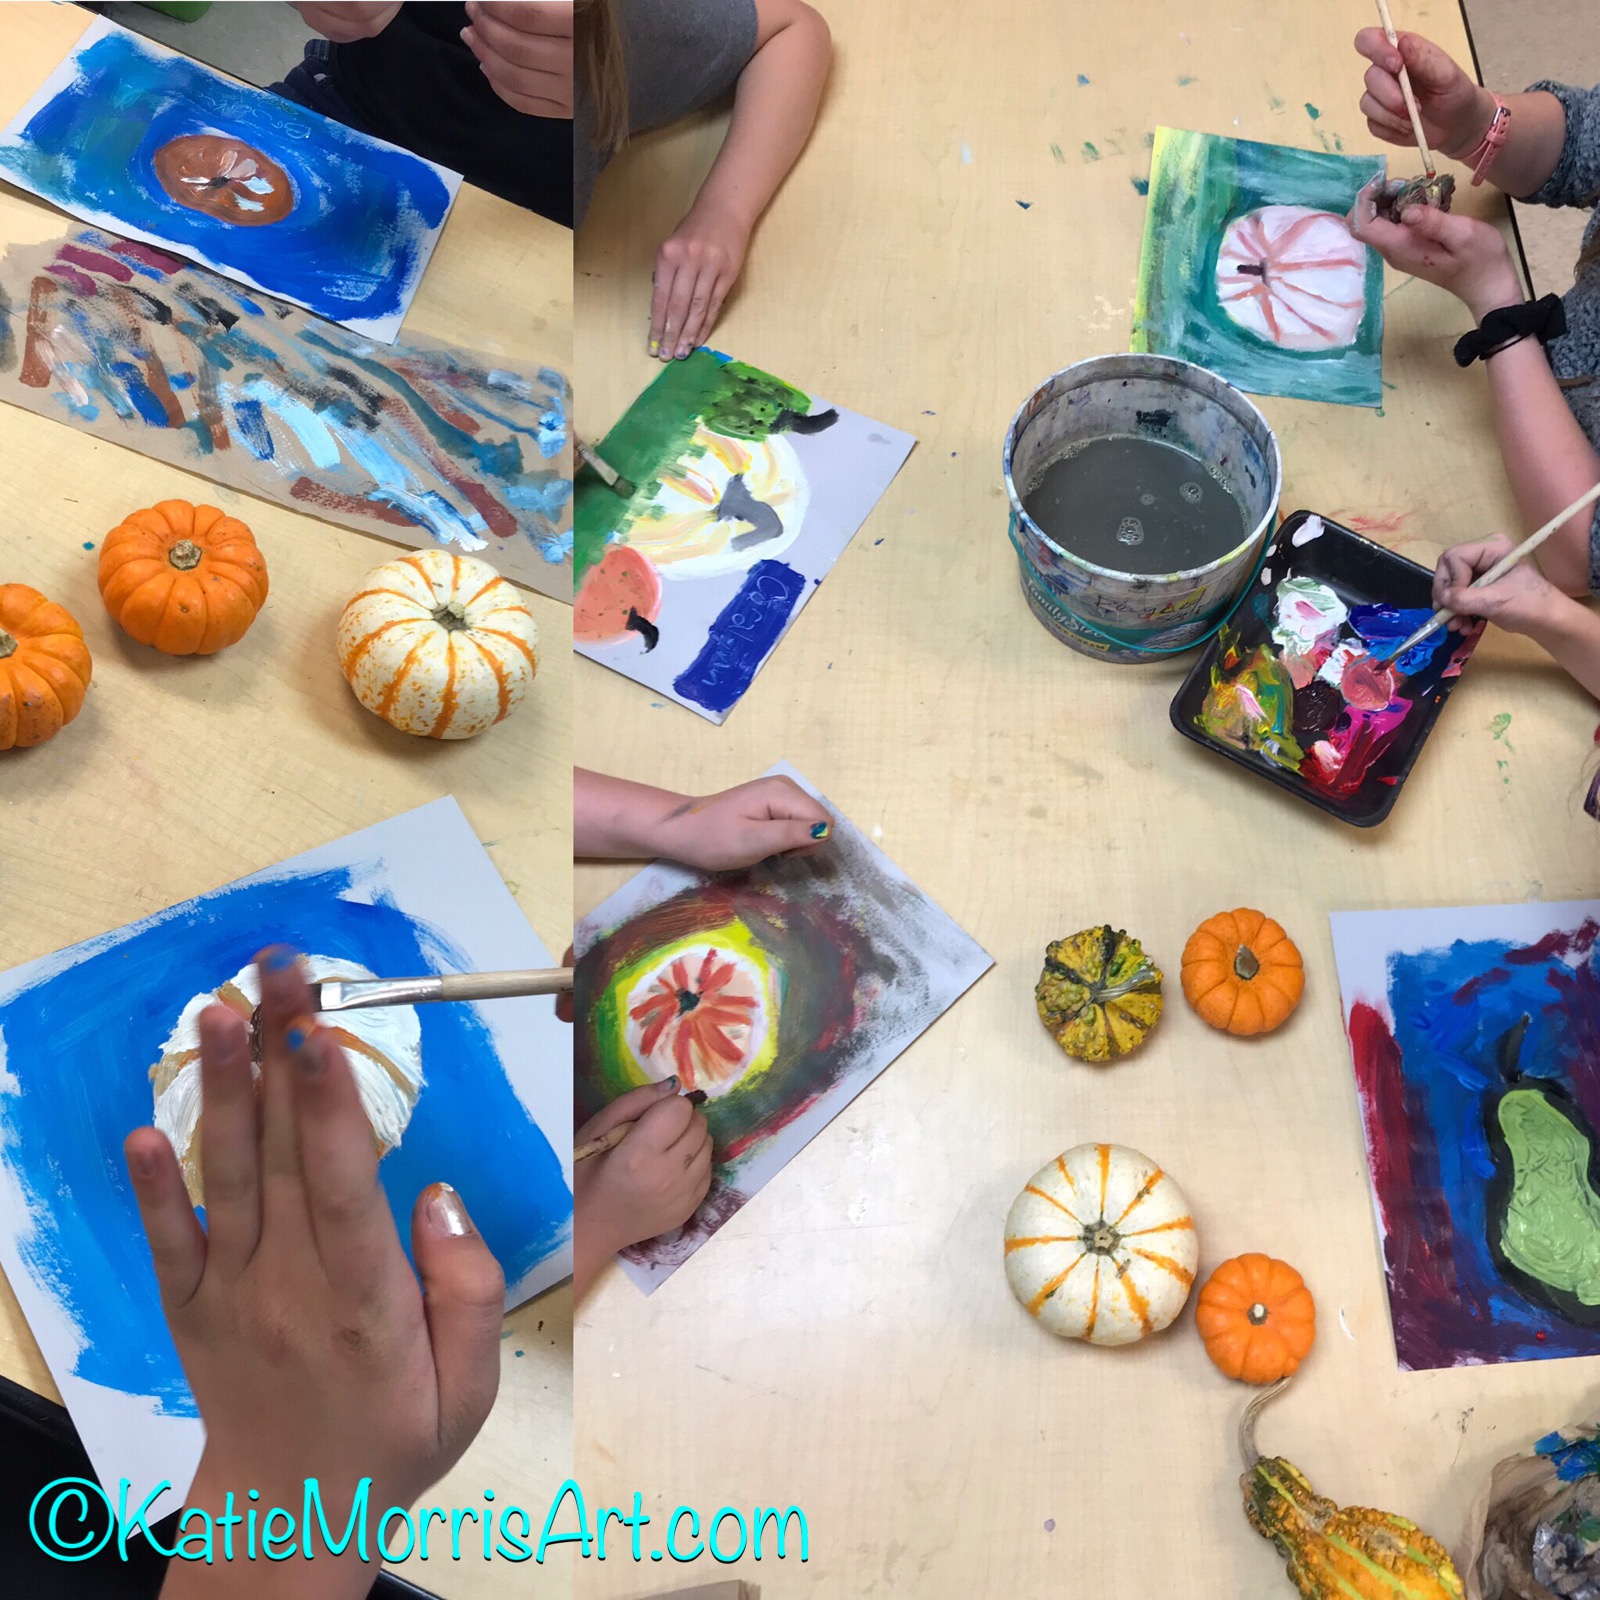 Before the students started on their 16x20 canvas paintings, we did a couple of exercises with opaque paint. First, we did a one class period “speed painting” challenge. I brought in a variety of miniature gourds with different colors and textures and students each chose one to observe and paint. Here are the rules- use only primary colors plus white and black. No pencils or drawing before painting. No washing your brush. I did about a 2 minute demo mixing paint directly on my paper and using my brush handle to make marks with a Sgraffito technique. While the students were hesitant at first they relaxed and had fun with it after a few minutes, besides a few that I’m still trying to help break free of perfectionism.


The 2nd exercise was a simple technique sampler. Students folded their paper into quarters and made tiny paintings with different techniques in each section: palette knife, dabbing, scraping (using a piece of mat board), and sgraffito.


When the time came for students to begin their final paintings they had learned some new techniques to have at their disposal. I gave the themes of “object” and “shoes” as starting points but some branches off in different directions.
I feel like intentionally practicing techniques for loosening up, in addition to introducing different styles of art in the art genres unit made a big difference in the students’ confidence and willingness to try new approaches.
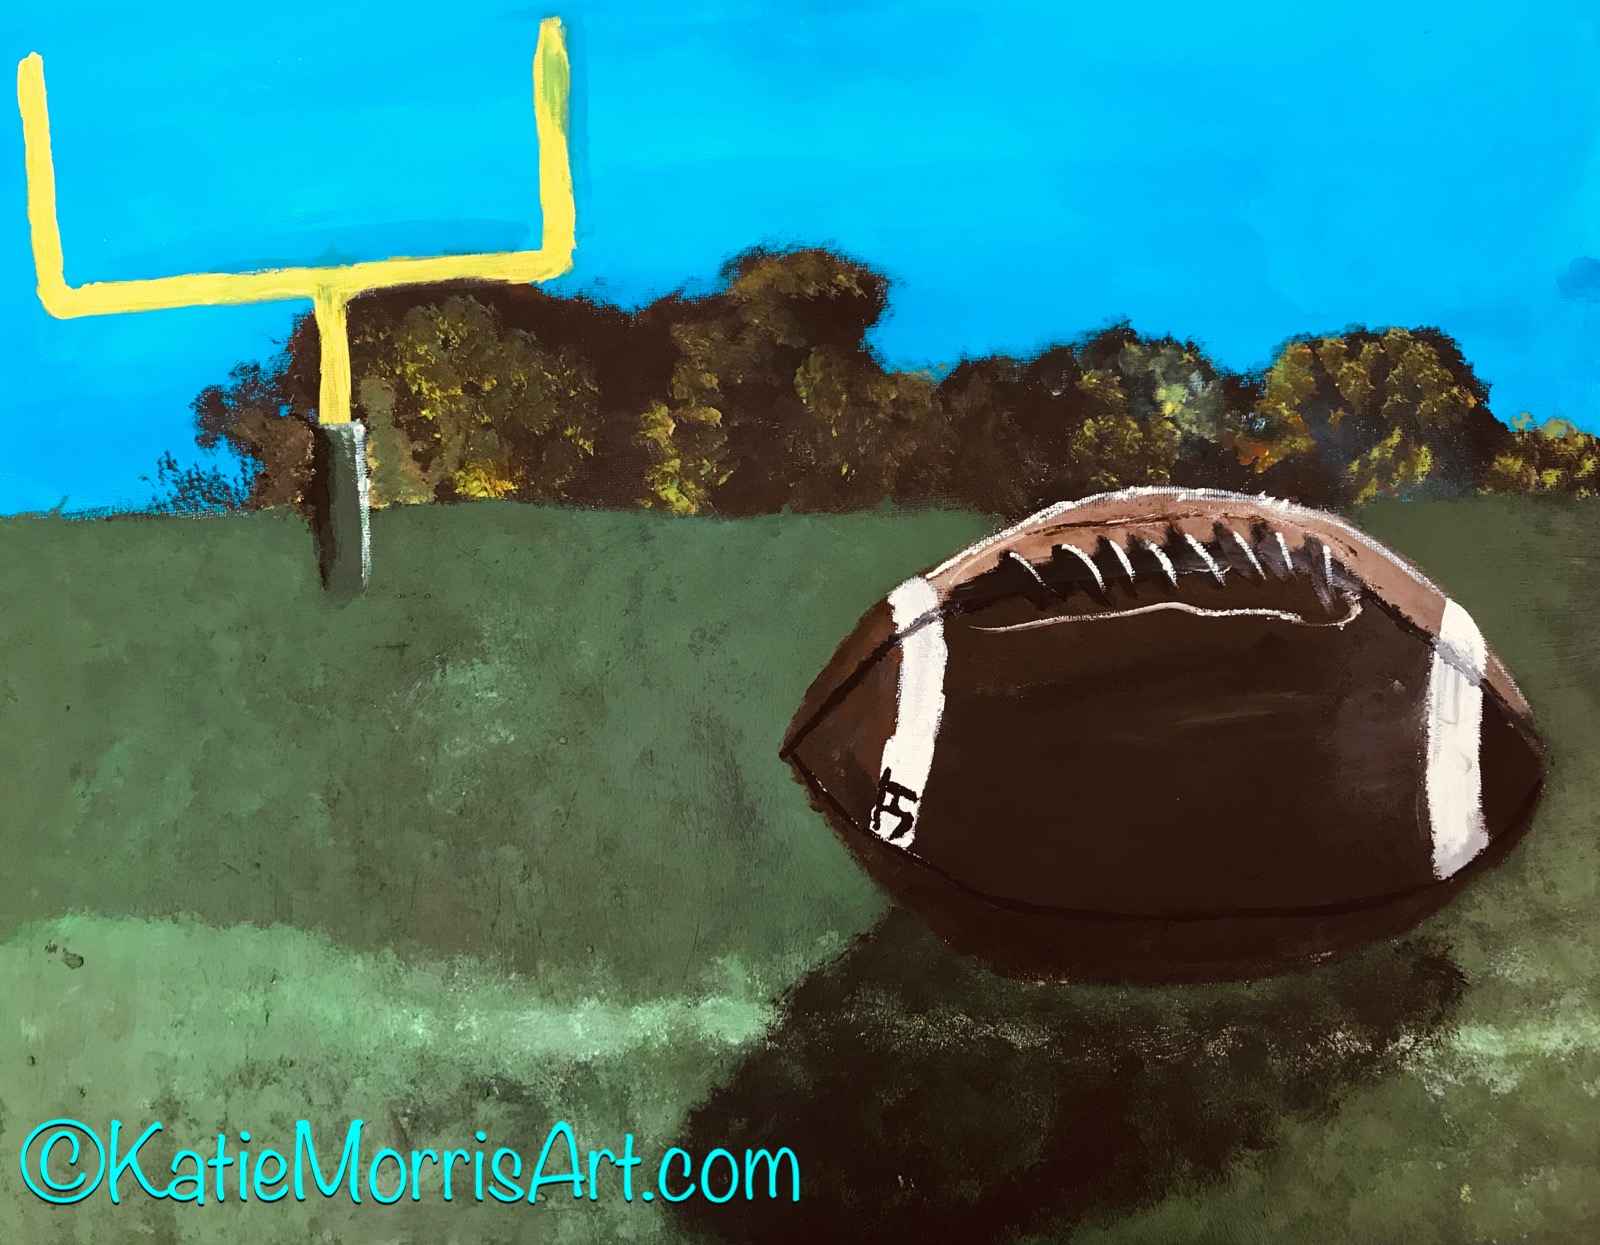

These paintings were created by a couple of freshmen boys who were not very comfortable with painting before.
 A few students decided to paint candy still lifes. I pulled in Wayne Thiebaud when they were trying to figure out what to do with their shadows.


Not many takers on watercolor, but the couple that used it did a nice job.


 |
| This is the wall in our front office where I can display 10 16x20 inch paintings. |
Wednesday, September 11, 2019
PreK Lilacs

 One time I read an article that was about how to teach a child to draw. Rather than follow step by step directions which teach one way to draw one thing, you spend some time activating their thinking by talking about what you notice in the thing you are observing. It was an awesome article and I hope I can find it again someday. That is the process we used for these PreK lilac watercolor paintings. The students and I talked about what we noticed in the lilacs and then they painted, first the stem, then the flowers. For simplicity's sake since we were nearing the end of the school year and had one day to finish the paintings, I gave each student just a purple and a green prang watercolor well instead of a whole set of paints.

We use ice cream buckets or coffee containers for cleaning brushes when painting. They are much less likely to spill than smaller cups and they are big enough that I can pretty much get by with putting one in the center of each table for students to share.

Here are the finished paintings from my PreK artists!
Friday, July 12, 2019
2019 State Fish Art Contest
I've written about the State Fish Art Contest before (see posts here) because I feel like it, along with the Jr Duck Stamp, are great programs that merge art and science. It's always a choice for my students to complete the art and an additional choice on if they want to enter the contest or not. This year I only had 3 students choose to enter... and 2 were my own children! My kids worked on their projects over spring break and it was a good distraction from screens since spring break in Kansas is usually too cold to do much outside.


My oldest son chose the Colorado state fish- the greenback cutthroat trout. He had watched me using watercolors a few months before so he was excited to try out some techniques. He drew the fish and used masking fluid to trace the outline. He used a wet on wet technique to paint the water, letting drops of color fall on the wet paper and then sprinkled coarse sea salt and some table salt on the wet paint to create a pretty cool effect.

When the background was dry, he painted the body of the fish and later used colored pencils to add details.
 |
| Showing off his finished painting |
My middle son used a wax resist technique, adding watercolor over his crayon drawing of a channel catfish.

Some states have a lot more participation in this program than others. It is not well known in Kansas but it is a worthwhile program, especially if you have students or children of your own interested in wildlife, conservation, or environmental science.
Monday, June 24, 2019
Painting in the Hospital: Senior Gifts
I don’t miss a lot of school. I’d never missed more than 2 days in a row aside from maternity leaves but that all changed the last month of school! Somehow I ended up with pneumonia. I stayed home from school for 3 days and then ended up in the hospital for 2 more after I “failed” outpatient antibiotics. It was tough being away from my family, little stressful making plans for school (but would have been worse without my awesome sub), and a little boring being stuck by myself in a hospital room. Luckily my husband was able to follow the directions I gave him to find all my watercolor supplies so I could work on gifts for my graduating seniors.

This was one of the get well soon cards a kindergartner made me. I’m pretty sure it’s supposed to say “I love paints” but I love that it says “pants”. :)

I don’t have one “thing” I do for my seniors every year. This year I made 5x7 inch watercolor paintings based on the students’ interests. They didn’t take me an unreasonable amount of time to complete, they made a nice gift when I slipped them into affordable frames, and it kept me entertained in the hospital!

Here are the supplies I used:
(If you decide to order through these links I receive a small commission at no additional cost to you)

When my oldest sons visited they made requests for paintings too. Their paintings are the “rainbow bunny” and chameleon in the lower right.
While I don’t recommend getting stuck in the hospital, I do suggest having art supplies to keep yourself busy if you find yourself in that situation!
Tuesday, February 19, 2019
Favorite New Watercolor Technique
 Last September I attended a watercolor workshop in my hometown where we learned to embrace the loose, flowy nature of the medium using Japanese techniques. We started by sketching the focal point and using masking fluid to cover it. It’s also nice to let some drops of masking fluid fall on the Negative space to create some highlights. When that was dry (do not use a blow dryer to speed it up), we wet the paper and just waited for it to lose the sheen. Next, we applied red, yellow, and blue watercolors (we mixed tube watercolor with water in little cups aiming for a medium value), allowing the colors to mix and bleed together. We added more paint in certain areas trying to match the light and dark zones from the reference picture. As the paint dries you can go back and work to define the negative space. An example would be making the background darker around the shape of a leaf. This is usually more interesting than just painting the positive space. Eventually you remove the masking fluid and paint the focal point in a more controlled manner.
 I really enjoyed this technique and since I realized I needed to do a better job of selling watercolor to my students, I made a small watercolor painting part of our painting bootcamp. I have the students 5x7 inch pieces of watercolor paper and asked them to choose a simple subject for the focal point that could have a flowy background, like a flower or an animal. We used sax liquid watercolors dispensed I go palettes and I also let the students sprinkle salt on the wet paint if they wanted to try out that effect. We have table salt at school but lately I’ve been adding a bit of sea salt or kosher salt at home and I like how the bigger crystals make a different look.
I enjoye this process so much that I used it as the hands-on portion of a TSB workshop I co-presented at the 2018 Kansas Art Education Association fall conference.

Masking fluid can be kind of expensive but I’ve found that you really only need 2 or 3 bottles since the students will be ready for it at different times and can share. I’ve also been told that it doesn’t last forever so you shouldn’t really buy more than you’ll use in a year.
What is your favorite watercolor technique to teach?
 |
| One of the art teacher workshop participants created this flower. |
Here are a few of the small paintings I've created practicing this technique.


 |
| My student's finished clownfish |
Wednesday, August 9, 2017
Summer PD
 As I prepare to head back to school next week I've been reflecting about all the learning and professional development I had the opportunity to participate in this summer! It started with hosting KAEA Summer Camp in my hometown in mid-June. There were 3 workshop choices and I did painted batik.


My friend, Tranda (Ag Wife Artist Life) was the teacher and it was SO fun. I'm excited to be able to teach this better now that I've had some guidance as I tried it out.


The week after Summer Camp, I left with 5 other KAEA board members for Elmhurst, Illinois where we represented Kansas at the NAEA Western Region Leadership Conference.

At the conference there were meetings where we worked with other Western Region states' representatives on proposed position statements, talked about the future of our evolving organizations, participated in workshops, visited museums, had fun, and ate some delicious meals.


We learned about a new-to-me art movement, the Chicago Imagists, from one of the artists, Suellen Rocca, and enjoyed the collection at the Elmhurst Art Museum.

One of our meals was sponsored by Davis. That was one of the first opportunities to really kick back and make friends with some of the other attendees.


We learned about using circuits to make kinetic sculptures, made small needle felted works, and gelli printed. I'm hoping to find a grant that will allow the purchase of some of the circuit kits that could be shared between the art room and the science department.
 |
The Kansas crew at dinner.  |

 |
| Fun road trip! |
 In July, a group of my art teacher friends got together to make stuff! First we did a bbq pit fire, which was super fun, and I would like to do on some sculptural pieces in the future.
 |
| We used a small bbq grill to heat up our pots then moved them into a metal bin filled with combustibles. |
 |
| We threw coffee grounds on this mug and got really cool effects. |
 |
| 3 different stages of the process- my carving in the cuttlefish, the machine melting the metal, and the can holding the cuttlefish after we poured the molten metal. |
 |
| Successful casts ready to be cleaned up. I made the pendant on the left and decided I liked the sprues so they will become part of the piece. |
 |
| This is a cuttlefish or cuttlebone. |

The last way I did some learning this summer was through Skillshare classes. I found an email in a weird folder with a link to try the premium membership free for 2 months. You know I love free stuff so I signed up. I started looking around and found SO many things to try. I took some digital classes to learn new skills and techniques that I will definitely utilize in my computer graphics class this year and I still have more I want to take. It's interesting to see other people's approaches to a topic whether it's poster design or painting.


One of my goals is to get more students excited about watercolor. I don't think I've "sold" it well enough before. I will use some of the ideas from one of the watercolor classes for my painting boot camp.

I also took a class on hand lettering which was really helpful and very practical. I think I'm going to incorporate her method into a computer graphics lesson this fall.
If you want to tryout Skillshare use this link to claim your TWO FREE MONTHS! There are still so many classes I want to take. I just keep adding them to my list for when my classroom is ready.
Subscribe to:
Posts (Atom)