Showing posts sorted by relevance for query 2nd grade. Sort by date Show all posts

Wednesday, October 13, 2010

Sunflower Still Life Drawings

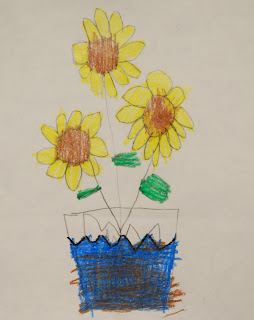
 About a month ago when the sunflowers were still blooming in my backyard, I took some blooms to school for a still life drawing lesson with my K-3rd students.  We looked at Van Gogh's sunflower series and I modeled looking and drawing sunflowers for the students.  First, I drew a generic flower and then contrasted it with a drawing of a sunflower where I paid attention to the shapes.  Most students attempted to capture what they saw but some are still in a different stage where they draw what they "know' instead of what they "see".  I gave the older students more choices.  3rd grade and 2nd grade students could either use traditional drawing materials or "draw with scissors" and make construction paper flowers.  It was good practice and a good one-day project.  Living in Kansas, the students are always excited about sunflower projects!
I put in some with no petals left and pointed out the flowers like that in Van Gogh's painting.  Not many takers, but I still think the textures look cool!

 Kindergarten
 Kindergarten
Kindergarten 
 2nd grade
 2nd grade
 1st grade- drew the table the flowers were sitting on
 2nd grade
1st grade
My construction paper and crayon example

Saturday, September 1, 2012

Common Core Cubes


When did you learn the "magic trick" to drawing a cube? I'm pretty sure it was one of my 5th grade teachers who taught me. I've shown students before if it happened to come up and they asked, but never any students younger than 4th grade. Apparently the new Common Core math standards say that 2nd grade students need to be able to draw a cube! The 2nd grade teachers asked if I could help with this and I was very happy to assist.
My student teacher, Miss Bennett, teaching about cubes.
In the students' first "real" Art class after handling all of the first-day-of-Art-class-business, we talked about cubes. I drew a square on the board and asked the students to identify it, which they did easily. Next, I held up a cube, which the students also identified. Then I asked the students what the difference between the two is, and they were eventually guided to the answer of shapes being 2D and forms being 3D. The students didn't really know the word "form" before, so I told them that in Art, we call things that take up space "forms". I think our district's paperwork say "3D shapes" but I refuse to call them that. One of our district level curriculum ladies said that Art just has a more specific vocabulary in that circumstance. Anyway, after covering the vocabulary, I told the students that there is a "magic trick" to drawing a cube that makes it look 3D. BUT, before I showed the students the magic trick, I wanted them to try to solve the problem of drawing a cube on their own.
I passed out blocks so that each student had a cube to observe and do their best to draw. This was a great assessment that helped me see how students "see", how they approach problems, and if they had any prior knowledge of drawing forms. There are about 130(ish) 2nd grade students and I think that 2 of them figured out the trick. It was really interesting to see their approach. Some drew squares inside of squares, some drew each side like they had cut the cube apart and flattened it, and several tried to trace the cube, only to find out that just makes a square. :)
After about 5-10 minutes of the students trying on their own, I finally showed them the "magic trick". The most common source of confusion comes from which lines to connect and which to erase. I asked the students to match up one set of corners at a time (top left to top left, etc.) and connect with a straight line. When it's time to erase, the students have to erase the inside of only one square which looks like a "Y" then erase a horizontal and a vertical line, each from inside the resulting rhombuses. If you keep your cubes looking transparent, you don't have to worry about it. If there was enough time left, the students traced the lines that stayed with crayon and colored each "face" of the cube a different color.
I mentioned in my last post, almost 2 weeks ago (it has been SUPER busy around here!) that I have a student teacher for 8 weeks this semester. Miss Bennett started on August 20th but it seems like she has been here so much longer than 2 weeks. She's doing a great job. She just observed in the first class and started jumping in to help after that. By Friday of her first week, she was teaching my lessons. Last week, she started teaching some of her own lessons. She's a natural. A rock star. The first lesson she taught was to 2nd grade and built on the cube drawings. She reviewed the information about and process of drawing a cube then talked to the students about "composition". I had always just told students that composition means how things are arranged in a picture, but Miss Bennett has been describing it as "Artist Choices". I like her description a lot better because it is more complete. Then, she had the students create their own composition by drawing cubes in different sizes, oriented differently, and overlapping. I was at first excited about mentoring a student teacher, then I got nervous. I was concerned about philosophies and personalities clashing, thinking it could be a long 8 weeks. I'm happy to report that were getting along famously! I'm sure I'll be sharing more of Miss Bennett's ideas in the coming weeks.


Thursday, December 27, 2012

The Dream Rocket Project

My 2nd and 3rd grade students spent the majority of November working on the Dream Rocket project.
In 2008, the IFC launched its current project, the Dream Rocket. The Dream Rocket project is a large scale collaborative fiber wrap. Up to 8,000 fiber panels will be created by individuals from various regions of the world, and then combined to wrap the Saturn V Moon Rocket in Huntsville, Alabama. The designated theme of the panels, “Dare to Dream”, challenges individuals to expand beyond the present state of the world and imagine the future. Perhaps most importantly, individuals are challenged to imagine their contribution to that future. These individual dreams and aspirations will combine to create a monumental work of fiber art of unprecedented size, providing a tangible demonstration of the beauty of individuals collaborating to meet universal challenges.

*I chose 2nd and 3rd grade students because of our schedule. This project is NOT just for elementary students, and not just for schools. A lot of community groups representing all ages have participated.
The basic idea of the Dream Rocket project is that students work collaboratively to create 2x2 foot panels based on one of many "dream themes". The suggested themes include Space, Imagination, Art, Music, Science, Conservation, My Favorite Story, etc.
I decided that there would be 3 projects for each 2nd and 3rd grade class which made a total of 15 for 3rd grade and 21 for 2nd. I showed some example panels off the Dream Rocket website and explained that we would be participating before the students started brainstorming ideas. I pulled up a blank document in Microsoft Word and typed their ideas. I asked each class to pick one for "My Favorite Story" since there is a chance the local library could pick one to display on their Bookmobile. Brainstorming ideas before splitting into groups let me make suggestions and offer guidance, and combine similar ideas. The students voted until there were three themes standing, then I assigned a theme to a location in the room and the students split themselves into equal groups.
I'm not sure if this was the best idea overall. I had a lot of bad combinations of students put themselves in the same group. Though the 3rd graders handled the group project better than most 2nd graders, it made for a pretty frustrating month. I spent half of my time trying to mediate disputes and I was really thankful for the help of Paras when they were assigned to a class in the Art room.
At the end of the first class, the groups made plans within their chosen theme and some started to sketch on their panels. 3rd grade students used 2x2 ft pieces of canvas given to us by the Dream Rocket coordinators and the 2nd grade students worked on 2x2 ft pieces of donated sheets that I primed with discounted off-white house paint. The 2nd and 3rd classes were spent painting. In the 2nd class, I thought it would work well for some students to work on the background while others worked on the subjects to spread out the work. In the 3rd class period, I got smarter and asked everyone to work on their background until it was totally done, then move on to the rest. In the 4th class period, the students finished anything that needed to be finished with oil pastels and filled out the "entry form"- marked their theme, titled their artwork, explained their idea, and recorded the materials and group members.
Here are some of the more successful panels, the ones where the students found a way to work together and make compromise.  Some of the other panels... well, let's just say you can tell there were a few too many "bosses" in those groups. Looking back now that I've had some recovery time, I'm glad we participated, excited that the students' artwork will help cover a real rocket, and not in a big hurry to work on a primary grade group project for a while! :)
 

Friday, May 15, 2015

Primary Weaving- Collaborative & Choice

I introduced a weaving concept to each grade at my primary school.
Kindergarten- Basic idea of weaving- over-under/ collaboration
1st Grade- Paper Weaving options
2nd Grade- Embellishing options for paper weaving
3rd Grade- Yarn weaving

Instead of asking each Kindergarten student to complete their own weaving project, I really just wanted them to understand what weaving is and to practice the over-under pattern. My first idea was to have each Kindergartener take a short break from their choice project to come to my table and practice weaving one strip in one of the large paper looms (12x18 inches) I'd cut for each class. After each student finished his/her strip, they wrote their name on one of the squares they'd created.

That proved to be a time consuming venture. After two days, a better idea came to me. After the introduction in my last Kindergarten classes, I sent students back to their tables where they worked with their groups to weave strips through 9x12 inch paper looms I'd precut. Not only was it faster, there was teamwork and problem solving. Only one student wove at a time, but they helped each other remember the pattern.

Other than in Kindergarten and 1st grade, weaving projects were optional for the students. Not all of the 2nd graders chose to weave paper, but I think all but a few 3rd graders did because they were SO excited about using yarn. I've found that the easiest looms for students to use are made from foam trays. The space between the suspended yarn and the bottom of the tray makes it easier for students than weaving on a flat surface. We displayed the yarn weaving projects by stapling the piece to a 6x9 inch piece of paper labeled with the student's  name.

Many students tried cutting different designs in the planning of their paper looms. The students who wanted a more traditional grid-like weaving used a precut 1 inch strip to trace the lines they would soon cut.
 Some 1st graders used their paper weavings as an interesting background for something else.
 Here are some 2nd grade projects exploring more ideas for embellishing weavings. From left to right, there is a weaving project with a handprint, weaving through painted paper, weaving through a marker drawing of tie-dye, and circles collaged on top with the letters of the student's name on top.
 Weaving projects with stamped paint on top.
More students want to do extra work outside of class on yarn weaving than on any other project. This student stuck to the rainbow pattern for the entire project. She worked on it in art class for a few weeks before taking scraps to finish it during recess.

Weaving has proven to be a very engaging project for my students over the last few years. Weaving is also one of the lowest cost projects. The looms were made either from meat trays I saved and sanitized at home or from recycled cardboard or mat board. I've also picked up 2 trash bags full of yarn at garage sales for under $5 total. It lasts a long time! I did buy some plastic weaving needles and though they were also very affordable, they are not necessary. Students can weave just using their fingers.

Over the summer I hope to try weaving a pouch. I've seem some lessons online but haven't yet had time to give it a go.

Do your students love weaving as much as mine?

Wednesday, July 31, 2013

Clay Roundup

I like to save clay for the last project of the year- we only do it once a year so students are excited and engaged, despite the approaching end of the school year. This year, however, clay projects were completed closer to spring break since I didn't know if baby #2 would let me finish the school year. (He was actually 3 days late but I ended up taking off a week early for my sanity.) I want to just post a quick rundown of each of my K-3rd grade clay lessons. 
*Click on the links next to the grade level headings to see a longer post with more information from a previous year.

3rd grade- The Pot That Juan Built

Students learn about Juan Quezada through this awesome book then make slab and coil pots. As long as they learn and use the techniques, they can make whatever they want. This year I didn't limit any color choices. The main body of the air dry clay projects were painted with tempera cakes and I gave black liquid tempera for details.

 2nd grade- Transportation

Last year I planned "transportation" as the theme for the 2nd grade lesson because it ties into their social studies curriculum. The students really enjoyed it so we tried it again this year. I demonstrated using pinch pots, coils, and attachments to make a few basic forms and the students made anything fitting the theme.
Wish I had noticed I messed up the photo. I loved the rider on this horse.

 1st Grade- Pinch Pot Creatures

One year the students made pinch pot turtles, then I added ladybugs, then I figured as long as they showed they learned how to make a pinch pot and attach things, the subject didn't really matter. Most students stuck to the animals I demonstrated- turtle, ladybug, fish- but some branched out and tried different ideas. There was even a beaver but I didn't get a photo of it. I know that the first time I saw the turtle idea, I was on Deep Space Sparkle but I've seen the other creatures too many different places to site an inspiration source.
Giraffe!

 Kindergarten- Knee Bowls, Choice, Adapted Ball Bowl

Most of my Kindergarten students made knee bowls- a slab of clay formed into a bowl by pressing over their covered knee. The students used tools to make designs and/or textures in the surface then painted in the next class period. This year I had several students who had made knee bowls with me in PreK and already knew the process and skills. Some of the students chose to try out the "adapted" ball bowl project I picked up at a workshop, and some made whatever they chose out of clay.
 Several Kindergarten girls sitting together made snowpeople family portrait sculptures. Below is one of my favorites, a self portrait riding a horse.
Next year if we get a district-wide agreement on what skills need to be mastered in clay at each grade level, I'm thinking about free choice as long as they demonstrate the skill.

Check out the related post, Loving Lumpy Pots!