Showing posts with label Fibers. Show all posts

Wednesday, February 12, 2020

Creative Reuse: Art from Scrap Textiles

It all started with a KAEA conference workshop. A workshop description mentioned recycling textiles into art. I thought "I like recycling. I have lots of fabric scraps at school." So I signed up.
I didn't even notice that the presenter was the wonderful Liz Kowalchuk when I chose the workshop. The presentation was inspiring and we all enjoyed making pendants out of old clothing. I couldn't wait to get started with my 8th grade students.

I started with a discussion to introduce the assignment. A slides presentation kept me organized.

Challenge 1: Create a pendant
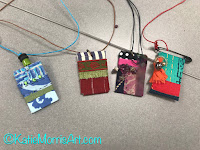
In the workshop, Liz provided us with templates. I found a bunch of small wooden shapes that had been donated to my classroom and scraps of mat board. They were all different sizes so I showed students how to make their own template on thin paper by tracing around their base and leaving enough of a border that it could wrap around onto the back. The students cut scraps of fabric from our collection- some quilting scraps and some cut from worn out clothing, glued them in place on their templates, and trimmed the corners before wrapping. When the wrapping was done, the pieces could either be turned into pendants to wear as a necklace, attached to a ring to use as a keychain, or turned into a broach by pulling one end of the fabric through a large safety pin when wrapping.

Challenge 2: Create an original work of art out of textile scraps
I am more confident working in 2D so I pushed myself to make a sculpture for my example. I formed the bird out of denim and wire, used netting from a produce bag and other scraps to form a nest, and perched it in the crook of a piece of hedge left from prom decorations last year.
I was also excited to have the excuse to pull out some of my cool fibers/textiles/mixed media books and magazines for inspiration!
I was able to purchase an inexpensive sewing machine with a grant a couple of years ago and I wish I had room for more than one because it was popular! Probably 3/4s of the students utilized the sewing machine in some way during construction.

The students didn't have many limits for what to make. Many made pillows, bandanas, or more jewelry. A couple went much bigger, working at home to add to their resources but still focusing on repurposing items.
This student found some old wire at her house and brought in burlap from her mom's wedding decorations to make a giant dream catcher which got a ton of attention hanging in the hallway.
This student was so excited that she finished her sculpture at home over the weekend right after it was introduced. Her mom and grandma gave her some help with papier mache. She used an old doll for the torso, a tomato cage for the rest of the body, an old coat for the fur, curtains for the skirt, and scrap fabric from her quilter grandma's stash.
A few students worked together in a group on a Batman costume that they stitched by hand and an armature to model it. Other students helped teach their classmates how to use the sewing machine or helped them problem solve.

Challenge 3: Plan the display
I explained to the students that they were going to be in charge of preparing their work for the display case including artist statements and a sign to explain the display so people could learn about our topic. I ended up home with a sick kid on the day they set up the display so it was really all them!


I couldn't have been more proud of the students' work on this project. They all learned new skills even though the skills were not the same across the board and they all communicated their ideas.

Friday, May 15, 2015

Primary Weaving- Collaborative & Choice

I introduced a weaving concept to each grade at my primary school.
Kindergarten- Basic idea of weaving- over-under/ collaboration
1st Grade- Paper Weaving options
2nd Grade- Embellishing options for paper weaving
3rd Grade- Yarn weaving

Instead of asking each Kindergarten student to complete their own weaving project, I really just wanted them to understand what weaving is and to practice the over-under pattern. My first idea was to have each Kindergartener take a short break from their choice project to come to my table and practice weaving one strip in one of the large paper looms (12x18 inches) I'd cut for each class. After each student finished his/her strip, they wrote their name on one of the squares they'd created.

That proved to be a time consuming venture. After two days, a better idea came to me. After the introduction in my last Kindergarten classes, I sent students back to their tables where they worked with their groups to weave strips through 9x12 inch paper looms I'd precut. Not only was it faster, there was teamwork and problem solving. Only one student wove at a time, but they helped each other remember the pattern.

Other than in Kindergarten and 1st grade, weaving projects were optional for the students. Not all of the 2nd graders chose to weave paper, but I think all but a few 3rd graders did because they were SO excited about using yarn. I've found that the easiest looms for students to use are made from foam trays. The space between the suspended yarn and the bottom of the tray makes it easier for students than weaving on a flat surface. We displayed the yarn weaving projects by stapling the piece to a 6x9 inch piece of paper labeled with the student's  name.

Many students tried cutting different designs in the planning of their paper looms. The students who wanted a more traditional grid-like weaving used a precut 1 inch strip to trace the lines they would soon cut.
 Some 1st graders used their paper weavings as an interesting background for something else.
 Here are some 2nd grade projects exploring more ideas for embellishing weavings. From left to right, there is a weaving project with a handprint, weaving through painted paper, weaving through a marker drawing of tie-dye, and circles collaged on top with the letters of the student's name on top.
 Weaving projects with stamped paint on top.
More students want to do extra work outside of class on yarn weaving than on any other project. This student stuck to the rainbow pattern for the entire project. She worked on it in art class for a few weeks before taking scraps to finish it during recess.

Weaving has proven to be a very engaging project for my students over the last few years. Weaving is also one of the lowest cost projects. The looms were made either from meat trays I saved and sanitized at home or from recycled cardboard or mat board. I've also picked up 2 trash bags full of yarn at garage sales for under $5 total. It lasts a long time! I did buy some plastic weaving needles and though they were also very affordable, they are not necessary. Students can weave just using their fingers.

Over the summer I hope to try weaving a pouch. I've seem some lessons online but haven't yet had time to give it a go.

Do your students love weaving as much as mine?

Wednesday, July 23, 2014

Yarn!

Fibers is a common studio choice in TAB (Teaching for Artistic Behavior). I didn't have a ton of fibers options last year, but I did make lots of yarn available. Weaving was the most obvious choice for using yarn, but students made use of it in other ways, too.
An old shoe organizer worked pretty well for holding skeins of yarn.
I started 4th graders off weaving in the fall and introduced it to one grade at a time since it was so popular that every loom was used. I introduced it to my 3rd graders in the spring and ran out of time to introduce it to 2nd grade.
I made almost all of my looms, most out of mat board or cardboard scraps. I started off measuring but eventually started eyeballing and just going for the same number of slits cut on each side. The mat board looms worked pretty well, but the easiest for the students to use were looms made of foam trays. I saved (and thoroughly washed) foam meat trays from home and used them at school. The students have an easier time going under the yarn when there's some space below to move. The trays hold up really well, unless the students pull to hard when warping and break a tab.
A 3rd grader asked if she could glue yarn down to make a picture. I let her use scraps and I think she would have kept working on this even longer if it hadn't been so close to the end of the year!
Speaking of scraps.... Sometimes ^THIS happens. My intermediate kids were pretty careless when it came to the scrap yarn, often just throwing it on top, and cutting way too much yarn to begin with. Many ignored the "wingspan at a time" rule. I will have to work on a better monitoring system for that this year. 
One of my 6th graders used a longer loom and ended up turning her weaving project into a hat. I thought it was pretty clever.
My 3rd graders used a larger loom and scrap yarn to make this group project which was donated to the PTO auction. I hoped to have each student weave one scrap of yarn but had to let some go back and add multiple strips to fill it in. I think we'll try it again next year on the even bigger classroom loom I ordered with Artsonia money.
I ordered a box of yarn at one school where we started to run out of some colors, but I think we're already set for the coming school year. I've scored some good deals at garage sales- like a trash bag full of assorted yarns for a dollar- and had another trash bag full donated by my husband's aunt, a retired school teacher. I'm glad that yarn is one supply that can be found so cheap!

Thursday, February 13, 2014

Paper Weaving: Beyond the Checkerboard Part 1

 Paper is a great medium to use when introducing weaving. It's a good way to practice over, under, over, under and the in-process projects don't take up much space. The product, however, can sometimes end up a little plain. Paper weaving had never been a big hit with my students before we started using choice based art and showing some different options for pushing the projects beyond the checkerboard. The artwork in this post was created by 2nd and 3rd grade students.
I will be writing a few posts about ways my students have enjoyed expanding their paper weaving projects. The method in this post is cutting skinnier strips of paper which are stacked when weaving the weft. This is so simple and so fun! I precut 1 inch thick strips that students use for the weft. If the students want to stack, they simply take a regular strip and cut it down the middle to yield two skinnier strips. The edges aren't perfectly straight but we don't mind- I actually love the look of it not being perfect. I figure if something is going to be handmade, it might as well look handmade!
Some students want the strips to be even skinnier to make more patterns so they just cut them smaller.
 A few students have even tried creating new patterns. Instead of just using an AB pattern, they might try ABB, like the student below. Over, under, under, over, under, under.

I think that having really nice construction paper, in addition to the new techniques, has helped make paper weaving so popular. I only order Pacon Tru-Ray construction paper and lately my favorite "packs" to order are warm colors, cool colors, and brights. This gives you a lot more variety than traditional assortments.

Sunday, January 26, 2014

Weaving with "Real Yarn"!

This fall was the first time I had taught weaving* to students with anything other than construction paper. I had always waited because I didn't have enough looms. Since I've been trying out choice based art this year, I decided to give it a go, not expecting the project to be so popular! I offered weaving to 4th graders and it quickly became apparent that I would need to make more looms. I think out of 110ish 4th graders, there were only about 5 who chose another project. At least 2 of those students tried it out later. I had about 30 chipboard looms that I had ordered. Thankfully, I have a big supply of mat board scraps and cardboard. It was super easy and pretty quick to make looms.
*Since we were studying American Indian cultures, I told them the story of Spider Woman and how she brought weaving to the Navajo people. Read the story HERE.

I used a ruler and a box knife to cut rectangles. I didn't worry about measuring, just getting my edges straight. Next, I took a big pile and marked little dashes in half inch increments on two opposite sides. I did this while trapped at my desk pumping. Oh, the things working moms do. :) After marking the sides, I used a pair of scissors to cut little slits. Some students helped with this step, and I had to cut the slits a bit deeper later since I didn't explain that the tiny marks were just to show where to cut, not the exact size the cuts should be. Lesson learned.
Here is one of the mat board looms.
Someone pointed out that I could have just skipped the measuring step and eyeballed the cuts, putting the same number of slits in each side. That would have made it a bit faster, but having grown up with a perfectionist carpenter father, it's not in my nature! I have more mat board scraps that I will turn into looms at my other school, and I'm also going to try using foam meat trays to see how that goes. Cardboard worked ok, but the mat board looms are holding up better.
 One of the hardest parts was just getting the looms warped. It was a hard concept to loop around the notches at the top and come back down the front instead of wrapping all the way around front and back. I had a pretty big stash of yarn from my predecessor that was stored in a big cardboard box. I got most of it untangled and displayed in an over the door shoe holder. I added some leftover yarn from projects I'd done at home and my mom scored some yeins of neon colored yarn at a garage sale. The brightly colored yarns, textured yarns, and variegated yarns were the most popular. I let students totally be in charge of which and how many colors they would use. Some worked in patterns or color families, some just experimented or went with their gut, choosing yarns they were drawn to.
I had just planned to show how to weave in stripes, but some students really picked that up quickly and wanted more. Two other options I demonstrated were splitting the weaving and rejoining it, and making zigzag patterns.
 I usually just said anyone who was interested could come around a table to see how to make the different patterns. I had SO MANY kids in my room during recess to work on their weavings. They were so excited to work with "REAL YARN"! They were even telling younger siblings about it and talking about plans to make their own looms at home. They were discussing how big of a loom they would need to make a blanket, how much they would sell said blankets for ($10, what a steal!), and talking about what they would do with their projects.
The other hardest part was tying all the knots to take weavings off looms. With the risk of sounding much older than my 27 years, "kids these days" don't know how to tie simple knots! This took a lot of time and help.
I needed a way to display the weavings in the hall, and what worked best for us, was to connect the projects to a piece of black construction paper with one staple and have the students write their names in colored pencil. We used the RoseArt Metallic Colored Pencils I was given and they worked great on black paper. I'm usually a Crayola girl but really like these RoseArt pencils. I couldn't find them when ordering supplies, but I just located them on Amazon.
When the projects came down, it was easy to remove the one staple without damaging the weaving.

 Most students finished in 3-4 classes but some are not yet finished. I didn't set a size requirement or anything like that, so as the semester went on, weaving projects started shrinking! We ended up with some funny little weavings, like one below that's around 15 rows. These were sometimes made by students who just weren't that in to weaving, but more often by those that tried and tried, but struggled.
 6th graders will have the option to weave next, and since most of them wove with yarn last year (CYOA: Weaving), I'm excited to see what they do this year!