

It all started with a KAEA conference workshop. A workshop description mentioned recycling textiles into art. I thought "I like recycling. I have lots of fabric scraps at school." So I signed up.
I didn't even notice that the presenter was the wonderful Liz Kowalchuk when I chose the workshop. The presentation was inspiring and we all enjoyed making pendants out of old clothing. I couldn't wait to get started with my 8th grade students.
I started with a discussion to introduce the assignment. A slides presentation kept me organized.
Challenge 1: Create a pendant
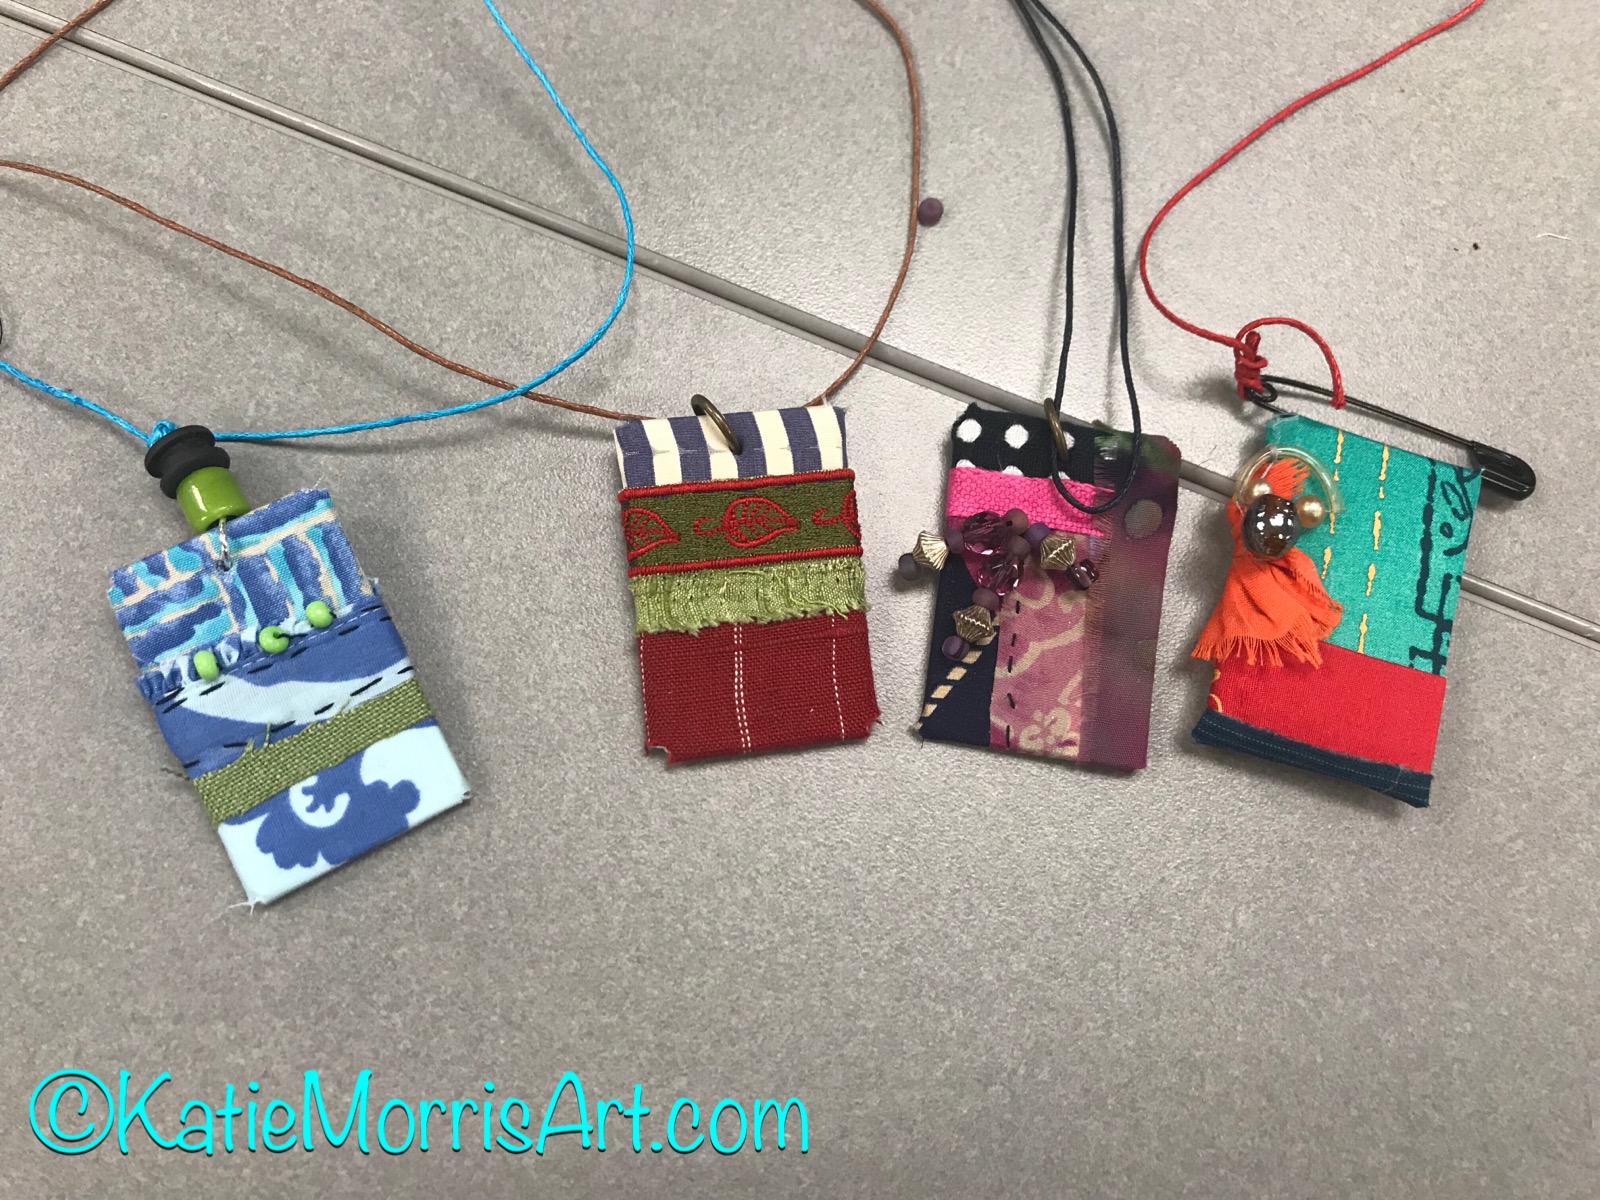
In the workshop, Liz provided us with templates. I found a bunch of small wooden shapes that had been donated to my classroom and scraps of mat board. They were all different sizes so I showed students how to make their own template on thin paper by tracing around their base and leaving enough of a border that it could wrap around onto the back. The students cut scraps of fabric from our collection- some quilting scraps and some cut from worn out clothing, glued them in place on their templates, and trimmed the corners before wrapping. When the wrapping was done, the pieces could either be turned into pendants to wear as a necklace, attached to a ring to use as a keychain, or turned into a broach by pulling one end of the fabric through a large safety pin when wrapping.


Challenge 2: Create an original work of art out of textile scraps
I am more confident working in 2D so I pushed myself to make a sculpture for my example. I formed the bird out of denim and wire, used netting from a produce bag and other scraps to form a nest, and perched it in the crook of a piece of hedge left from prom decorations last year.

I was also excited to have the excuse to pull out some of my cool fibers/textiles/mixed media books and magazines for inspiration!

I was able to purchase an inexpensive sewing machine with a grant a couple of years ago and I wish I had room for more than one because it was popular! Probably 3/4s of the students utilized the sewing machine in some way during construction.


The students didn't have many limits for what to make. Many made pillows, bandanas, or more jewelry. A couple went much bigger, working at home to add to their resources but still focusing on repurposing items.

This student found some old wire at her house and brought in burlap from her mom's wedding decorations to make a giant dream catcher which got a ton of attention hanging in the hallway.

This student was so excited that she finished her sculpture at home over the weekend right after it was introduced. Her mom and grandma gave her some help with papier mache. She used an old doll for the torso, a tomato cage for the rest of the body, an old coat for the fur, curtains for the skirt, and scrap fabric from her quilter grandma's stash.
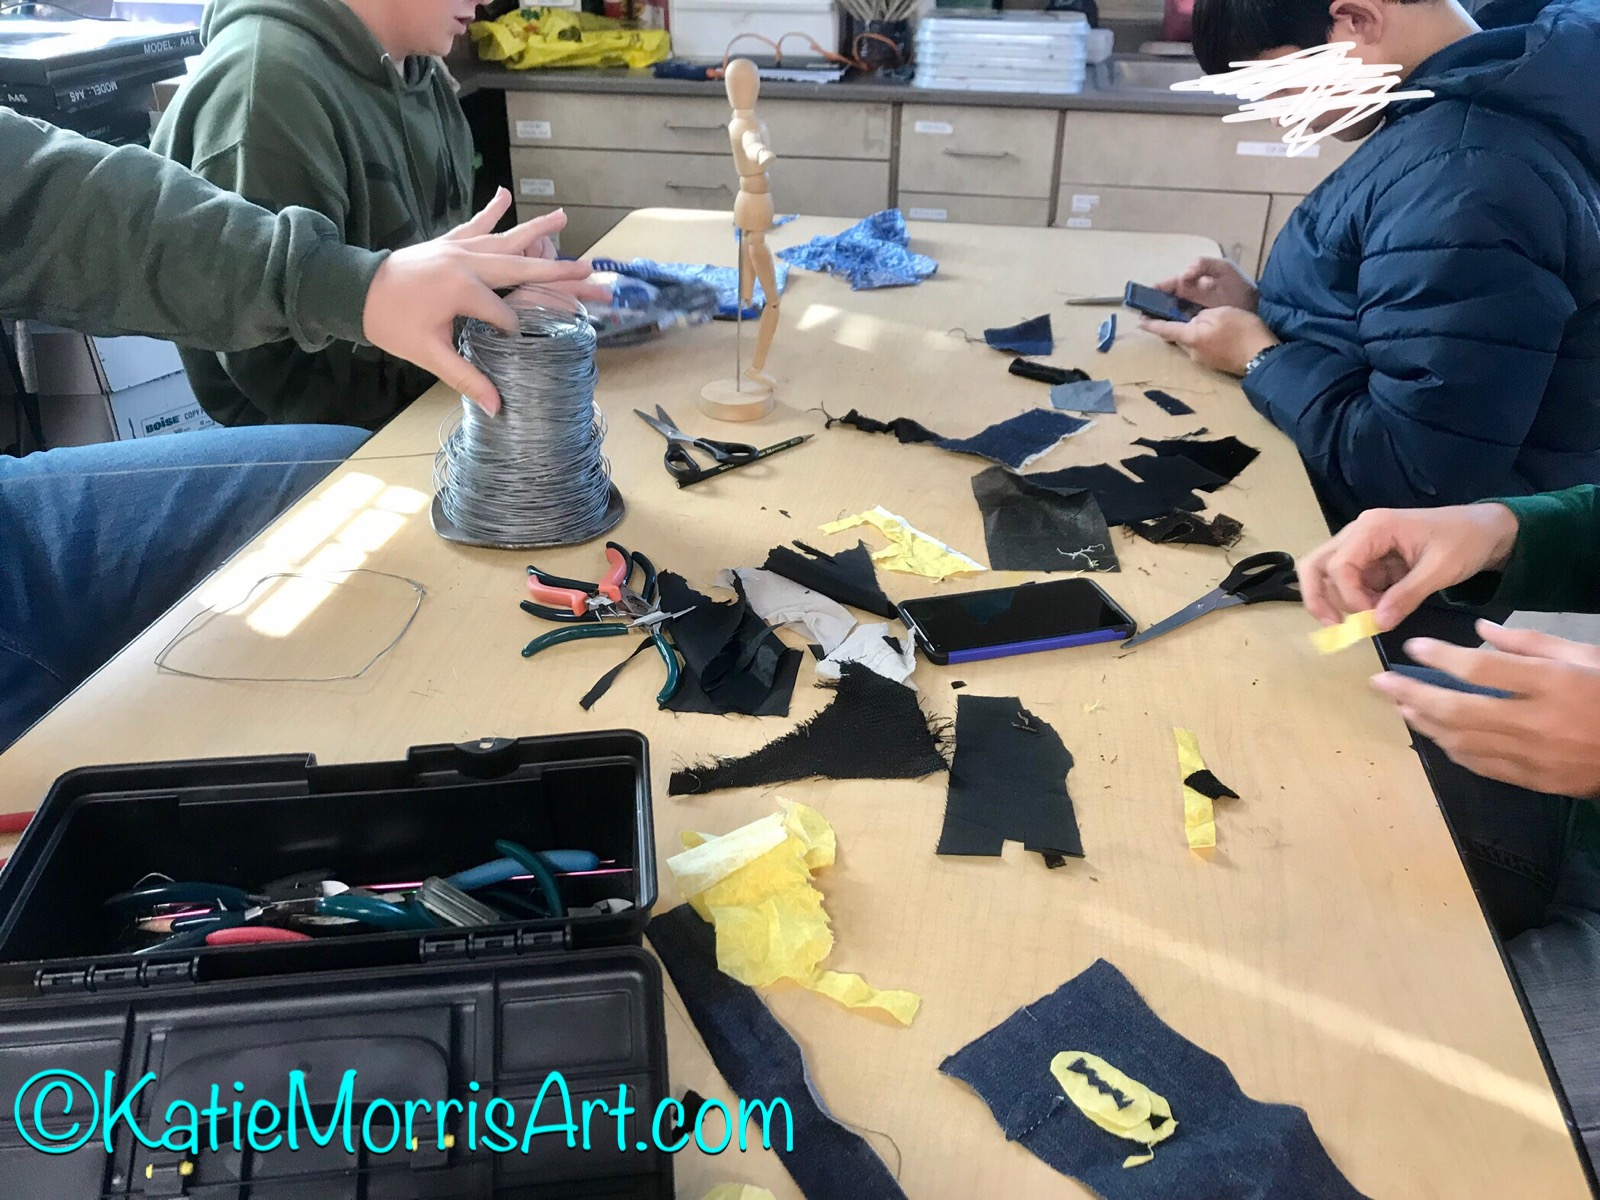

A few students worked together in a group on a Batman costume that they stitched by hand and an armature to model it. Other students helped teach their classmates how to use the sewing machine or helped them problem solve.

Challenge 3: Plan the display
 I explained to the students that they were going to be in charge of preparing their work for the display case including artist statements and a sign to explain the display so people could learn about our topic. I ended up home with a sick kid on the day they set up the display so it was really all them!


I couldn't have been more proud of the students' work on this project. They all learned new skills even though the skills were not the same across the board and they all communicated their ideas.
No comments:
Post a Comment