Showing posts with label colored pencils. Show all posts

Friday, July 6, 2012

2nd Grade Self Portraits

My 2nd grade students spent 2 class periods toward the end of the year on these observational self portraits. We talked about facial proportions, I gave a demo, then the students looked in mirrors to draw. The first class period was spent exclusively on pencil drawing. In the 2nd class period, the students added color with colored pencils and color sticks. Self portraits can be tricky with kids... Some work really hard and some don't want to put in the effort because they are content with stick people. These are some of the portraits by students who really worked hard and didn't give up.
(The drawings are on 6x9 inch paper. I asked the students to aim for just head and shoulders to fill the space and checked the size of their head before they continued.)
Blonde hair can be confusing... especially when it's that blonde that's almost white. In this case, the student's hair was actually a lighter color than his skin so we tested some colored pencils and came up with a solution. On an unrelated note, the last portrait here demonstrates the most common problem for my 2nd graders: they colored the white part of their eyes a dark color. Hmmm...

I had ordered enough little sets of Crayola's Multicultural Colored Pencils that I could put a couple sets at each table. That would have worked great, if the students could keep the sets together. I get so frustrated with things like that- it should be easy, right? So, tired of sorting colored pencil sets when students did not put them away properly, I turned a plastic chips container into our new mc colored pencil storage. I cut the front of one box off and used packing tape to attach it to the container so it's easily identifiable. Now the students have to come up to choose their skin and hair color, then put it back when they are done.

Wednesday, April 20, 2011

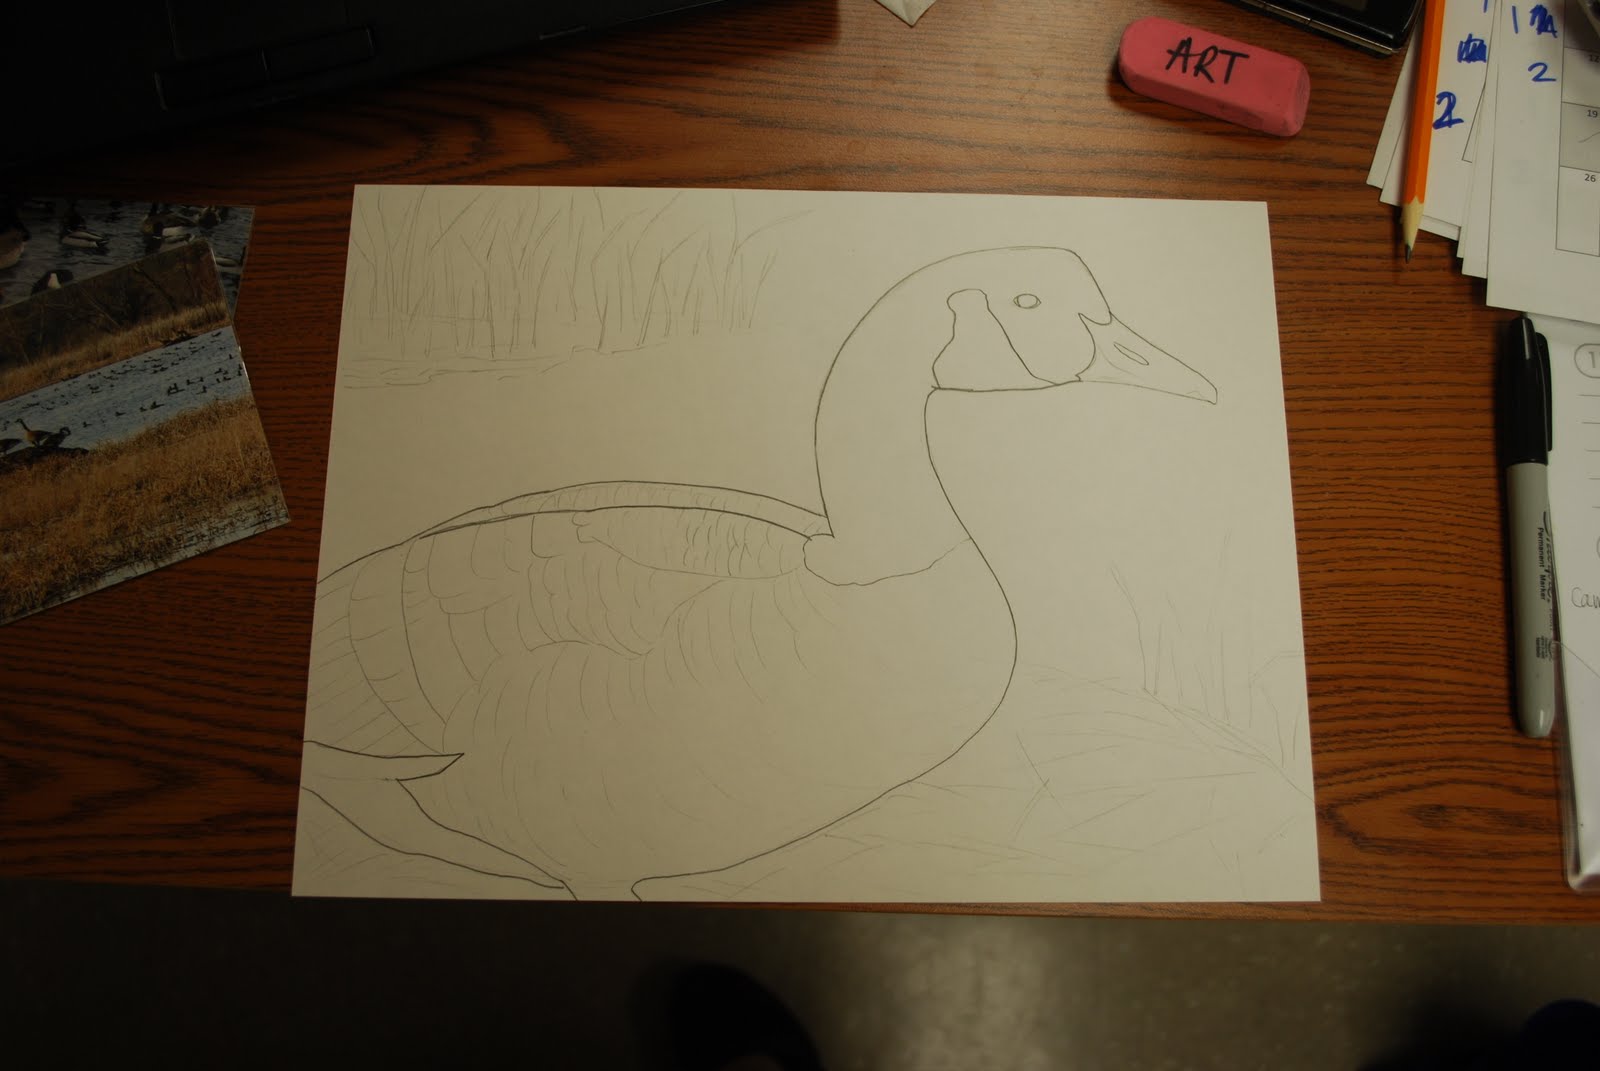
Photos of Drawing a Goose

As I mentioned in my last post about the Jr. Duck Stamp Program, I created a PowerPoint that shows how I approach drawing a Canada Goose.  Since I was gone on maternity leave when my older students began the project this year, I was even dorky enough (and "nesting" enough) to record my voice explaining each step.  I always think it's interesting to see how different people approach drawing so I thought I would share the photos of my drawing.

This picture is hard to see, but I basically laid out the drawing really lightly with pencil.  I always suggest that to my students so it is easier to erase if they make a mistake.  Or draw a teeny tiny picture instead of filling the space.  Lots have trouble with controlling the pressure but some are starting to get the hang of the press lightly approach.

When I have the lines where I want them to stay, I erase any extra lines and "firm" the lines that are staying.

 After I got the larger areas all laid out, I started to add smaller details.

 I always think the black markings on Canada Geese has a blue undertone so I start there.
This is the photo I was referencing for the body of the goose.

 Finished the beak, then started adding black to the neck and head.
Added more layers of black then started with the first layer of color on the feathers. 
 Added more layers of color on the body and started to develop some light shadows.
 Started to work on the background.  I used a photo I took of some wetlands to reference for the background.


 Adding navy for more depth in the background grasses.
 Working on water and reflections.
Finished drawing (all made with school grade colored pencils!)  It was really helpful for the students to see the process without having to watch me draw the whole thing!

Monday, April 11, 2011

Jr. Duck Stamp Program

5th grade student, Honorable Mention

Ever since I took part in the Jr. Duck Stamp program in high school, I've been a big fan.  I know a lot of teachers don't do the program with their students because it takes so much time but  I had always planned to do it with my students and something the other elementary Art teachers in my district were already doing. (Check out last year's post to see a photo of wetlands in my area and photos of my high school duck stamp drawings.)

If you are not familiar with duck stamps, here's a brief summary, at least as brief as I'm capable of being (if you want a more in-depth look at duck stamps, check out the US Fish and Wildlife Service page.  Federal Migratory Bird Hunting and Conservation Stamps, or "Duck Stamps," are sold by the government to raise money for wetlands conservation.  98 cents out of every dollar generated from duck stamps goes to purchase or lease wetlands.  A lot of people think it's all about hunting because those 16+ who want to hunt waterfowl are required to purchase a duck stamp but they are also bought by stamp collectors and people  who want to use them as a pass to get into National Wildlife Refuges.  Wildlife artists compete each year to try to get their paintings chosen to be printed on the duck stamp.  Jr. Duck stamps have been around since 1989 and the goal of the program is teaching "conservation through the arts." The students create a realistic drawing of an approved duck or goose to show that they have learned about the species and their habitat.  Students can enter their artwork into a contest at the state level.  In Kansas, they choose 3 1st place, 2nd place, and 3rd place winners and I think 12 honorable mentions in each of the 4 age groups.  All the first place winners are put together and the Best of Show is chosen to represent the state at the national level contest.  The national winner is actually printed on a Jr. Duck Stamp and the student gets scholarship opportunities.  I assume that all the states have similar processes.

The Jr. Duck Stamp program is a great way to incorporate science and observational drawing and ties into the curriculum for most grades as you can talk about the animals, their habitat, and environment.  I always start off by assessing prior knowledge of wetlands and habitats.  I then show the students some of the duck stamps my dad has saved for me and explain what they are all about.  I have lots of photos I have taken of ducks and geese printed out for the students to reference and some calendar photos that one of the teachers gave me.  This year I had created a PPT of me making an example drawing with photos of each step since I was gone on maternity leave when my 4-6th grade students had to start the project.  I showed the PPT to my younger students as well since it is a lot quicker than me demonstrating in person.  I did draw a few things up on the board like legs and feet and beaks/bills to point out that they are not stick legs and not plain triangles for the beak.  I told the students when we practice observational drawing we can pretend to be scientists and draw all the important details.  Each student chose a photo to reference when drawing but I encouraged them to change the background or something to make it their own.  I allowed three classes for each grade level to work on this project.  The first class was mostly introduction, passing out paper, labeling information on the back, and filling out an entry form.  I encouraged each student to take home an entry form for the art contest just in case they decided to enter. Some of the classes had a little time to start drawing in the first day.  I had the students draw out all the important details in pencil before starting with color.  This is a good time to talk about composition.  The students have to use 9x12 inch paper (must be horizontal) but the design needs to be appropriate for printing on a smaller stamp.  I tell the students to draw big so we can see the details and to fill the space.  Even if their reference photo has a whole flock of geese, I ask them to focus on drawing one or two.  So far I have just given the students colored pencils to work with but I may let them use paint next year.  I always preferred to use colored pencils when I entered because I felt like I had more control over the media and could be more detailed.  On the last day, I talked about ripples, reflections, and shading.  If any students finished early, I had them write a conservation message which is an additional contest.  Most of the students enjoy this project but a few complain about it being "hard".  I always tell them that just because something is hard doesn't mean they can't do it and that we learn more from challenges than doing things that are easy all the time.  Next year I may give the students a choice of Jr. Duck Stamps or the State Fish Art Contest since the goals for the project are similar.

If I remember correctly, I sent in about 300 entries between my two schools this year.  I ended up having 7 students receive Honorable Mentions and all I can say is that the drawings that placed higher must have been AMAZING because I am so proud of my students!

5th grade student

5th grade student

6th grade student

6th grade student, Honorable Mention

4th grade student, Honorable Mention

4th grade student

1st grade student, Honorable Mention

1st grade student/future Art teacher, Honorable Mention

2nd grade student

3rd grade student, Honorable Mention