
Here's a time lapse video of the construction!
Group photo of some of the artists!



Here's a time lapse video of the construction!
Group photo of some of the artists!
 |
| Here is the large mural displayed above some lockers. |
 |
| Here's my room before I moved tables to hold the in-progress murals. |
 Our StuCo picked "Nobody rides this ship. We all row. We're all in." for a theme for the year so I drew the biggest “mural” out ahead of time based on that saying and had it stretched across 3 tables in the art room. Each class painted and we finished it before the end of the day. The students planned the colors and added more details as they worked. When it became clear that it would be finished before my last class came in, I grabbed some more butcher paper and sketched out another table sized mural. We ended up making a couple more that the students designed and I sketched out under their direction to make it quicker. Next year I may have the students work in groups to completely design and create murals I just did not expect them to finish so quickly this year so I adapted!

 |
| Students working on organizing colors on the collaborative color wheel. |
 |
| Finished color wheel. |


 I wanted to take a few minutes to share the project we used to kick off the year and transition into art class. I used the same process a few years ago (I use that term loosely) at one of my previous schools and thought it would work well for high school. Each high school and middle school student completed one square for each class in which they are enrolled. Some finished early and drew extras. I put the lesson up on the smARTteacher for their August challenge so you can read about the whole process there.

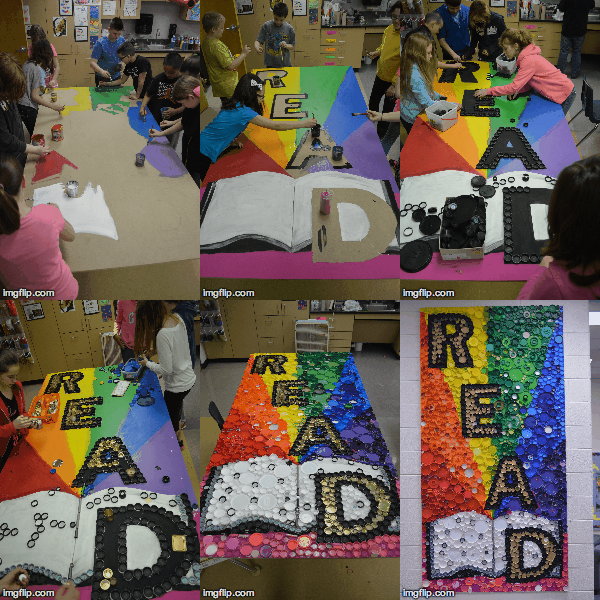
 I'm not sure between the caulking and hot glue which one sticks better. I thought the caulking was working fine, but several caps have had to be re-glued. I had used a caulking gun to squirt it out on cardboard and the students dipped the caps and stuck them down. I think some students just didn't get enough caulking on the back, while others got WAAAAAY too much. The maintenance crew that hung the panels suggested Spikes Special Adhesive and left me a small tube for repairs. It does seem to be sticking really well and is definitely stronger than the caulking. However, I don't know how the cost would compare. I suppose it's another option for someone to look into.


 Last spring my 3rd grade students created a Peace Pole to represent Kansas in the Youth Art Peace Pole Project and last month on the International Day of Peace, the Peace Pole was displayed at the Brown v. Board of Education National Historic Site. It worked out for the students, now in 4th grade, to go on a field trip to the NHS during the week the Peace Pole was on display.


 I chose 3rd graders to work on this project because they are the oldest grade I see weekly. This would have been better suited to an older grade level but the schedule just wouldn't allow it! To begin our lesson, we spent a bit of time talking about "Peace". What is it? What isn't it? It didn't take long for students to think of a big non-example in schools- bullying. I hoped that they would think of bullying. We talked about examples of bullying- physical, name-calling, excluding people, etc. I really wanted to make sure that we touched on bullying because I think it will help them better understand discrimination when they learn about the Brown v. Board case that ended legal segregation in public schools. Thankfully the lovely people at the Brown v. Board site and the students' new principal (they switch schools between 3rd and 4th grade) are excited about planning a field trip to the NHS this September when the Peace Pole will be on display. I only hope it can be scheduled on a day that I'm at the intermediate school so I can attend, too!


