
Showing posts with label air dry clay. Show all posts

Wednesday, July 31, 2013

Clay Roundup

I like to save clay for the last project of the year- we only do it once a year so students are excited and engaged, despite the approaching end of the school year. This year, however, clay projects were completed closer to spring break since I didn't know if baby #2 would let me finish the school year. (He was actually 3 days late but I ended up taking off a week early for my sanity.) I want to just post a quick rundown of each of my K-3rd grade clay lessons. 
*Click on the links next to the grade level headings to see a longer post with more information from a previous year.

3rd grade- The Pot That Juan Built

Students learn about Juan Quezada through this awesome book then make slab and coil pots. As long as they learn and use the techniques, they can make whatever they want. This year I didn't limit any color choices. The main body of the air dry clay projects were painted with tempera cakes and I gave black liquid tempera for details.

 2nd grade- Transportation

Last year I planned "transportation" as the theme for the 2nd grade lesson because it ties into their social studies curriculum. The students really enjoyed it so we tried it again this year. I demonstrated using pinch pots, coils, and attachments to make a few basic forms and the students made anything fitting the theme.
Wish I had noticed I messed up the photo. I loved the rider on this horse.

 1st Grade- Pinch Pot Creatures

One year the students made pinch pot turtles, then I added ladybugs, then I figured as long as they showed they learned how to make a pinch pot and attach things, the subject didn't really matter. Most students stuck to the animals I demonstrated- turtle, ladybug, fish- but some branched out and tried different ideas. There was even a beaver but I didn't get a photo of it. I know that the first time I saw the turtle idea, I was on Deep Space Sparkle but I've seen the other creatures too many different places to site an inspiration source.
Giraffe!

 Kindergarten- Knee Bowls, Choice, Adapted Ball Bowl
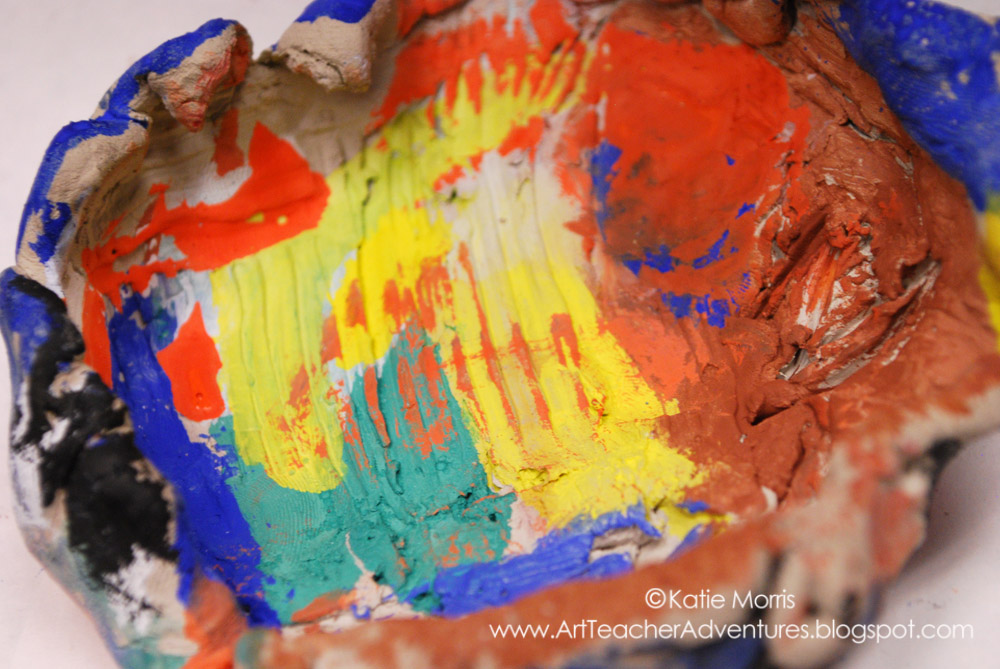
Most of my Kindergarten students made knee bowls- a slab of clay formed into a bowl by pressing over their covered knee. The students used tools to make designs and/or textures in the surface then painted in the next class period. This year I had several students who had made knee bowls with me in PreK and already knew the process and skills. Some of the students chose to try out the "adapted" ball bowl project I picked up at a workshop, and some made whatever they chose out of clay.
 Several Kindergarten girls sitting together made snowpeople family portrait sculptures. Below is one of my favorites, a self portrait riding a horse.
Next year if we get a district-wide agreement on what skills need to be mastered in clay at each grade level, I'm thinking about free choice as long as they demonstrate the skill.

Check out the related post, Loving Lumpy Pots!

Monday, January 30, 2012

Tips for Teaching Elementary Ceramics Without a Kiln


I've been thinking about clay lately. So far, I don't have access to a kiln. Other Art teachers, who are just trying to help with a "can-do" attitude, have offered the advice of "Get the high school Art teachers to fire it for you!" Well, when I have 750ish students, and they have waiting lists for Art courses, you can bet that their kilns are too busy firing work for their students to consider firing my students' work. But, there is good news! I am hopefully going to be getting a kiln by next fall! The fire marshal has approved a spot in the boiler room and one of my principals is excited and working on getting funding lined up for me. I don't even care too much that there are a bunch of stairs to get into the boiler room. All I asked him was who to check with to see if a location would be approved and he jumped right on board and took over making all the phone calls. Now I'm supposed to pick out a kiln (I'm told I want a computerized Skutt kiln?) and give him a price range so he can work out the funding. 

*If you are curious about any of the projects pictured here, view my post from last spring: http://artteacheradventures.blogspot.com/2011/08/finished-clay-projects.html

In the mean time, I'm still working without a kiln. So here are a few tips I've come up with in my long, 2 1/2 year career.
  1. No talking with clay in your hands. The best way to do clay projects with my school schedule is one class period for wet clay and one class period to paint. To help students focus and finish on time, my rule is that there’s no talking while working with clay. The students are so excited that they really don’t mind working silently. (Most of the time.) I try to play music or read a book like “The Pot that Juan Built” by Nancy Andrews-Goebel while they work.
  2. Buy Air-Dry clay- If you can afford it. Some people say that there is no difference between air-dry clay and regular earthenware clay but I disagree. I order air-dry clay and when dry, it is harder and sturdier than the earthenware clay leftover from the previous teacher in my position.
  3. Cover basic skills but plan sturdy projects. Avoid attaching long, skinny pieces without support. It’s ok for the projects to be a little thick. Thick = Sturdier.
  4. Paint dry pieces. Obviously glaze is not an option with no kiln, but painting works well. I’ve used tempera and even watercolor. Just remind students not to use too much water or they will start to rehydrate the clay.
  5. The most important tip: Emphasize the process over the product. I know that being unable to fire clay projects leaves them in a fragile state and probably more than one project will be dropped in the hallway on the way home and shatter beyond repair. Because of this, I really emphasize to my students that the most important part of the lesson is learning the skills and getting practice. When pieces break, the students are sad, but I can remind them that we’ll work with clay again next year and they still learned a lot.


Do you have any no-kiln-available clay tips? If so, please share in the comments!


Tuesday, August 2, 2011

Finished Clay Projects


I'm trying to utilize nap time to finish up blog posts from the last school year so I can delete photos of student artwork and make room for new ones!  Teachers in my district start back to school one week from today, students start one week after that.

My third grade students made slab (tortilla) and coil (chorizo) bowls inspired by The Pot That Juan Built (GREAT book!)  We have to use air dry clay in my district since we do not have access to a kiln.  When the pots were dry, they painted with tempera cakes.


Second grade students made slab "fossils" with ball and coil decorations around the edge so they could practice scoring and slipping.  I bought plastic bugs, spiders, and some toy dinosaurs that could be pressed into the clay to make the fossil.  Students painted with tempera paint.  I don't have any photos because it was kind of impossible to tell what they were supposed to be.  I had seen this project done before where they stained the fired clay to make the impressions show up.  It didn't work so well with air dry clay.

First grade students made pinch pot turtles, inspired by the lesson I saw at Deep Space Sparkle.  This was a really good project for the students to practice pinch pots as well as attaching clay for legs and heads.  The students used pencils to carve designs into the shells.  These were painted with watercolors when they dried. Lots of legs broke off but the students just made up stories about how the missing limbs came to be- like they got in a fight with a shark!


Kindergarten students made "knee pots" by pressing their clay into a slab and forming it over their paper towel-covered knee.  Some carved designs in with pencils, some not.  We painted with watercolors when they dried.  Some of the kindergarten teachers said they were really confused when the students asked for paper towels during their play-doh time until they started making knee pots!