
 I had planned to do one more digital project for my high school graphic design class after spring break and thought an Andy Warhol-style project would work well for the planned theme of "Multiplicity". Well.... Covid-19 threw a wrench in those plans.
My students are 1:1 with laptops that all have some version of Adobe Photoshop or Photoshop Elements on them. I thought with my step by step tutorial complete with screenshots and shortcuts it would be no problem! I was wrong, but we still got through. Some students had major issues with their photoshop so we found that www.photopea.com works well for a web-based program. There are really only a few minor differences between photopea and photoshop. Some students just didn't want to or know how to problem solve so I had a couple share their screens with me and I helped them step by step.
I ended up saying that even if they only got one version done instead of 4, that was ok. I really wanted them to learn to use blend modes and understand changing colors and I think we at least achieved that much!
 My tutorial is HERE- feel free to use with your students if it is helpful! If you want to make any changes just go to file, make a copy, and it will give you a version you can change.
My tutorial was inspired by https://www.deke.com/content/how-to-create-dekes-new-improved-andy-warhol-effect-in-photoshop with changes to work better for my students.
Adobe Photoshop Andy Warhol Effect
Inspired by: https://www.deke.com/content/how-to-create-dekes-new-improved-andy-warhol-effect-in-photoshop
*Some of you will not have the same version of photoshop but you should still be able to accomplish this task, even if your tools look a little different.
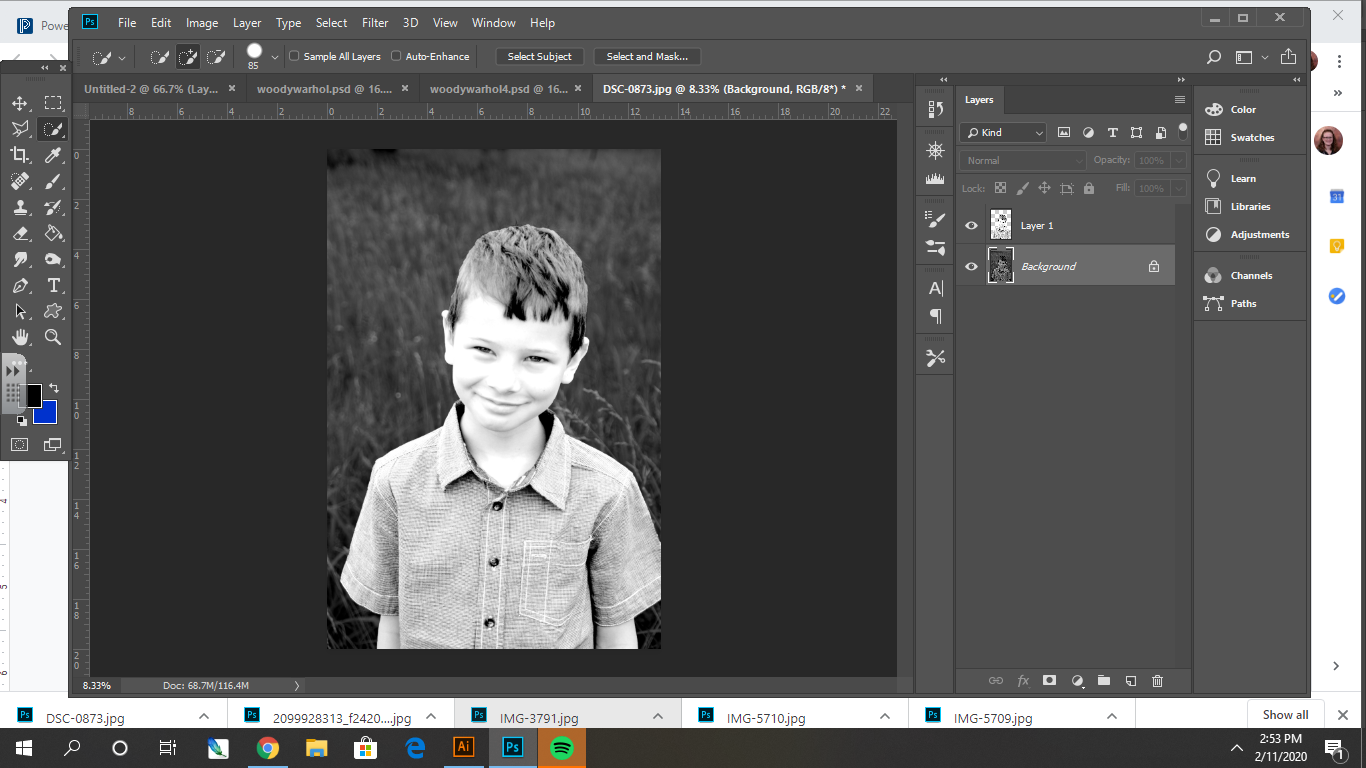
1. Open your chosen image in Photoshop. Photos with simple backgrounds work the best.
2. Use the quick selection tool (w) to select your focal point. Ctrl +C to Copy then Shift+Ctrl+V to paste in place.

3.
Turn the image to black and white. Go to Image > Adjustments > Black and White. Adjust the levels to make sure you have a good amount of contrast. Try 40 for the shadows, 2 for the midtones, and 160 for the highlights, but adjust to work for YOUR photo.

4.
Turn the background image black and white. Go to Image > Adjustments > Black and White. If you need to simplify the background, blur it (Filters > Blur > Gaussian Blur) and/or make it very dark or very light by adjusting the levels.
5.
Open the image of canvas texture. Drag and drop it into your document over the top of the photo.
Ctrl+T to resize and stretch the canvas so that it covers the entire document. Apply the transformation.

6.
Click on the canvas layer and change the blend mode on the layers panel from normal to overlay. This will let the texture show through so it looks like it is on canvas.


7.
Create and label a layer for each feature- in this example I will create a layer for skin, shirt, mouth, eyes, and hair.
On each labeled layer use the paintbrush tool (B) with hardness turned all the way to 100%. Select a color and paint the feature.

8.
Shift select each of the painted layers. Click the 3 horizontal lines at the top right of the layers panel and select new group from layers.

9.
Drag the group behind the figure. Change the blend mode from normal to multiply.

10.
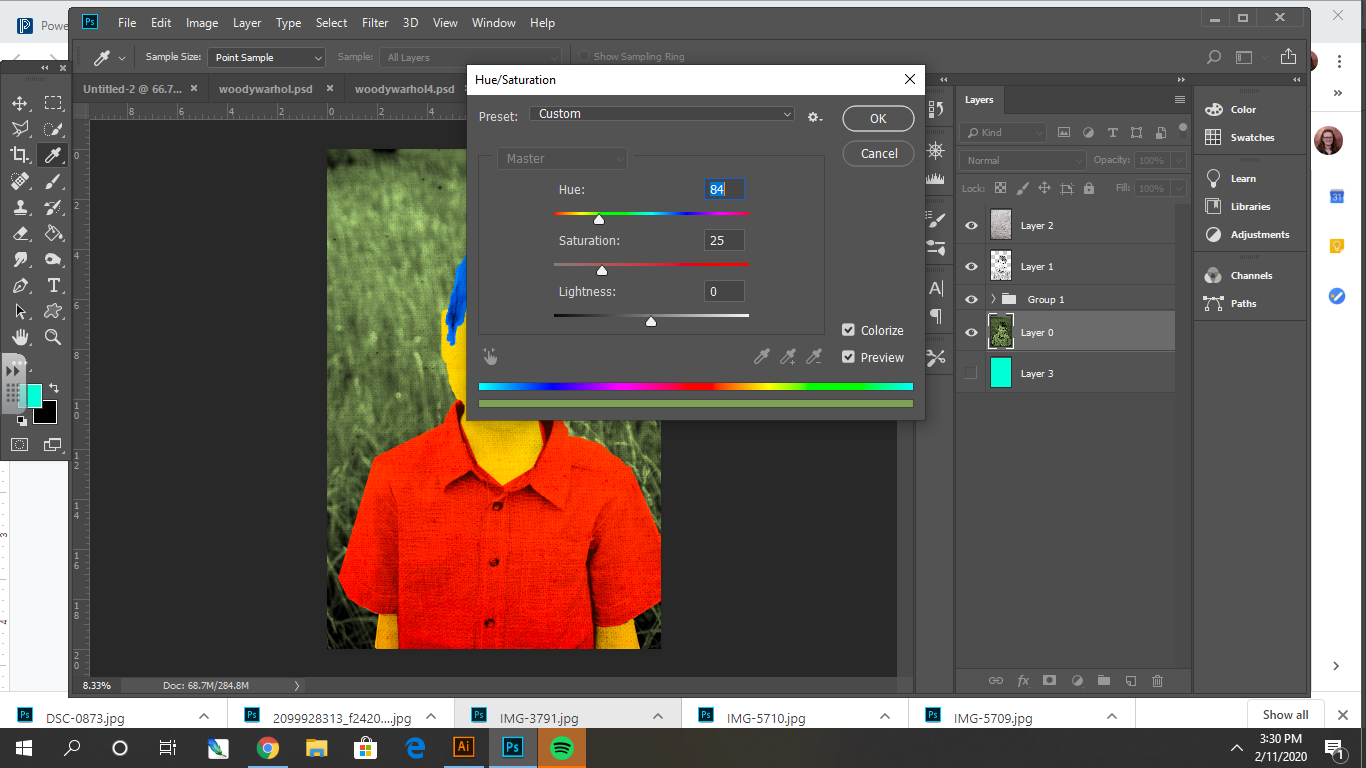
Select your background layer. Pull up the Hue & Saturation menu (Ctrl+U) and click colorize. Adjust the bars until you like the color of the background.
11.
Save your image as a PSD and as a JPEG.
Use the paint bucket tool or Hue and Saturation to change all the colors on your image and save as a JPEG. Repeat until you have 4 separate files with different color combinations. I named mine Warhol1, Warhol2, Warhol3, and Warhol4.
12.
Create a new document that is big enough to fit 4 copies of your image in it, either in a row or 2x2. Open each JPEG you saved then drag and drop them one at a time into the new document. Use Ctrl+T to resize as necessary.

13.
Save your completed document as yournameWarhol.jpeg.
Example: MrsMorrisWarhol.jpeg and turn it in on Google Classroom. If you turn in a PSD the file will be really big and take a long time to upload and download, plus you will not get full credit.


No comments:
Post a Comment