Tuesday, August 30, 2011

Your Thoughts? Process vs. Product and other ramblings...

So this is what's been running through my head all day today.

What do you do when a project just isn't turning out how you planned?  Do you hang it in the hallway "as is"?  Do you add another class and try to figure out how to improve it?  Or do you say "good try" and move on?

My son examining his first painting :)
My current Kindergarten and 1st grade projects are just not exactly what I had in mind.  Kindergarteners learned about lines and looked at Paul Klee's "The Golden Fish" and "Fish Magic" before drawing fish pictures with lots of crayon lines.  They painted over to make a wax resist.  1st grade students were painting fish starting with primary and neutral paint to practice mixing colors.  The main objectives (practicing lines and mixing paint colors) were met but I don't know if the average hallway passerby would have any clue what they were looking at!  The students like the projects, and they look kinda cool, most just don't look so much like fish.  I wasn't thinking about the backslide that happens over the summer so my first graders' painting skills were a little behind last May and most of the Kinders still had some scribbles in them!

The process is more important than the product.  But the product is a little important.  I don't know if I'm nervous about hanging it in the hallway because I still feel like a self-conscious new teacher (even though this is my 3rd year) and I'm afraid people will think I don't know what I'm doing or what!

Anyway, it just got me thinking.  Not every product is going to turn out exactly how you pictured when you try something new so I wondered what other people do when they are in a similar situation.  I know I'm not the only one! :)

Monday, August 22, 2011

Prang vs. Crayola... sort of

I read a post over at Deep Space Sparkle today where Patty discusses her favorite paint supplies for the classroom.  She mentioned that she was looking to try pan watercolors other than Prang.  Last year, one of the teachers at school brought me a whole box full of Art supplies that were left from her classroom.  Included in the box were several trays of Crayola watercolors.  I came up with the brilliant plan of making two watercolor paintings, one with Prang and one with Crayola, so I could compare the results.  What I didn't count on was that I would end up wanting to make paintings with two totally different color schemes!  I ended up with two paintings of birds but other than that, they aren't very similar so my color comparison experiment is a bust.  I think I should just do something simple like a color wheel to compare.  I'll add that to my list of 137 things to do. :)

Here is a wood duck painted with Prang watercolors, below is a rainforest bird (I think some kind of bee eater but I'm having trouble with the identification) painted with Crayola watercolors.


Thursday, August 18, 2011

Remeber to Proof Read

In my frenzy of back to school Art room poster making...
I didn't notice until it was hanging.  I decided to leave it and see how long it takes some smarty pants student to notice! :)

Wednesday, August 10, 2011

3rd Grade Funny Fish


I taught a similar lesson to last year's 3rd grade using dried up markers to "paint" underwater scenes.  This year I started thinking about all the cool fish names I had heard before and wondered what other names would work for the idea I had forming... I found a list of common fish names on Wikipedia and narrowed down the list to names that could be used to make funny illustrations.  I told the students I didn't want them to draw what the fish really looks like, I wanted them to draw what the name made it sound like it should look.  It was hard to describe with words exactly what I had in mind, so I drew out a name and demonstrated.  

My example- Trumpet Fish
I printed out my narrowed down list and cut the names apart.  I put all the names in a tub and asked the students to draw out a name.  I didn't just let them pick because I wanted to get some variety and avoid a whole grade's worth of hammerhead sharks and clownfish.  There were actually enough fish with good names on the list that we didn't have any repeats.  I did let the students trade fish names with a classmate if they wanted and if they really didn't like the name they drew the first time, I let them draw out one more then they could use the new name or the original.  Some students didn't understand why the fish name was funny so I explained it if I could and realized that some names were beyond a third grader's understanding! :)

The rest of the first day was spent making a line drawing of their funny fish.  I asked them to draw the fish first then work on the background.  I also stuck with my suggestion of drawing the size of your hand to fill the space.  On day two, the students dipped the dried up markers we had been collecting in water to "paint" with them.  They also brushed water over the marker pigment to help spread it more.  I'm not sure why the marker painting didn't seem to go as well this year.  I had some students who just couldn't break out of trying to make it look like a marker drawing instead of a painting.  We did get some cool results but I'm thinking this idea would actually work better with older students.  A lot of the projects could have been improved if the students had made color choices that went with the name of their fish instead of just their favorite colors.  All in all, I'd say it was a decent project, but not great.  If I do a marker painting next year, I won't do funny fish again.

Lady Fish
Mustache Triggerfish
Lamp Fish
Mosquito Fish
Jewelfish
Finger Fish
Sleeper Shark

Mullet Fish!
Walleye


Sunday, August 7, 2011

Southern Africa

Every year the high school in my district has "Cultural Heritage Week".  This year they chose Southern Africa as the focus.  Each of the elementary Art teachers is supposed to teach a 6th grade lesson based on Southern Africa.  I have been using Pinterest to collect images for my research.  (You can see my Southern African Art board here.)  Anyway, I was just sitting here thinking about how cool it would be if we could somehow connect with students actually living in Southern Africa.  Wouldn't that make it so much more meaningful for the students?  I would love to do some sort of Art swap or even just send a letter and some artwork to give a school there.  The problem is, I'm not sure how to go about doing this.  So I am reaching out to the wonderful community we have here, in the hopes that someone might either BE in Southern Africa, KNOW someone in Southern Africa, or know HOW to go about making connections!  I don't know where to start!

In case you don't know (I had to look it up since geography is not my strong suit,) the five countries that make up Southern Africa are:


Any help you can offer would be greatly appreciated.  If you have ideas for me, you can comment here or email me at catharine.morris@yahoo.com.

*So far, I just searched for schools in South Africa (using this website http://www.schoolguide.co.za/directory/search-results_m213/query:all/cat:6/order:featured/) and started emailing but I don't know if this is the best route to take!

Tuesday, August 2, 2011

Finished Clay Projects


I'm trying to utilize nap time to finish up blog posts from the last school year so I can delete photos of student artwork and make room for new ones!  Teachers in my district start back to school one week from today, students start one week after that.

My third grade students made slab (tortilla) and coil (chorizo) bowls inspired by The Pot That Juan Built (GREAT book!)  We have to use air dry clay in my district since we do not have access to a kiln.  When the pots were dry, they painted with tempera cakes.


Second grade students made slab "fossils" with ball and coil decorations around the edge so they could practice scoring and slipping.  I bought plastic bugs, spiders, and some toy dinosaurs that could be pressed into the clay to make the fossil.  Students painted with tempera paint.  I don't have any photos because it was kind of impossible to tell what they were supposed to be.  I had seen this project done before where they stained the fired clay to make the impressions show up.  It didn't work so well with air dry clay.

First grade students made pinch pot turtles, inspired by the lesson I saw at Deep Space Sparkle.  This was a really good project for the students to practice pinch pots as well as attaching clay for legs and heads.  The students used pencils to carve designs into the shells.  These were painted with watercolors when they dried. Lots of legs broke off but the students just made up stories about how the missing limbs came to be- like they got in a fight with a shark!


Kindergarten students made "knee pots" by pressing their clay into a slab and forming it over their paper towel-covered knee.  Some carved designs in with pencils, some not.  We painted with watercolors when they dried.  Some of the kindergarten teachers said they were really confused when the students asked for paper towels during their play-doh time until they started making knee pots!

Monday, August 1, 2011

5th Grade Personal Pop Art

Popcorn for his mom.
When I was researching Jim Dine for my Kindergarten Hearts lesson, I became much more interested in his drawings of tools.  I love how Dine uses value and texture and how his artwork has personal meaning.  I filed the idea away and saved it for the end of the year with my 5th grade students.  I think this project had a lot of strong points but of course I learned things that would make it work better in the future.

Glasses/Goggles for her grandma.
On the first day, I started with a PowerPoint about Jim Dine.  The students were somewhat familiar with Pop Art since they made food sculptures last fall but I pointed out that Dine was different than most Pop Artists because he had personal reasons for choosing the objects he represented.  I deemed it Personal Pop Art.  I passed out half-sheet planning forms to help the students plan for the project.  

Click on the photo to see a larger version.
The students were supposed to think of 3 people who are really important in their lives.  *I did not allow students to use a heart symbol.* I suggested leaning towards family members or role models (someone they look up to and have a real relationship with) instead of friends.  I just had this fear of students choosing a friend and then destroying their artwork if they had a fight with that friend or something silly like that.  This was my favorite part of this project, seeing the relationships.  For each of the people the students wrote down, they were supposed to brainstorm possible objects they could use as symbols for that person.  I suggested an object that was small enough to hold in their hands.  The tricky part for some was coming up with an "object" for a symbol.  For example, some students wrote down an activity like "dance" or "fishing" so I helped them come up with objects as symbols for those things.  I briefly conferenced with each student to help them choose the best symbol and it was really cool to hear them talk about the who, what, and why.

The rest of the class was spent making a line drawing of their object on construction paper.  I let them choose any color they wanted besides black and white since I explained we would ONLY be using black and white media to add value and texture to the drawings in the second class.  The students had to think about what they wanted the final project to look like and consider that when choosing a color.  I told them if they wanted a color besides black and white, that is the color of paper they should choose.

Fishing pole for his grandpa.
During the second class, the students added value to their objects.  This is where it would have been REALLY handy to have the actual object for the students to look at.  We were able to find a few things around the Art room to use (a CD, a book, a fake banana, etc.) but most just had to make it up or look at a picture I pulled up on the computer.  This project showed me that I really need to focus more on value with the students.  I realized that when I talked about shading before with them, it was in color.  That knowledge doesn't always translate to black and white.  After value was added to the objects, the students experimented with expressive mark making to add texture similar to Jim Dine's drawings.  I pulled out just about all the black and white media I could find.  I found sharpies, crayons, graphite sticks, and also watered down black paint so it could be used for splatters.  Experimenting and using lots of media/techniques was encouraged.

Check out some of my favorite examples below and view our exhibit on Artsonia!

Crappie for her grandpa.
Hockey stick for a RoadRunners player who he looks up to.
A bobber for a grandpa that likes to fish.
This student combined his three different ideas for his mom: a shield, a paintbrush, and a cross.
Banana for her sister "Hannah Banana"
Apple for her teacher
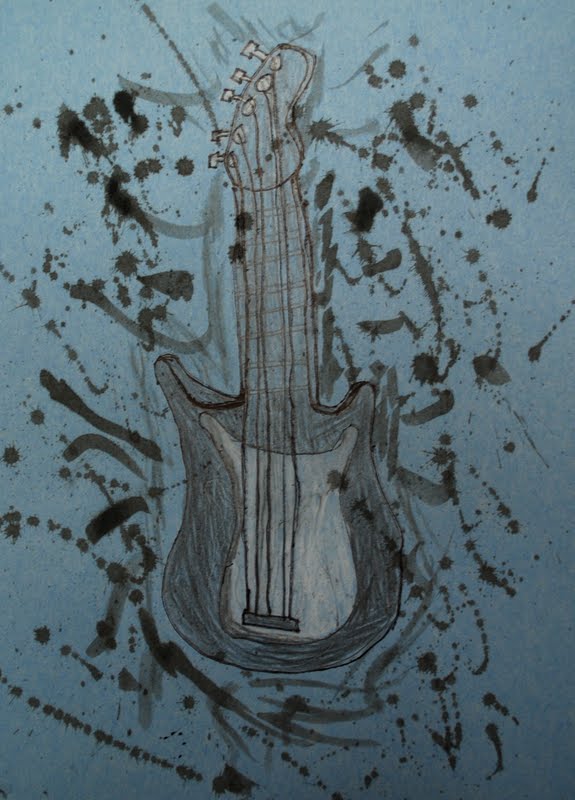
Guitar for Dad
Bouncy Ball for a cousin