
Showing posts with label recycled. Show all posts

Saturday, May 9, 2015

Recycled Art Challenge (Continued)

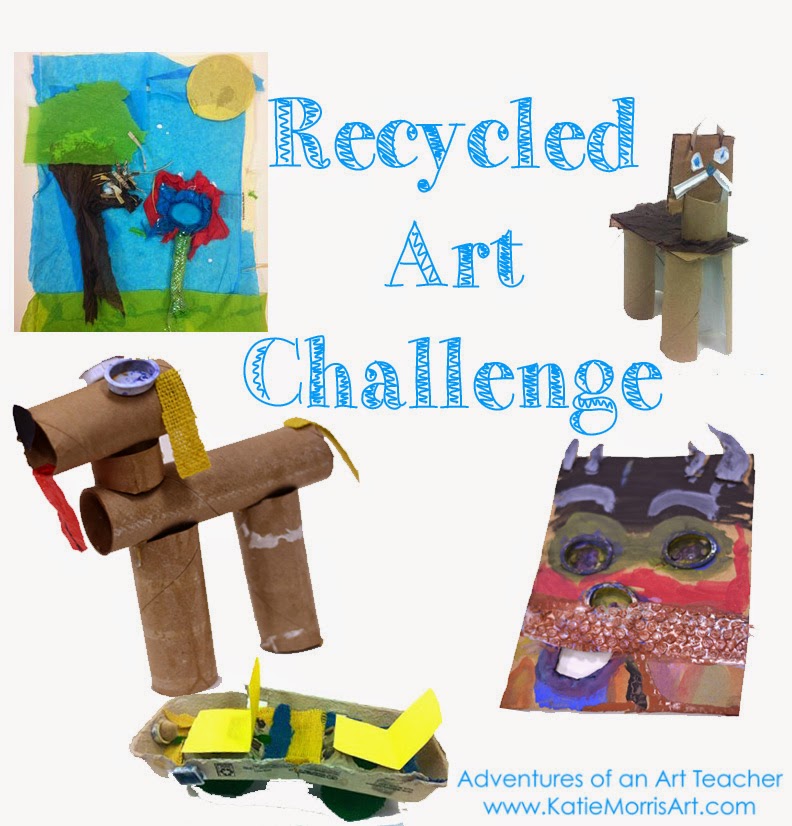
In honor of Earth Day, my 2nd and 3rd grade students participated in a "Recycled Art Challenge" where they had 2 class periods and a ton of different "recycled" materials with which to make something. The project could be 2D or 3D, but most went 3D. We saw lots of collaboration and creativity. I already shared a few photos a few weeks ago (see here) but I wanted to share some more photos of the students' art as well as a list of their favorite materials (at the bottom of this post).

Above we have a pop monster and a collaborative Minnie and Mickey Mouse project. The pop monster (my term) was made of a pop can, 6 bottle caps, a bunch of pop tabs, curling ribbon, tissue paper, and cardboard. Mickey and Minnie were made by two friends. One student made each figure but they worked to make their sculptures match. They used paper towel tubes for the bodies and juice can lids (tons were donated) for the heads. The idea came to them after seeing the red and white polka dotted wrapping paper scraps I brought in. The bow was made from tissue paper and Mickey's shorts were made from scrap paper in the collage center.
There were probably 6 students working on the landscape theme. Some worked with partners and a couple worked individually. They used old file folders as a base and tissue paper, ribbon, can lids, and watercolor wells for the flowers and trees. The nest in the tree on the left was made from leftover shredded newspaper from the Bird Nest lesson I taught 4 years ago. Yes, that's a long time to keep shredded paper, but I bet some of you have held on to random supplies longer than that! :)
Here we have a textured collage and an alligator or crocodile, whichever does not show its teeth with a closed mouth. The alligator/crocodile was made from egg cartons, cardboard, tissue paper, and bottle caps.
 An art creature and glass of lemonade... The art creature has colored pencil stub legs and watercolor well eyes. The lemonade gets color from tissue paper.
One of my ASD students is kind of obsessed with computers. He was always asking if I had any computer magazines for collages and wanted to spend any time he could get away with talking about computers. I was not surprised when he whipped this laptop out for his project. He used a piece of drawing paper for the base, bubble wrap for the keyboard, and some foam packing sheets for the screen. He used cereal boxes to make the frame and buttons.
 Several students wanted to make rooms. The top left shows a folded paper base with magazine cut out pop-ups. The top right is a bathroom. I like the sink the best. He found one of those flattened blue marbles (my elementary school counselor called them dragon tears) for water and used watercolor wells for all the basins after constructing the walls from cardboard.
 Here's another room. The student would have added more details if she hadn't run out of time.
 I should have taken a photo of this project from another angle. She spent a lot of time wrapping the different parts in tissue paper. The stem is a paper towel tube and the leaf is cut cardboard.
 There were lots of "machine" models made. Lots of cars, tanks, cannons, etc. The student who made the above tank figured out how to make it "shoot" marker caps. When he pushes a new cap through, the front cap shoots out!

Here are my students' Top 10 Favorite Materials for the Recycled Art Challenge

  1. Cardboard tubes (paper towel and toilet paper)
  2. Egg cartons
  3. Can lids (with smooth edges, of course)
  4. Bottle caps
  5. Pop tabs
  6. Tissue paper (saved from holidays and birthdays)
  7. Cardboard (saved from boxes)
  8. Bubble wrap (saved from shipments)
  9. Play-doh lids
  10. Parts from old watercolor trays- the wells and the "ladders"
Another favorite material that was not exactly recycled, but was leftover from some project and donated, was burlap! We had it in blue, green, yellow, and red. It was really fun for them. I wish I would have thought to bring more fabric scraps from home.


Sunday, May 8, 2011

1st Grade Bird Nests


This is a revised project from last year.  I have a "thing" for bird nests.  I have a few real nests that I have collected after storms and am fascinated by the construction.  In one of the robin nests, you can see the mud and grass, but you can also see that the bird used string and plastic, and lots of "recycled" materials. Birds are pretty resourceful and that was the first reason I wanted to do this project!  

Last year, I had the students draw trees with construction paper crayons on colored paper, create patterned papers to cut eggs from, and glue tinted, shredded newspaper on for the nest.  This year, I changed a few things and I like the results more:
Day 1
  1.  Blow thinned brown tempera paint with a straw on white paper to create the branches (like I've seen in so many cherry blossom projects).
  2. Roll a peeled blue crayon on it's side to create a sky with a subtle texture.
  3. Use green crayons to draw leaves.

Day 2
  1. Each student cuts an egg shape out of magazine paper (I pre-cut swatches that had interesting colors, textures, or patterns on them for the students to choose from.)
  2. Glue eggs on the paper, slightly above a branch so it won't look like the nest is about to tumble.
  3. Glue nest materials on paper covering the bottom of the egg.  


This year the nest materials were made up of newspaper that I sprayed with watered down brown paint and shredded, and small pieces of raffia.  I think the raffia adds more interest.  I tried to talk about composition and scale but this was lost on some students.  I talked about "zooming in" on a branch so the nest would be the right size.  Some just couldn't see the brown paint as a branch and instead used it as a whole tree.  First grade logic. :)


Tuesday, May 3, 2011

Egg Carton Ants

I have a bunch of egg cartons.  Like a lot.  I save them and have lots of donated egg cartons.  I had been saving and saving them but didn't know what I wanted to use them for.  The specials teachers at one of my schools are in charge of organizing the baked potato lunch this Friday for Teacher Appreciation Week and our librarian thought of a picnic theme.  They were talking about decorations so I said I could have one of my Kindergarten classes make ants.  I needed a one day project to get everything straightened out after the schedule changed so it worked out really well.

At the beginning of the class, I asked the students what they know about ants.  The Kindergarten science curriculum starts to talk about insects, mammals, etc. so they were happy to tell me all about the 6 legs and 3 body parts as well as ant-specific things.  I had pre-painted and pre-cut* the egg cartons so I gave each student a 3 section piece that was already brown.  I showed them how they could cut strips of paper and glue them to make legs.  I stressed pinching the paper to the egg carton for a few seconds to make sure the liquid glue would stick.  I let them add any details they wanted with scrap construction paper and crayons.  We even used the circles of paper out of the hole punch for eyes.  I really like how they all have personality.  Even my 3rd grade students who saw the ants drying asked if they would get to make them!

*Is there some magic trick to cutting egg cartons?  I had a really hard time.  I ended up using a paintbrush to apply water to the cardboard cartons where I wanted to cut and letting it soak through a couple times to make it a little easier.  I also had better luck with short scissors than my bigger pair.  It was time consuming.  Any tips you would like to share?

I didn't want to use a plain background for the photographs and luckily I remembered seeing this table cloth in the teacher's lounge!  I thought it looked picnic-y and decided to give it a try.  I wrote the students' names on small pieces of paper and put them off to the side so that I could crop out the name when I published the work on Artsonia.


Sunday, August 29, 2010

Rainbow Crayons

Problem: LOTS of old, broken, nasty looking crayons.  Baskets of them.  I want to start using my class packs of crayons but don't want to be wasteful.
Solution: Make rainbow crayons!  

At the end of the school year when students finished projects early and wanted to help with something, I told them they could help peel paper off of the old crayons knowing that I wanted to recycle them.  I bought a cool old muffin tip for a quarter at a garage sale that I could dedicate for to the sole purpose of crayon recycling.  

If you've never tried before, it's super easy.  First, make sure all of the paper is peeled off of your crayons.  Next, sprinkle crayons of different colors into muffin tins.  Make sure that you break up larger crayons into small pieces and try to get a variety of colors.  I had more brown crayons than any other color but I tried to spread them out.  You don't need to fill the muffin tins all the way up, I aimed for about 2-3 layers of crayons in each tin.

After the crayon bits are in the muffin tins, set your oven to a low heat.  I tried about 250 degrees.  Place muffin tin in the oven, check the crayons and remove when melted.  I wish I would have paid more attention, but I think I left them in the oven about 10-15 minutes.  If you leave them in too long, your nose will let you know!  Try not to jostle the tray too much when removing so the colors keep some separation instead of turning into "mud."
Remove muffin tin and let cool.  If you're lucky, as the rainbow crayons cool, they will slightly pull away from the edges of the muffin tin.  I had to pop some of the crayons out and even turn the tin upside down and bang on the counter for a couple stubborn crayons.  Don't judge your crayons by the top side visible in the tins.  It kind of looks like the impurities come to the surface when everything is melting.  When you flip the crayons over, you will see the bright colors and neat designs that the colored wax makes.  I have seen some rainbow crayons made in molds to get fun shapes which looks really cool, but the circles work for me.  I made about 4 dozen rainbow crayons over the period of a couple nights.
I plan to use these crayons mostly for texture rubbings with Kindergarten students.  I think the crayons should be a good size for their little hands to hold onto.  These crayons also make a fun gift for a little kid!

Saturday, March 20, 2010

1st Grade Recycled Bird Nests

I have a thing for bird nests.  My photo of a bluebird nest (above) was recently published in KANSAS! magazine.  Besides making photographs of bird nests, I have collected a couple nests.  I have three or four nests that have fallen out of trees.  The best example I have is a robin's nest that blew down in my back yard during a storm last summer.

The top rim of the nest is just perfectly woven and lined with mud.  I think the nests are so beautiful and show that not only are the birds master builders, they are also quite resourceful.  I showed my first grade students the nest and how if you look at the bottom, you can see bits of string, something unidentified and fuzzy, and part of a plastic bag.  I really wanted to do a mixed media project with the first grade students so we made a drawing for the base, cut and glued paper eggs, and used newspaper for the nest.


This project took two 40-minute class periods to complete.

The background of the project is a drawing of a tree branch.  Or a whole tree, depending on how small your students draw!  I demonstrated drawing branches like we were zoomed in, instead of drawing the whole tree.  I showed the students how the branch is thicker closer to the trunk of the tree.  I stressed that we didn't want floating branches, so either at least one side of the branch needed to go all the way off the edge of the paper  or they could draw the branch connecting to the tree trunk which would go off the edge of the paper.  The students drew their branches in pencil first then used construction paper crayons to add color.  I let the students choose between light blue construction paper or some pale green card stock that was in the Art room.  To make the project faster, the drawing could be eliminated to just focus on the nest.  

To make the eggs, I gave each student a small piece of white paper.  I quartered 9x12 inch drawing paper and could probably have used smaller pieces.  We quickly reviewed using lines and shapes to make a pattern.  (I had to say "design" because if I only say pattern, the students think they can only make AB patterns from math class!)  The students used construction paper crayons to fill one side of their small piece of paper with a design.  We flipped the paper over and after demonstrating, I asked the students to draw 2 or 3 eggs on the back of their design paper.  If I had not told the students a number, I am sure I would have ended up with 13 and a half miniscule eggs!  I tried different measurements but I found most of the students drew little bitty eggs anyway.  I passed out scissors and the students cut out their eggs.  I picked up the scissors as soon as the eggs were cut out.  I have already found that if scissors are left at the tables these two things ALWAYS happen:
  1. Students continue cutting scrap paper into smaller and smaller pieces that end up on the floor.
  2. Students cut the corners off of their papers.  I don't know why that bugs me so much! 
As the students finished cutting out their eggs, I asked them to place the eggs on their drawing where they would be glued in place.  I asked the students to put their eggs a little bit above the branch so when the nest was added, it would look safe for the eggs and not like it would fall out of the tree.  The eggs were glued down and then I demonstrated making the nest.  The nest was made from newspaper.  I only used one section of the paper and after my 100+ students made their projects, I probably still have enough left for 4 or 5 more years!  To prepare the newspaper, I watered down brown tempera paint in a spray bottle.  I sprayed the newspaper to tint it brown, let it dry, then took it home and put it through my paper shredder!  The shredded paper went into a shopping bag and traveled to school.


When I made my sample, I very carefully glued a couple strips of newspaper at a time to make the nest.  The students had a different approach... I tried to get them to use thin layers of bottled glue but most made a big blob, took a pinch of newspaper, and plopped it down on the glue.  The students' method actually worked pretty good and it was a lot faster than my original plan!  The very best results were still achieved by using thin layers of glue.  You'll need to put down the first layer of newspaper and then add another layer of glue to avoid holes in the nest.  It is also helpful to lightly press the newspaper down to make sure it sticks.  If there is too much glue in one spot, the paper buckles when it dries on the rack.  

The gluing portion of this project can obviously get a little messy.  I called one table at a time to wash their hands.  Students who weren't washing were picking up the newspaper pieces from the floor.  I found that the nest pictures needed at least a whole day to dry on the rack before being stacked.  The students seemed to enjoy the project and the chance to help others if they finished early.  Even one of the students who wasn't super excited at first said:
Wow, this is way 'funner' than I thought it would be!