Showing posts with label lines. Show all posts

Saturday, July 5, 2014

Primary Lines

In the second half of the school year my Kinders needed to review lines and primary colors. We had been using the vocabulary, but I realized I probably hadn't been as explicit about it after the first introduction. Sometimes I forget how much repetition the students need when they only have art class once a week (if we don't miss school). This lesson plan is available on The smARTteacher.
On the first day of the project we reviewed lines and the students made a composition using many different kinds. This was also a good time to reinforce paintbrush technique and care. I showed how to make thin and thick lines by turning the brush different directions and talked about trying to go in one diction to make the lines smoother. They sure like to go back and forth to smooth out a line and end up making the lines fuzzier AND thicker.


On the second day when the black paint was dry, the students were given the primary colors and white to mix tints. The students watched the Sesame Street music video by OK Go while I filled paint palettes. 
I've been doing something a little different with a lot of liquid tempera painting projects. Instead of putting out water, which usually ends up getting added to the paint making it less opaque and dirty looking, I ask students to try to use all the paint on their brush before switching colors and then to just wipe on a paper towel before "dipping the tip" into a new selection. It works really well most of the time and saves a lot of headaches.

If a student missed the first day, I let them choose if they wanted to draw lines with sharpie or paint black lines and wait until the following class period to use colors.

On the third day some students decided to add collage elements or do more painting. Many started new projects and kept on going with the liquid tempera and mixing colors. 

 This would be a great beginning of the year project, but it works equally well for review at the end.

Saturday, August 11, 2012

1st Grade Pumpkins

 Last fall my 1st graders learned about line and color mixing in this pumpkin painting project. In the first class, we talked about lines. EVERY time I teach a lesson about lines to my primary students, I draw the different kinds of lines the students think of on the board, then we all "draw" them in the air with our fingers. The added movement tends to help the students remember better. Next, I led the students in drawing a pumpkin. 
Here's the trick that we like:
  1. Draw a large ellipse in the middle of your paper
  2. Add a "banana" shape on one side
  3. Add a "banana" to the other side so it looks like a hotdog in a bun
  4. Draw the stem above the middle ellipse
  5. Add another "banana" to each side

 Next, the students filled one shape at a time with a different kind of line in each and traced with crayon. We talked briefly about background then the students drew a horizontal line on each side of the pumpkin to represent the back edge of a table top. If the students still had time left, they added lines to the wall in the background and the table top.
In the second class period, I passed out trays with combinations of primary colors. First I gave each table red and yellow paint. They mixed orange and painted their pumpkin. While the students were painting with orange, I was preparing yellow and blue to be used for the stem and table. I prepped the red and blue paint while they painted green. It's a good idea to remove each tray of paint as the groups finish so they don't accidentally dip their brush into the wrong tray. Oh, and about the paint- I bought really cheap tempera, which I will never do again, but this project is the only time it not really being opaque worked in our favor. The students go to mix the liquid paint easily and still see the crayon through it.

I almost always give the students more choices than they had in this lesson. These are not the best example of creativity or artistic expression since they pretty much all look the same. But, it was good way to ensure that they really learned how to mix each secondary color and practiced at least 5 different kinds of lines. I'm telling myself that this is ok once in a while. Honestly, the students were super proud of their paintings even though they looked the same.


Thursday, January 19, 2012

Kindergarten Tint and Shade Triangle Trees

Oh, Pinterest, you give me so many ideas.
Source: purlbee.com via Katie on Pinterest

I saw this quilt pinned a couple months ago and right away knew what I would do with the idea. I love how simple and graphic it is and the strong shape. A big part of the Kindergarten math curriculum at my school is learning the 5 basic geometric shapes (circle, square, triangle, rectangle, ellipse) and I like to support that however I can. Last year we did wax-resist pyramid paintings for "triangle" but I wanted to try something wintery this year, and this was an easy 2-3 class period project.
Day 1: Using tempera to paint 4 different greens. 
1. Green right out of the bottle
2. Mixing yellow and blue
3. Green with white added- TINT
4. Green with black added- SHADE
Before painting, students folded their papers hotdog and hamburger style to make a "t" down the middle. Reviewed paintbrush technique but not cleaning since no water is required for this as long as you do the shade last. Just rinse brushes at the end of class!

 Day 2: Make some trees!
We discussed the quilt picture, students identified the shapes, and pointed out the different colors and patterns. I asked the students to tell me what they were looking at a picture of and most said "Christmas trees" (it was December, after all), and I used that opportunity to put in a quick science lesson about evergreen trees. Next, we cut the papers into 4 sections and I showed how to cut triangles. I gave students the choice between drawing triangles first or "drawing with scissors". I tried to get them to cut their first 4 triangles so big that they touched the top AND the bottom of the painted paper then they could use the scraps to make "baby" trees. I had pre-cut, or more like chopped since I definitely didn't measure, some brown pieces for trunks. We covered "just a dot, not a lot" for glue bottle use and they went at it.

*Tip- Save the painted paper scraps for students who missed the painting day.
Day 3: Some students would have had time for this at the end of the 2nd class but I decided to utilize "peer tutoring" and have them help struggling classmates with their gluing instead. In the beginning of the 3rd class, we reviewed different kinds of lines and practiced drawing them in the air with our fingers. I have no actual proof, but I'm convinced that getting the kinesthetic action helps the students remember it better. And it's a little silly and fun. After our practice, the students used construction paper crayons to add patterns to their trees. I told the students about shadows and gave a 30 second demonstration. Most tried to add shadows then added other details in the background. I had a couple students who missed the first 2 classes so they just made construction paper crayon drawings of patterned trees.

Skills/Concepts Learned or Reviewed: Geometric Shapes, Cutting, Gluing, Lines, Patterns, Color Mixing, Tints, Shades, Thinking about Composition
This student said she made a whole forest. 

It may look like this student was just being sloppy by gluing every scrap of paper she could find onto her background, but she had a whole story about how all the trees in her forest fell down. 

I love the letters on this tree!
*I forgot to say earlier that this is doable as a sub plan. I was there for every painting class but was gone for one afternoon of gluing and another afternoon of adding patterns. I was afraid it might turn out too cookie cutter but I think it's ok since nobody traced anything and the students were free to add whatever colors and patterns they wanted on trees they placed wherever they wanted.

Wednesday, December 7, 2011

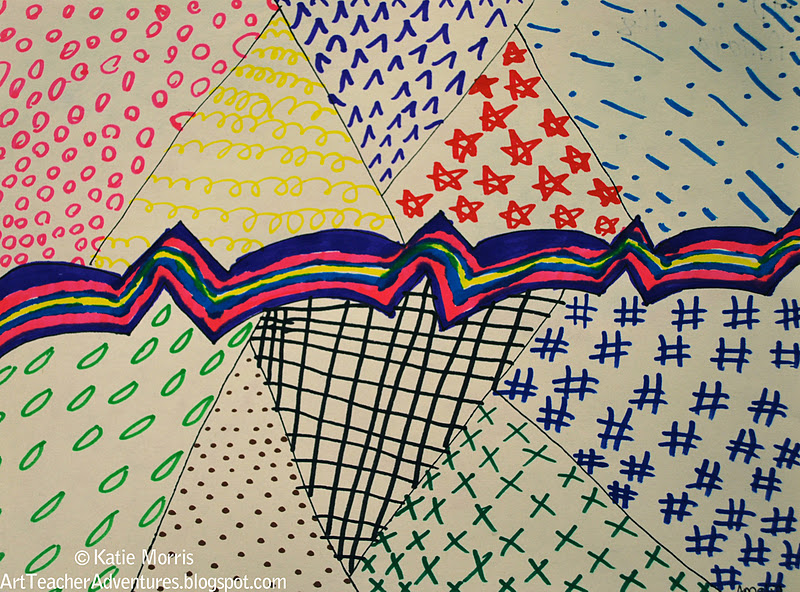
Easy Sub Plan- Bold Lines

I needed an easy sub plan a few weeks ago and I was reminded of a lesson I saved as a Favorite on Artsonia. I'm sure lots of you have seen this lesson before, I recently saw it on the Kids Artists blog.
If you are on Artsonia, the lesson was posted by Linda Welling from Cedar Creek Elementary School. The lesson id is 2665.

The basic idea is for the students to draw a bold, interesting line in marker then "echo" it with different colors. Next, the negative space is filled in with line and shape designs.

This lesson was done with 4th and 6th grade classes in one 40-minute class period. Judging from the results I found when I got back to school, it was enough time for most students on 9x12 inch paper. I left the same sub plan last week but apparently forgot to specify the paper size. (40 minutes is NOT enough time for 12x18 inch paper!)

It looks like the students enjoyed the project and some of them definitely took the idea and made it their own!

This student figured out that writing in cursive makes one line. By the way, it cracks me up that students in Kansas make things about surfing!

 Several students filled in all the negative space with color but still made some cool patterns. I like what she did in the lower left corner.
 Getting geometric...
These two were pretty straight forward and very cautious. It shows the personality of these two students!
And a few students drew pictures of objects instead of lines and shapes. Objects like hotdogs. :)