Showing posts with label clothesline. Show all posts

Tuesday, June 4, 2013

CYOA- Clothing and Textile Design

In my last post, I described how my 5th grade students were choosing an area of Fibers to explore (Choose Your Own Adventure). The options were weaving, quilting, and clothing/textile design. There were many options within each of the three categories. Weaving was by far the most popular choice, but I did have quite a few takers on clothing and textile design.
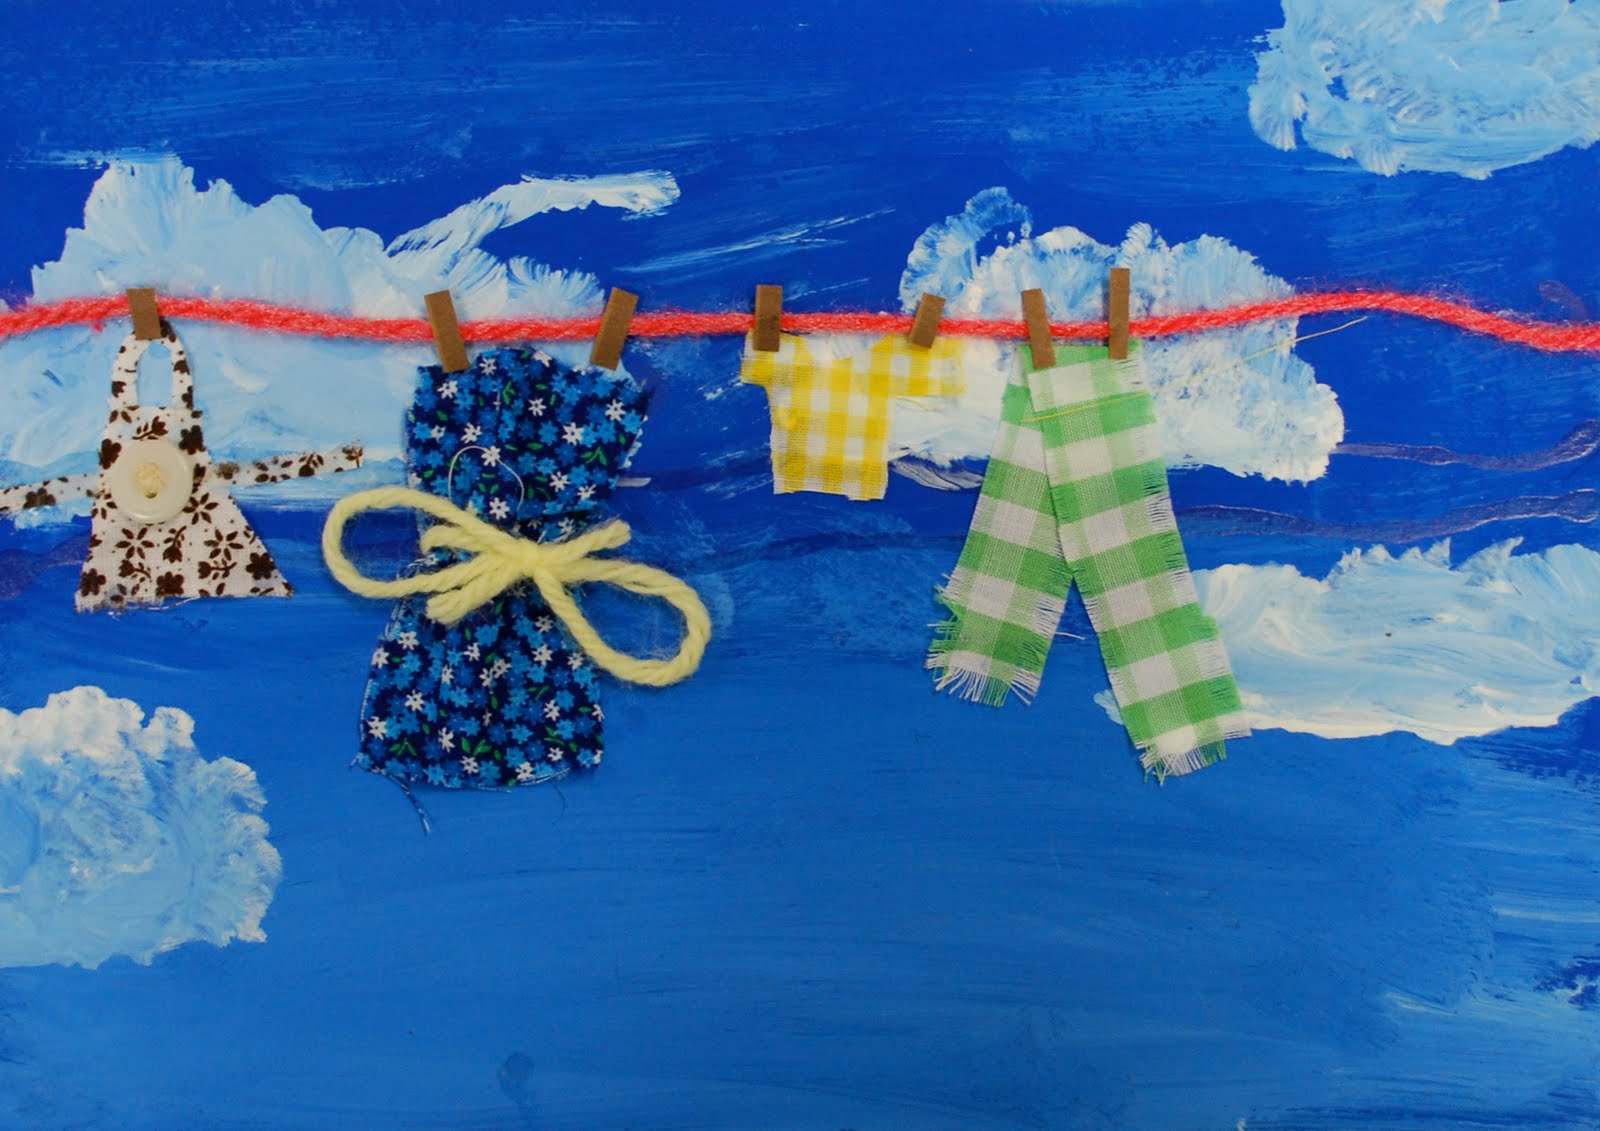
One option, was the clothesline project I've taught a few times. Students paint a sky background then learn to cut and manipulate real fabric to design miniature clothes. You can read about the project on previous blog posts here and here or read the article I wrote for Arts & Activities magazine last December here.
You'll notice a couple differences between this batch of clothes on a clothesline and those from previous years. First, there is a lot more variety in the skies. When I taught the lesson before, I demonstrated how I like to paint clouds and put out the same paint colors at each table. This year since the students had more choices, those working on similar projects sat near each other and together asked me for the certain colors they wanted. It didn't take too long to dispense the paint, and if my pumps weren't prone to clogging and spraying, I would have let the students get their own paint. The second difference is that the overall level of craftsmanship might have been a little lower. Partly because a few, not all, of the girls were more interested in talking and partly because the students were working more independently and making their own choices.
 Another option within clothing and textile design was to create a fabric design on paper, with the idea that it would be pushed further. This option was a little disappointing. I think about 5 students chose this option and they had no sense of urgency. The stamps were created by cutting out foam shapes and gluing on to small pieces of cardboard. I told them that their stamps needed to be finished in the first class period so they would be able to print in the second. Only one student finished creating her stamps the first day and I think she forgot where she put them and had to start over! The other students didn't finish gluing until half way through the second class so they used their extra time to create a second stamp so that they could print in a pattern on the third day. I think what was most frustrating to me is that I know the students were capable of more. I did a stamp making lesson with 2nd grade and even with my Kindergarten students at the same time and the younger students seemed to work harder. I did feel a little better on the last day to see the 5th graders who made stamps at least adding interest with multiple colors. The stamped pattern above is the only one I ended up with a photo of. There were a couple girls adding multiple colors to one stamp to highlight certain shapes and if they had finished, it would have been really cool.
The Choose Your Own Adventure lesson was an experiment. I'm wanting to transition to Teaching for Artistic Behavior but I may have to use a modified approach. I won't know for sure until I get a chance to talk to my principals and until we get our new district standards written. I'm thinking that CYOA could be a happy medium. If it would be a requirement that, for example, students at a certain grade level complete a weaving project, I could whip out menus and the students could still have several choices within that requirement.

Thursday, May 19, 2011

5th Grade Clotheslines

Last year my 5th grade students voted for this project as their favorite of the year!  I decided it was definitely a keeper.  This was a 2-class period project.

Short description: 5th grade students made mixed media pictures of clothes on a clothesline. First, the students learned how to paint a monochromatic (one color) sky and glued on a yarn clothesline about 1/3 of the way down from the top. In the next class, the students learned that clothing designers have careers in art. Then the students cut miniature pieces of clothing from real fabric and glued them to the background. Buttons and yarn were available for embellishment.


On the first day, we talked about careers in Art and how clothing designers think about line, shape, color, and the other elements of art when designing clothes.  We also talked about how your clothes can show your personality, style, interests, and even your career.  I pointed out that our principal usually wears a nice shirt and tie and I usually wear a paint-covered apron.  Police officers, doctors, athletes, servicemen and women and lots of other people where clothes that work for their jobs.  After the discussion, I explained the project: make a clothesline with clothes on it that show your personality and maybe what you want to be when you grow up.  

I showed the students how to paint a simple sky using tempera paints and how to glue yarn down for the clothesline.  We used a really dense cardboard/fiberboard kind of material for the background last year.  This year we used some thin cardboard pieces, about 8x10 inches, that somebody donated.  I gave each table blue and white tempera and showed the students how to mix a little bit of white in the sky and dab white paint to make clouds without over blending.  I used to have a mental block on clouds because I tried to make them look "perfect".  Now that I am more relaxed not only do I enjoy painting clouds more, they look better.  I suggested gluing the yarn for the clotheslines about 1/3 of the way down from the top.  (Yeah for fractions!)  If you were super organized, you could have every student glue the yarn the same distance from the top so it would form one giant clothesline in the hallway.  I had precut yarn in several colors that was a few inches longer than the boards were wide.  (We taped the extra on the back in the second class so that it wouldn't fray and didn't have to be cut the exact right size.)

The boys were obsessed with adding socks and boxers!
 In the second class, the students cut miniature clothes from fabric and glued them to their backgrounds.  The students could choose whether to glue the clothes flat or raised off the surface.

At the end of class, they cut thin strips of brown paper to look like clothespins.  The students tend to cut out really tiny clothes so I had to give several reminders about scale and how it affects the composition.


Some teachers and my wonderful mom donated fabric scraps and I had saved old shirts and jeans to use the fabric.  If you really want to impress your students, make a small cut in the fabric and rip it with your hands.  They said I was like the Hulk!  The boys especially liked when I cut and ripped my husbands old jeans.  I also had some ribbon and buttons that the students could add for embellishment.


Sunday, August 1, 2010

5th Grade Clotheslines

I came up with this idea when I was flipping through the Artist Trading Cards I traded for and collected a few years ago.  This project was a big hit- voted the favorite project of my 5th grade students.  On my survey, I asked the students to give a reason why the project they chose was their favorite of the school year.  The students who actually answered the full question said they liked the clotheslines because they got to express their personality.  This project was completed in two 40-minute class periods.  Most students could have used extra time so next time I will allow three class periods.

Day 1: I demonstrated the first several steps of the project.  I have a ton of really dense cardboard pieces, sized about 8x10 inches that we used for the base.  I showed students how they could use blue and white tempera paint to make their skies more interesting than a flat blue.  *BEFORE the students paint, remind them to write their name on the back of the board!  The students painted all of the board blue, using horizontal brush strokes and then worked a tiny bit of white paint into the blue starting at the bottom for variation.  After the background was painted, the students cleaned their brushes thoroughly and used the white paint to add clouds.  I told the students that I used to have a really hard time painting clouds because I tried to make them PERFECT.  I finally got over it by not taking it quite so seriously!  I showed the students how to dab and swish the brush (not scrub!) to make clouds.  I also suggested giving the clouds a flatter bottom to make them look a little more realistic than big circles.  After the clouds were painted, the students used white glue to add a piece of yarn to be the clothesline.  I briefly touched on the rule of thirds and suggested the students glue their yarn 1/3 of the way from the top of their sky- to make their compositions more interesting and allow plenty of room for the clothes.  I had precut pieces of yarn a couple inches wider than the boards (yarn can be trimmed or wrapped around and secured on the back) in as many different colors as I had to give the students more choices.

Day 1 progress on the drying rack.  *I saved the boards I created during demonstration so students who missed the first class period could use one and have time to finish their projects.

Day 2:  I had scraps of old shirts and jeans, fabric remnants, ribbon, buttons, and construction paper available for students to use to make their clothes.  When I introduced the project to the students, I used my completed clothesline to show how clothes can express your personality and tell something about you.  On my example (which I should have photographed) I included an art apron like the one I wear at school everyday.  I didn't want to sound shallow when talking about the clothes but I know my students are at the age where they are really getting in to fashion and expressing themselves through their clothes.  We discussed how clothes can show your interests (favorite color, sports fan, etc.) and can show what you like to do (uniform, jersey, career clothes, etc.)  I asked the students to cut a smaller section of the big pieces of fabric to work from so the others would have a chance to use it.  I talked about setting the fabric on their board before cutting to make sure it was big enough for at least three items of clothing.  Some students felt comfortable just cutting the shape of the clothes and some drew it out first, either with chalk or a sharpie.  I suggested cutting the basic shape first and then thinking of details to add with other materials.  Up until the point in class where I felt I needed to tell the students to just finish what they had started, I suggested cutting the clothes and playing with the arrangement before gluing down.  We talked about contrast- you don't want to put a really light colored fabric on top of a white cloud, and trying to get a variety of colors, textures, and patterns.  I was super impressed with the creativity of my students.  I don't have photographs of the most innovative artwork because I don't have Artsonia permission slips for those students.  :(  One student cut little slots in her miniature jeans so she could thread a belt through and made tiny functioning pockets!  If students got their clothes glued on the line in time, I showed them how they could use little pieces of construction paper as clothespins.  I wonder how many of my students have actually seen a real clothesline?  They are becoming a thing of the past but are a fun framework for an art project.