Showing posts with label Fauvism. Show all posts

Thursday, July 2, 2020

Elementary Art Enrichment Ideas

When we started our Continuous Learning Plan, Kansas' response to Covid-19, it was decided that elementary specials would be offered as enrichment. Music and PE had two different Zoom sessions a week for PK-2 and 3-6 but I got permission to just do one for all elementary and to use Facebook live. I think it worked better for me with demonstrating (not that I was flawless) than Zoom would have. Why did I ask for one session? Well, besides that I had scheduled Zoom sessions with my middle and high school classes on the same day, I knew that I could present the same ideas and tell how younger and older kids could participate. I also know that with my own children, if the older kid is doing an activity, the younger kids want to do the same thing. All in all, it worked out pretty well.

Here are the themes I used for each week:
Week 1: Color
In the first week I talked about primary and secondary colors and how to mix them then we made a found object color wheel for the #colorwheelchallenge!
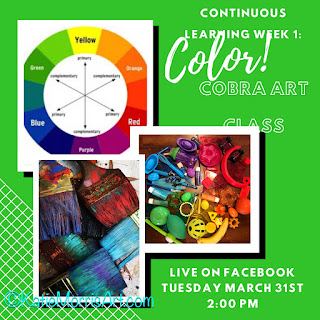
Does anyone else have trouble when downloading images from the Canva app? Sometimes I have to do a screenshot to avoid distortions like in the graphic above.

Week 2: The Creatrilogy
Peter H. Reynolds gave permission for teachers to read his books to our classes and since I'm a big fan, I read The Dot, Ish, and Sky Color from the Creatrilogy box set. Suggested activities were...
The Dot: Make dot artwork!
Ish: Draw ishly- use a marker so you can't erase and embrace mistakes!
Sky Color: Observe the sky and paint what you see. Maybe even observe the sky at different times of day or different days of the week. Watercolor demo.

Week 3: Zoos and Aquariums
Have you seen all the zoos and aquariums that were offering virtual field trips and animal talks during social distancing? I showed 4 project ideas inspired by specific zoos or aquariums- a porcupine from the Elmwood Park Zoo, a jellyfish from the Monterrey Bay Aquarium, Fiona the Hippo from the Cincinnati Zoo, and a giant panda from the Smithsonian National Zoo. Check it out!


Week 4: Earth Week
Goldsworthy-inspired nature artwork, Patrick Dougherty-inspired stick art, nature faces, nature fairies, and stick weaving. I love nature art!
Here is the doc with the activities I suggested. Feel free to make a copy so you can edit!

Week 5: Fauvism
I thought of Matisse's Open Window as soon as I knew we would be working from home. I wanted to talk to students about looking around them and how we all see different things out their windows. I said they could draw from observation what they see out their window or even what they would like to see! I went ahead and threw in some more art history and talked about setting up a colorful still life to observe.
Here is the doc I shared!


Week 6: Art Outside
This was my worst week! I paid attention to the temperature in the forecast but not the wind speed. And I live in Kansas! I tried to show using toys to draw shadows and doing texture rubbings but it was so windy that after 5 or 10 minutes I told the students watching it was a good thing they already knew I wasn't perfect and gave up.

Week 7: 2D and 3D
I couldn't really decide what to do for the last week so I asked on my facebook page what the students wanted. A first grader told her mom it would be "life changing" (LOL) if I would show how to draw 3D shapes since they were doing that in 1st grade math. We talked about the differences between 2D shapes and 3D forms (in art we have more specific vocabulary) and then I showed how to draw cubes, cylinders, and cones. I ended by showing how to do 1 point perspective letters since that is usually a hit with upper elementary students.


Wednesday, March 10, 2010

When Pigasso Met Mootisse

If you haven't already, you REALLY need to check out When Pigasso Met Mootisse by Nina Laden.  
The very clever and very funny book is kind of a parody of Pablo Picasso and Henri Matisse's friendship.  My students and I really enjoyed it.  You can view my lesson plan on Artsonia (or just keep reading!)

Objectives
1. The students will listen to and participate in a discussion about Nina Laden’s “When Pigasso Met Mootisse.” 
2. The students will define friendship and brainstorm a list of attributes of a good friend. 
3. The students will create a portrait of a friend they would want to have (not a specific person) in a style that combines Cubism and Fauvism. 
4. The students will write at least five words/phrases that describe a friend they would want to have. 
5. The students will apply knowledge of warm and cool colors in the creation of their drawings.

Materials
Day 1: 9x12 inch white paper, pencils and erasers
Day 2: Pencils, erasers, sharpies or other black marker/felt tip pen
Day 3: Crayons or oil pastels

Day 1: The teacher will introduce the project by reading “When Pigasso Met Mootisse” to the class. After the story, the class will discuss the big idea of the book: Friendship. The teacher will call on students to answer the questions:
What is friendship?
How do you know if someone is your friend?
Next, the teacher will ask the class to brainstorm qualities of a good friend. As the qualities are listed, the teacher will record them on the board. The teacher will explain to the students that for their assignment, they need to think of what qualities they want in a friend. The teacher will tell the students that they will be drawing a portrait of a friend they would want to have (a generic friend, not a specific person). The teacher will remind the students that Pigasso and Mootisse were based on real artists from history, Pablo Picasso and Henri Mattisse. The teacher will tell the students that Picasso was one of the founders of Cubism (more than one side of something is shown at the same time) and that Matisse was a Fauve (Fauve means wild beast, called that because of the bright, wild colors they used.) Both styles will be reflected in the portraits.
The teacher will lead the students through the drawing of a Cubist portrait.
1. Ask the students to place their hand in the middle of their paper. Since your face is about the size of your hand, it is a good guide. The students will use their pencils to put a dot right above the middle finger and right below their palm.
2. Draw the outside shape of a face. An oval or egg shape will work fine since the portraits will be abstract. The dots are a guide to get the head big enough. The top and bottom of the oval should touch the dots. If students need a guid for how wide to make the shape, the width of their hand will work.
3. Draw a side view of a face (in profile) in the middle of the paper. Students can start at the top dot and end at the bottom. (Before drawing, I turned sideways and traced my profile with my finger pointing out forehead, brow ridge, nose, bottom of the nose, lip 1, lip 2, chin. While drawing, I modeled my thought process so students knew I wasn't just making a squiggly line.)
4. Add features to face in profile: side of nose, lips, eye brow, eye looking sideways, ear.
5. Add features to the other half of the face, looking straight forward. Simplified shapes are good (football shape for eye, etc.)
6. With any remaining time, show the students how to draw shapes for hair. Stress to the students not to shade in the hair or make individual strands, just the outline. This is where the students can make their "friend" a boy or a girl.

Day 2: The teacher will quickly review the material covered on day 1. The students will choose at least 5 words of phrases that describe the kind of friend they would want to have (nice, honest, fun, etc.) and use a pencil to write them around their drawing. The students will use sharpies or black markers to trace over all of the lines they have drawn and the words that they wrote. When everyone is done tracing, pick up the markers and tell students to get their pencil again. Next, use the pencil to lightly draw lines dividing the head and background into more shapes. I suggest using a line on the paper as a starting point and drawing a straight line to the edge of another line for the face or to the edge of the paper for the background. Tell the students that every shape will be carefully colored in so they should not overdo it! If everyone finishes early, start the process described for Day 3.

Day 3: The teacher will remind the students that the first part of the drawing was inspired by Cubism and the colors will be inspired by Fauvism. The teacher will review warm and cool colors with the students and tell them that they will use warm colors for the face and hair and cool colors for the background. The teacher will demonstrate applying color with crayon to a drawing. The teacher will also remind the students that the colors don’t have to make sense. A color can be used more than once but two shapes of the same color should not touch.

Here are some of the results!  You can view the whole exhibit in our Artsonia gallery!