

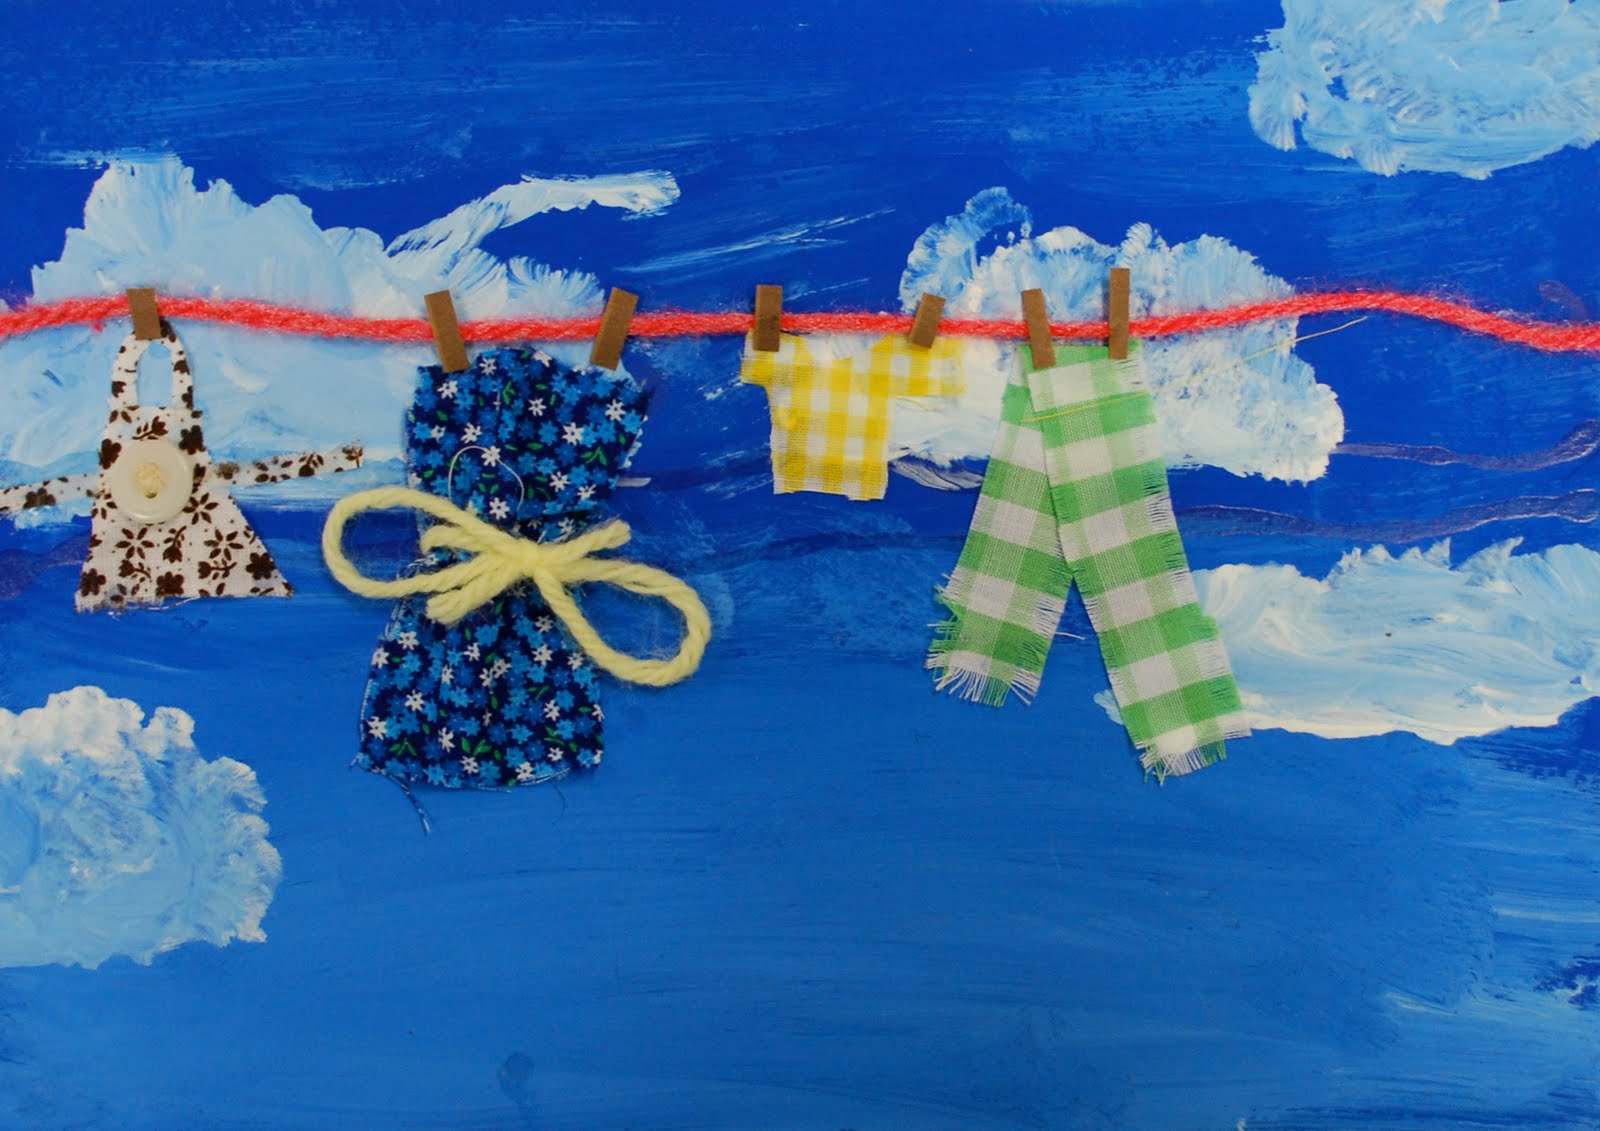
Day 1: I demonstrated the first several steps of the project. I have a ton of really dense cardboard pieces, sized about 8x10 inches that we used for the base. I showed students how they could use blue and white tempera paint to make their skies more interesting than a flat blue. *BEFORE the students paint, remind them to write their name on the back of the board! The students painted all of the board blue, using horizontal brush strokes and then worked a tiny bit of white paint into the blue starting at the bottom for variation. After the background was painted, the students cleaned their brushes thoroughly and used the white paint to add clouds. I told the students that I used to have a really hard time painting clouds because I tried to make them PERFECT. I finally got over it by not taking it quite so seriously! I showed the students how to dab and swish the brush (not scrub!) to make clouds. I also suggested giving the clouds a flatter bottom to make them look a little more realistic than big circles. After the clouds were painted, the students used white glue to add a piece of yarn to be the clothesline. I briefly touched on the rule of thirds and suggested the students glue their yarn 1/3 of the way from the top of their sky- to make their compositions more interesting and allow plenty of room for the clothes. I had precut pieces of yarn a couple inches wider than the boards (yarn can be trimmed or wrapped around and secured on the back) in as many different colors as I had to give the students more choices.

Day 1 progress on the drying rack. *I saved the boards I created during demonstration so students who missed the first class period could use one and have time to finish their projects.
Day 2: I had scraps of old shirts and jeans, fabric remnants, ribbon, buttons, and construction paper available for students to use to make their clothes. When I introduced the project to the students, I used my completed clothesline to show how clothes can express your personality and tell something about you. On my example (which I should have photographed) I included an art apron like the one I wear at school everyday. I didn't want to sound shallow when talking about the clothes but I know my students are at the age where they are really getting in to fashion and expressing themselves through their clothes. We discussed how clothes can show your interests (favorite color, sports fan, etc.) and can show what you like to do (uniform, jersey, career clothes, etc.) I asked the students to cut a smaller section of the big pieces of fabric to work from so the others would have a chance to use it. I talked about setting the fabric on their board before cutting to make sure it was big enough for at least three items of clothing. Some students felt comfortable just cutting the shape of the clothes and some drew it out first, either with chalk or a sharpie. I suggested cutting the basic shape first and then thinking of details to add with other materials. Up until the point in class where I felt I needed to tell the students to just finish what they had started, I suggested cutting the clothes and playing with the arrangement before gluing down. We talked about contrast- you don't want to put a really light colored fabric on top of a white cloud, and trying to get a variety of colors, textures, and patterns. I was super impressed with the creativity of my students. I don't have photographs of the most innovative artwork because I don't have Artsonia permission slips for those students. :( One student cut little slots in her miniature jeans so she could thread a belt through and made tiny functioning pockets! If students got their clothes glued on the line in time, I showed them how they could use little pieces of construction paper as clothespins. I wonder how many of my students have actually seen a real clothesline? They are becoming a thing of the past but are a fun framework for an art project.


Love this idea! I may have to steal it.
ReplyDeleteI'm glad you like it, it was a lot of fun!
ReplyDeleteKatie, these are adorable. I bet it would be fun to do with kids in younger grades too.
ReplyDeleteThanks, Phyl!
ReplyDeleteI love this lesson. I think my fifth graders would enjoy it, too. I am at a school where the students wear uniforms so I know they would love to express the own taste in clothing.
ReplyDeleteThis is a great idea. I think many of my students would like to design for this one, so I may try it when school starts up again. I am like Della Rae in that my students have a dress code, so they would enjoy putting examples of their more creative clothing hanging from the line. Thanks for the tips you shared in your blog.
ReplyDeleteYou were mentioned on my blog site today! http://bartz-mrszwahl.blogspot.com/
ReplyDeleteI'm the Editorial Assistant for Fun Family Crafts and I wanted to let you know that we have featured your clothesline project! You can see it here:
ReplyDeletehttp://funfamilycrafts.com/clothesline-craft/
If you would like to display a featured button on your site, you can grab one from the right side bar of your post above. Thanks for a wonderful project idea!