Showing posts with label challenge. Show all posts

Saturday, August 27, 2016

Chopped: Art

I love watching Food Network, especially the shows where chefs use their creativity and think outside the box (or basket?). I always thought that there were a lot of possibilities to bring some of those competitions into the art room. My 8th graders recently participated in a "Chopped" challenge on their 3rd day of school to get them used to the idea of collaboration and problem solving, and to introduce them to the location of supplies I moved around in the art room over the summer.
To familiarize the students with the concept of "Chopped", I played a video of a round of Chopped. I recommend some of the Chopped: Junior videos. I explained the concept to them: work with your partner to make art out of the "mystery ingredients" that I had prepared ahead of time. I tried to talk like the Chopped host "also available to you are the tools and supplies in the art room". 

I only have 6 students in my 8th grade class so I drew names to put them in three partner pairs. I presented the bags, which some also used as "ingredients", set a timer, and let the students start. The groups that had the best communication did the best in the competition. The first team to be chopped became judges with me in the next round. I tried to get them to commentate with me and they were feeling a little shy, but they did help me to choose the chopped champions. 
Maybe you're thinking, ok, but what if I have more than six students? (I know that my class is tiny!) Well, I have some suggestions. You could make bigger teams, set the timer for shorter rounds, or stretch the completion to more than one day. My students asked to do it again the next day but I didn't have mystery ingredients prepared so I might do it again toward the end of the semester.

 I used paper bags to hold the ingredients. I honestly just pulled stuff out of cabinets in the classroom, things that didn't necessarily go together so the students would have to think a little more. Some that I used were donated rolls of receipt paper, tongue depressors, clothespins, safety pins, pipe cleaners, a ball of yarn, rubber bands, and toothpicks. I wish I would have thought to plug in the hot glue guns ahead of time so they would have been warm.

I think this game was a hit. It had a little more structure than a task party (which sounds super fun but I don't think my students are ready for it yet) but it still got the students active and their creative juices flowing. I will definitely do this again, even with high school or upper elementary.

Saturday, May 9, 2015

Recycled Art Challenge (Continued)

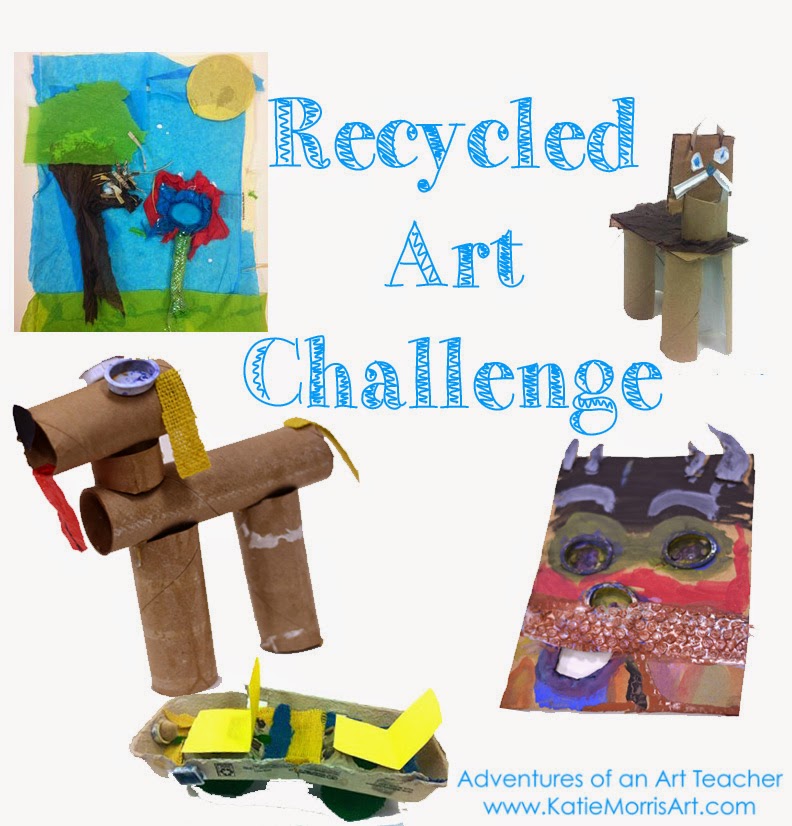
In honor of Earth Day, my 2nd and 3rd grade students participated in a "Recycled Art Challenge" where they had 2 class periods and a ton of different "recycled" materials with which to make something. The project could be 2D or 3D, but most went 3D. We saw lots of collaboration and creativity. I already shared a few photos a few weeks ago (see here) but I wanted to share some more photos of the students' art as well as a list of their favorite materials (at the bottom of this post).

Above we have a pop monster and a collaborative Minnie and Mickey Mouse project. The pop monster (my term) was made of a pop can, 6 bottle caps, a bunch of pop tabs, curling ribbon, tissue paper, and cardboard. Mickey and Minnie were made by two friends. One student made each figure but they worked to make their sculptures match. They used paper towel tubes for the bodies and juice can lids (tons were donated) for the heads. The idea came to them after seeing the red and white polka dotted wrapping paper scraps I brought in. The bow was made from tissue paper and Mickey's shorts were made from scrap paper in the collage center.
There were probably 6 students working on the landscape theme. Some worked with partners and a couple worked individually. They used old file folders as a base and tissue paper, ribbon, can lids, and watercolor wells for the flowers and trees. The nest in the tree on the left was made from leftover shredded newspaper from the Bird Nest lesson I taught 4 years ago. Yes, that's a long time to keep shredded paper, but I bet some of you have held on to random supplies longer than that! :)
Here we have a textured collage and an alligator or crocodile, whichever does not show its teeth with a closed mouth. The alligator/crocodile was made from egg cartons, cardboard, tissue paper, and bottle caps.
 An art creature and glass of lemonade... The art creature has colored pencil stub legs and watercolor well eyes. The lemonade gets color from tissue paper.
One of my ASD students is kind of obsessed with computers. He was always asking if I had any computer magazines for collages and wanted to spend any time he could get away with talking about computers. I was not surprised when he whipped this laptop out for his project. He used a piece of drawing paper for the base, bubble wrap for the keyboard, and some foam packing sheets for the screen. He used cereal boxes to make the frame and buttons.
 Several students wanted to make rooms. The top left shows a folded paper base with magazine cut out pop-ups. The top right is a bathroom. I like the sink the best. He found one of those flattened blue marbles (my elementary school counselor called them dragon tears) for water and used watercolor wells for all the basins after constructing the walls from cardboard.
 Here's another room. The student would have added more details if she hadn't run out of time.
 I should have taken a photo of this project from another angle. She spent a lot of time wrapping the different parts in tissue paper. The stem is a paper towel tube and the leaf is cut cardboard.
 There were lots of "machine" models made. Lots of cars, tanks, cannons, etc. The student who made the above tank figured out how to make it "shoot" marker caps. When he pushes a new cap through, the front cap shoots out!

Here are my students' Top 10 Favorite Materials for the Recycled Art Challenge

  1. Cardboard tubes (paper towel and toilet paper)
  2. Egg cartons
  3. Can lids (with smooth edges, of course)
  4. Bottle caps
  5. Pop tabs
  6. Tissue paper (saved from holidays and birthdays)
  7. Cardboard (saved from boxes)
  8. Bubble wrap (saved from shipments)
  9. Play-doh lids
  10. Parts from old watercolor trays- the wells and the "ladders"
Another favorite material that was not exactly recycled, but was leftover from some project and donated, was burlap! We had it in blue, green, yellow, and red. It was really fun for them. I wish I would have thought to bring more fabric scraps from home.


Saturday, February 15, 2014

Kindergarten Gelli Printed Hearts

I pretty much always do a quick heart lesson with Kindergarten in February as the students spend a lot of time learning about heart health in PE and doing Jump Rope for Heart. I recently purchased some 6x6 inch Gelli plates and decided to give them a try. The first class cut out symmetrical hearts and used them as a mask to make a negative space heart in their print and after that the students drew with cotton swabs. 
The students got to take the printed heart with them at the end of class and the actual print stayed at school. The tempera paint dries super fast on these prints. If you have acrylic paint, even cheap craft paint, it rolls on to the plate more evenly.
Gelli plates have been gaining popularity over the last few years. I always thought they looked cool but couldn't find room in my budget to order a class set. I've won a couple challenges on the smARTteacher which come with $100 gift certificates to Dick Blick. Score! I decided to purchase 4 6x6 inch Gelli plates with my most recent winnings that I can share between my two schools. Here's how we used them:
I called the whole class around one table and gave a demonstration of "inking" the plate by rolling tempera paint with a brayer, using texture combs to remove a bit of paint (subtractive method), putting my paper heart in the middle, then placing a square of construction paper over the top, rubbing, and removing the paper to reveal the print. I grabbed purple, pink, and red tempera and had a stack of warm and cool colored construction paper cut to the same size as the plate, 6x6. I didn't want to mess with trying to "register" bigger paper so a bleed print worked well. We talked briefly about the effect warm colored paint would have on warm and cool colored paper so the students could choose what they wanted to try. After the students wrote their names on their papers and cut out the hearts, they came to my table 3 at a time to try the monoprinting center. (Forgive me if it should be monotype instead of monoprint. I can never remember the difference!) The students who were waiting or already finished either worked on a project from the previous class or used modeling clay or blocks. They are very used to using centers in this way so it was just fine. Cutting the hearts, however, was tricky as I expected. It was such a rush to finish that in following classes, we skipped the heart mask and instead used cotton swabs to draw designs on the plate.
When we didn't have to mess with cutting hearts, we had time to make ghost prints. Ghost prints are so fun, and I sometimes prefer them to the first generation print. Basically after the students pulled the first print, they used a second piece of paper (this time just 6x6 inch white drawing paper) to pull a print with whatever paint was left on the plate. Sometimes the ghost print doesn't have enough paint to really show up, but you can usually see most of the design. Ghost prints can be fun to work back into with other media. 
Ghost print on the left, first edition print on the right. The Gelli plate is at the top. I don't like to clean the plate until they get really dirty because I like the surprise effect of a bit of leftover color.
  A lot of the fun of printing with a Gelli plate is layering and seeing how the plates pick up textures. I let some 3rd graders give it a try, and another batch will have a chance in coming weeks until they've all had a turn.
I also enjoy using my gelli plates at home. I have a 6x6 and an 8x10. I'd also really like to get a circle plate. If you are interested in learning more about printing with Gelli plates, I can try to answer your questions and/or you can follow Gelli Arts on Pinterest or other social media for ideas and tutorials. 
I purchased my Gelli plates from Dick Blick because I had gift certificates but they are also available on Amazon. They're a bit of an investment but can be used countless times!